
A wobbly, broken, or store-bought bed frame can leave you wishing for something sturdier and more your style. The good news is that you can build or repair one yourself with a welder and a little practice. Learning how to weld a bed frame opens the door to a custom piece that fits your room, your mattress, and your budget perfectly. Metal frames last for decades, hold heavy weight without creaking, and look sleek in any bedroom.
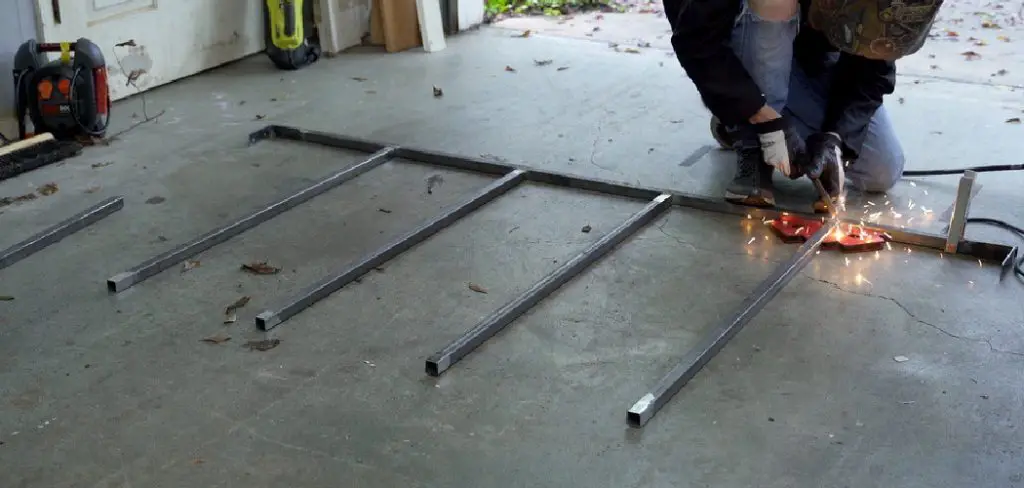
This guide breaks the whole project into clear, beginner-friendly steps you can follow even if you’ve only welded a few times. We’ll cover planning your design, gathering materials, cutting and prepping the steel, and laying down strong, clean welds. You’ll also learn how to finish the frame so it resists rust and looks great. No engineering degree required, just patience, safety gear, and a willingness to learn. By the end, you’ll feel ready to spark up your welder and create a frame that holds firm for years.
Why Welding a Bed Frame Matters
Building your own metal frame gives you strength that flat-pack furniture rarely matches. Welded steel joints don’t loosen, squeak, or pull apart the way bolted assemblies do over time. That means a quiet, rock-solid bed that supports heavy mattresses, box springs, and restless sleepers without complaint.
There’s also the freedom of full customization. You choose the exact size, height, and look, whether you want a low platform style or a tall frame with built-in storage room underneath. Welding your own often costs far less than buying a comparable quality piece in a store, and the skills you build carry over to countless future projects. On top of that, a hand-welded frame becomes a lasting piece you can repair, modify, or pass down, rather than tossing out and replacing every few years.
Step-by-Step Guide to How to Weld a Bed Frame
Step 1: Plan Your Design and Measurements
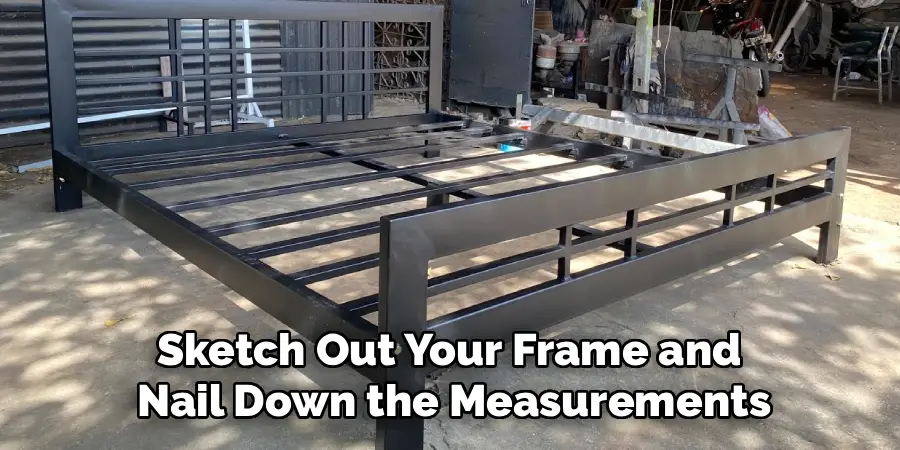
Before you strike a single arc, sketch out your frame and nail down the measurements. Standard mattress sizes guide your dimensions, so a queen needs a frame roughly 60 inches wide by 80 inches long, while a twin runs about 38 by 75 inches. Add a little clearance so the mattress slides in without forcing.
Decide on the height, leg style, and whether you want center support for larger sizes. Draw the frame from the top and side so you can count exactly how many pieces of steel you’ll need. A clear plan saves you from wasted cuts and weak spots later. Spend extra time here, because every later step depends on these early numbers being right.
Step 2: Gather Materials and Safety Gear
With your plan ready, collect your steel and tools in one spot. Most frames use square or rectangular steel tubing, often 1.5 to 2 inch stock, since it balances strength with manageable weight. You’ll also want a welder, an angle grinder, clamps, a metal chop saw or cutting disc, a tape measure, and a square.
Safety gear is non-negotiable when you learn how to weld a bed frame, so grab a proper welding helmet, fire-resistant gloves, long sleeves, and closed-toe boots. Work in a well-ventilated area away from anything flammable. Keep a fire extinguisher within reach. Good preparation here protects both your body and your project, letting you focus fully on clean, confident work.
Step 3: Cut the Steel to Size
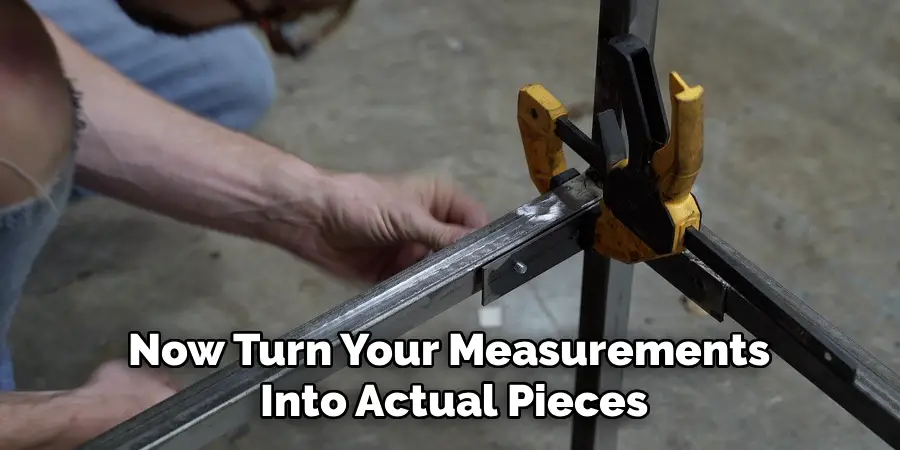
Now turn your measurements into actual pieces. Mark each cut clearly on the tubing with a soap stone or marker, double-checking every length against your plan before the blade touches metal. The old rule of measuring twice and cutting once saves you both steel and frustration.
Use a metal chop saw or an angle grinder with a cutting disc for clean, straight cuts. For corners that meet at right angles, a 45-degree miter on each end creates a tight, professional seam. Cut all your rails, end pieces, legs, and any center supports in one session so everything stays consistent. Lay the pieces out on the floor afterward to confirm they match your design before you move on.
Step 4: Prep and Clean the Joints
Strong welds need clean metal, so this step matters more than beginners expect. Use your angle grinder with a flap disc to remove any rust, mill scale, paint, or coating from the areas you plan to weld. Bare, shiny steel lets the weld bond properly and prevents weak, contaminated joints.
Wipe away dust and oil with a clean rag, since grease ruins a weld fast. Then dry-fit your pieces together to check the fit at each corner. Gaps should be tight and even. File or grind down any high spots so the joints sit flush. Taking a few extra minutes to prep now gives you cleaner arcs and far stronger connections that hold weight reliably for years.
Step 5: Tack Weld the Frame Together
Start joining the frame with small tack welds rather than full beads. Clamp your first two pieces onto a flat surface, line them up with a square so the corner sits at a true 90 degrees, then lay a short tack at the joint. Tacks hold everything in place while letting you check and adjust alignment.
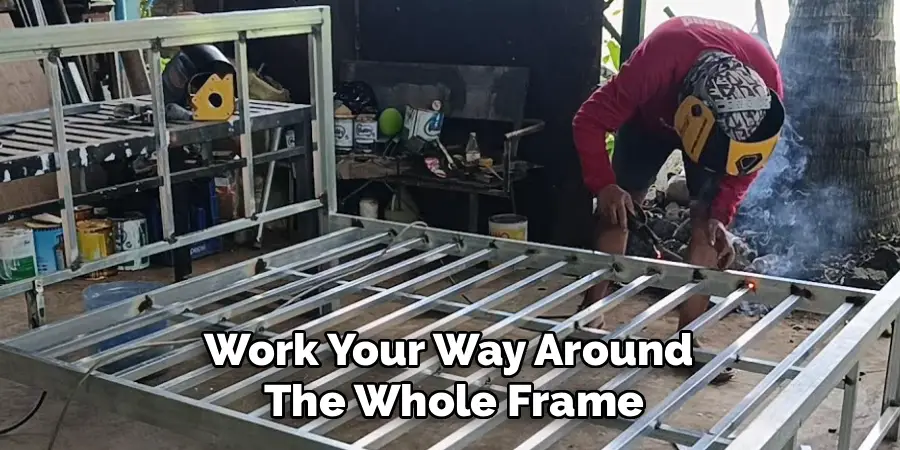
Work your way around the whole frame, tacking each corner and support. After every few tacks, measure the diagonals from corner to corner, since equal diagonals confirm the frame is square. If a joint sits off, you can grind a tack loose and reset it easily. This stage builds the skeleton, so go slow and keep everything aligned before committing.
Step 6: Lay Down the Final Welds
Once the frame checks out square and true, finish each joint with full welds. Knowing how to weld a bed frame well comes down to steady hands and consistent travel speed, so move at an even pace and keep your arc length short. Weld in short sections, alternating around the frame to spread out the heat and prevent warping.
Let the metal cool between passes if it gets too hot to touch nearby. Fill each corner completely, working both sides of a joint where you can reach for maximum strength. Aim for smooth, even beads rather than tall, lumpy ones. These final welds carry all the weight, so take your time and make every joint solid and complete.
Frequently Asked Questions
What Type of Welder Is Best for a Bed Frame?
A MIG welder is the friendliest choice for beginners building a bed frame. It’s easy to learn, lays down clean beads quickly, and handles the steel tubing most frames use without fuss. Stick welders also work well and cost less, though they take more practice. TIG offers the cleanest results but is slower and trickier. For most home projects, a MIG setup gives the best balance of speed and simplicity.

What Thickness of Steel Should I Use?
For a sturdy, long-lasting frame, square steel tubing between 1.5 and 2 inches with a wall thickness around 1/8 inch works beautifully. This stock supports heavy mattresses and active sleepers without bending or flexing. Thinner steel saves weight and money but risks sagging over time, especially on larger queen or king sizes. When in doubt, go slightly thicker, since the extra strength costs little and gives lasting peace of mind.
Do I Need Center Support for a Larger Frame?
Yes, any frame wider than a twin really benefits from center support. Queen and king mattresses carry a lot of weight, and a single center rail or extra cross brace stops the middle from bowing under pressure. Without it, the frame can flex, the mattress can dip, and joints take extra strain. Adding one or two support bars during the build is simple and keeps your finished bed solid and quiet.
How Long Does It Take to Build One?
A first-time builder should set aside a full weekend, while experienced welders can finish in a single day. Planning and measuring take an hour or two, cutting and prepping the steel another couple of hours, and welding the rest. Don’t forget drying time for primer and paint, which can add several hours or overnight. Rushing leads to mistakes, so give yourself room to work carefully and enjoy the process.
Is It Cheaper to Weld a Frame Than Buy One?
It often is, especially for a quality metal frame. Steel tubing and finishing supplies usually cost less than a comparable sturdy store-bought frame, and you avoid paying for assembly and brand markup. The bigger investment is the welder and tools, but those pay off across many future projects. If you already own the equipment, building your own almost always wins on both price and durability.
Conclusion
Building a metal bed frame from scratch is a rewarding project that rewards you with strength, style, and skills you’ll use again and again. By planning your design carefully, cutting clean pieces, prepping your joints, and laying steady welds, you create a frame that stays solid and silent for decades. Finishing it with a smooth grind and a protective coat ensures it looks sharp and resists rust for the long haul.
Now that you understand how to weld a bed frame from the first sketch to the final coat of paint, you’re ready to gather your steel and fire up your welder. Start with a simple size, take each step slowly, and don’t rush the parts that matter most, like squaring and final welds. Your effort pays off every single night in a bed that’s truly your own. Grab your gear, plan your build, and get started this weekend.

Rick is a handyman who grew up helping his dad with his business. He learned a lot from him about how to fix things, and also about how to work hard and take care of business. These days, Rick is still into fixing things- only now, he’s doing it for a living.
Rick is always looking for new ways to help people grow and develop. That’s why he started contributing to this blog: to share all his experience and knowledge so that he can help people who are interested in DIY repair.