
There’s something deeply satisfying about sitting on a piece of furniture you made with your own hands. A simple bench is one of the friendliest projects for anyone just getting into woodworking. It doesn’t demand fancy tools, a big workshop, or years of experience. Yet it gives you a sturdy, useful piece for your entryway, kitchen, or the foot of your bed.
If you’ve ever wondered how to build indoor bench projects without feeling overwhelmed, you’re in exactly the right place. This guide breaks the whole process into clear, manageable steps written for beginners and confident DIYers alike. We’ll cover the tools you need, the measurements that matter, and the little tricks that make your finished bench look professional. By the time you reach the end, you’ll have the confidence to grab some lumber, set aside an afternoon, and create something you’ll actually use every day. Let’s turn a stack of boards into a bench you’ll be proud of.
Why Building an Indoor Bench Matters
Building your own bench gives you more than just a place to sit. You get to customize the size, height, and finish to fit your space perfectly, something store-bought furniture rarely offers. It’s also a budget-friendly choice. A quality wooden bench can cost a small fortune in stores, while a homemade version often costs a fraction of that. Beyond the savings, this project builds real skills you’ll carry into bigger builds later. You’ll learn how to measure, cut, join, and finish wood, all on a forgiving, low-pressure project. Plus, a handmade bench adds warmth and character to your home that mass-produced pieces can’t match. Every time you walk past it, you’ll feel that quiet pride of “I made that.”
Step-by-Step Guide to How To Build Indoor Bench
Step 1: Plan Your Design and Measurements
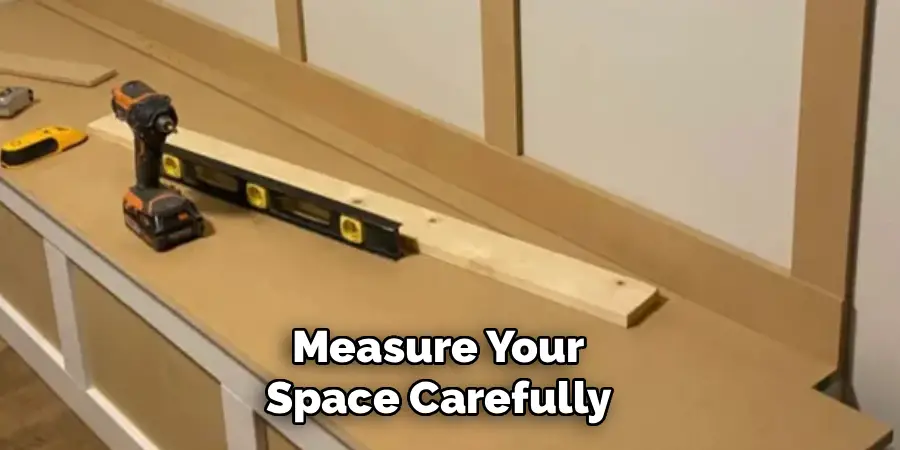
Start by deciding where your bench will live and how big it should be. A standard seat height sits around 18 inches, with a depth of 14 to 16 inches for comfortable sitting. Measure your space carefully and sketch a simple drawing, noting the length, width, and height you want.
Once you have your dimensions, create a basic cut list of every piece you’ll need: the seat top, legs, aprons, and any supports. Writing this out before you shop saves time and prevents costly mistakes. Think about the style too, whether you want a sleek modern look or a rustic farmhouse vibe. A clear plan keeps the rest of the project smooth and stress-free.
Step 2: Gather Your Tools and Materials
Knowing how to build indoor bench projects successfully starts with having the right supplies ready. For tools, you’ll want a saw, a drill, a measuring tape, a square, sandpaper, clamps, and a pencil. A pocket-hole jig is optional but makes joinery much easier for beginners. Lay everything out before you begin so you’re not hunting for things mid-project.
For materials, choose a wood that fits your budget and style. Pine is affordable and easy to work with, while oak or maple offer durability and a richer look. You’ll also need wood screws, wood glue, and a finish such as stain, paint, or sealant. Buying quality materials now pays off in a longer-lasting bench.
Step 3: Cut Your Wood to Size
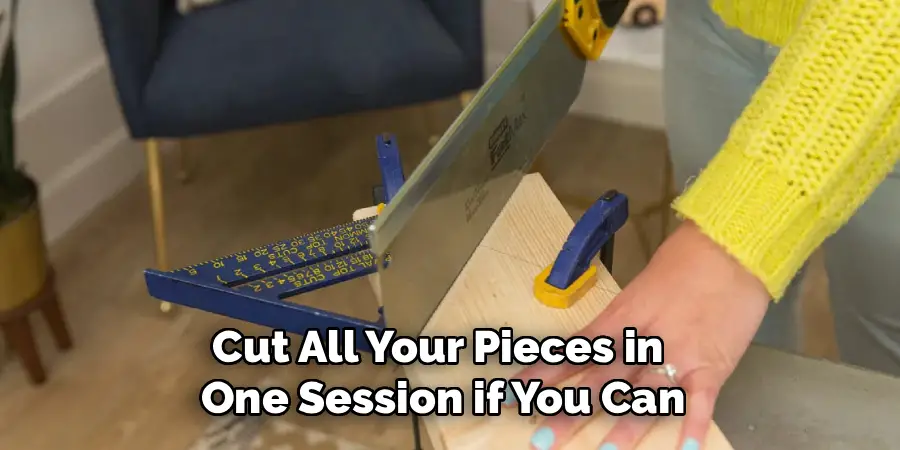
With your cut list in hand, mark each measurement clearly using your tape and square. Accuracy here is everything, so follow the old carpenter’s rule: measure twice, cut once. Take your time marking straight lines, and double-check each number against your plan before the blade touches the wood.
Cut all your pieces in one session if you can, keeping similar parts grouped together. This helps you stay organized and ensures matching pieces are identical in length. After cutting, lay the parts out and lightly label them with a pencil so you remember which piece goes where. Clean, precise cuts make the assembly stage far easier and give your finished bench a polished, professional look.
Step 4: Sand Every Piece Smooth
Before any assembly, sand each board thoroughly. Starting with smoothing now is far easier than reaching tight corners after the bench is built. Begin with a medium-grit sandpaper, around 120, to knock down rough spots and splinters, then move to a finer 220-grit for a silky finish.
Always sand in the direction of the wood grain, never against it, to avoid scratches that show up later under stain. Pay extra attention to the edges and corners, softening them slightly so the bench feels pleasant to touch. Wipe away the dust with a dry cloth or tack cloth when you finish. Smooth, clean wood not only feels better but also absorbs stain and paint far more evenly.
Step 5: Assemble the Legs and Frame
Now comes the exciting part where your bench takes shape. Begin by attaching the legs to the aprons or side supports, forming the base frame. Apply a thin line of wood glue at each joint, then secure with screws or pocket-hole connections. Use your square often to make sure every corner sits at a true 90 degrees.
Clamp the pieces together while the glue sets to keep everything tight and aligned. Work on a flat surface so your bench doesn’t end up wobbly. Once the base frame feels solid, gently test it by pressing down on the corners. A strong, square base is the foundation of a bench that stays steady for years, so don’t rush this stage.

Step 6: Attach the Seat Top
When you learn how to build indoor bench seating, the top is where your hard work really starts to show. Center your seat boards over the assembled frame, leaving an even overhang on all sides if your design calls for it. Adjust the placement until it looks balanced, then mark the spots where you’ll fasten it down.
Secure the top using screws driven up through the frame from underneath, which hides the hardware for a clean look. Add a little glue along the contact points for extra strength. If you’re using multiple boards, keep the gaps between them consistent for a tidy appearance. Press firmly and check that the surface sits flat and even before the glue fully cures.
Step 7: Apply the Finish
The final step transforms raw wood into a beautiful, lasting piece. Wipe the entire bench clean of dust, then apply your chosen finish. Stain brings out the natural grain, paint adds bold color, and a clear sealant protects the surface while keeping its natural tone. Use a brush or cloth and work in thin, even coats.
Let each coat dry fully before adding the next, following the times listed on the product label. Most finishes need two or three coats for the best protection and look. After the final coat cures, attach felt pads to the bottom of the legs to guard your floors. Let everything dry overnight, and your handmade bench is ready to enjoy.

Frequently Asked Questions
What Type of Wood Is Best for a Beginner Bench?
Pine is the top pick for beginners. It’s affordable, widely available, and soft enough to cut and sand easily without heavy-duty tools. If you want something more durable and elegant, oak or maple work well, though they cost more and are harder to work with. For a first project, pine gives you a forgiving material that still produces a sturdy, attractive result you’ll be proud of.
How Long Does It Take to Build a Bench?
Most beginners can complete a simple bench in a single weekend. The actual hands-on work, cutting, sanding, and assembly, often takes four to six hours. The bigger time factor is the finish, since stain, paint, or sealant needs drying time between coats. Plan for an afternoon of building and an overnight wait for the finish to cure fully before you put it to use.
Do I Need Expensive Tools to Get Started?
Not at all. A basic saw, drill, measuring tape, square, clamps, and sandpaper will handle the whole project. Many beginners borrow tools or rent them for a single build. A pocket-hole jig makes joinery easier, but it’s optional. You can create a strong, good-looking bench with affordable equipment, so don’t let tool costs hold you back from starting.
How Do I Make Sure My Bench Doesn’t Wobble?
Stability comes from accurate cuts and square corners. Use a square often while assembling the frame, and clamp pieces together while the glue dries. Always build on a flat surface so the legs end up even. If a small wobble appears later, sand or trim the longest leg slightly, or add adjustable felt pads to the bottom for a quick, easy fix.
Can I Customize the Design for My Space?
Absolutely, and that’s one of the best parts of building your own. You can adjust the length, height, and depth to fit any room perfectly. Add storage underneath, a backrest, or a cushion on top for extra comfort. Choose a finish that matches your decor, from rustic stains to bold paints. The design is entirely yours to shape around your needs.
Conclusion
Building your own bench is a rewarding project that proves you don’t need years of experience to create something beautiful and useful. By planning your design carefully, gathering the right tools, making accurate cuts, sanding well, and finishing with patience, you set yourself up for a result that looks and feels professional. Each step builds naturally on the last, turning a pile of lumber into a sturdy piece you’ll use for years.
Now that you understand how to build indoor bench projects from start to finish, there’s nothing stopping you from getting started. Grab your measuring tape, pick out some wood you love, and set aside a free afternoon. The skills you gain here will give you the confidence to tackle even bigger builds down the road. Most of all, you’ll have a handmade bench that adds warmth and character to your home, and a great story to tell every time someone asks where you got it.

Rick is a handyman who grew up helping his dad with his business. He learned a lot from him about how to fix things, and also about how to work hard and take care of business. These days, Rick is still into fixing things- only now, he’s doing it for a living.
Rick is always looking for new ways to help people grow and develop. That’s why he started contributing to this blog: to share all his experience and knowledge so that he can help people who are interested in DIY repair.