

White furniture looks crisp and clean, but sometimes you want a piece with more character. That’s where a little creativity comes in. Learning how to distress white furniture with black paint gives your tables, dressers, and chairs a charming, lived-in look that feels timeless. The black peeking through the white creates depth, contrast, and a rustic, farmhouse-inspired finish that suits almost any room.

The best part? You don’t need to be a pro to pull this off. This technique is beginner-friendly, budget-friendly, and surprisingly forgiving. If you make a small mistake, it usually just adds to the worn, vintage effect you’re going for.
In this guide, you’ll walk through everything step by step, from prepping your surface to sealing the final result. Whether you’re updating a thrift-store find or refreshing an old family heirloom, this approach helps you create a piece that feels rich with history. Grab your supplies, set aside an afternoon, and get ready to transform plain furniture into a standout statement.
Why Distressing White Furniture With Black Paint Matters
Adding a distressed finish does more than just change a color. It tells a story. A white piece with hints of black underneath feels warm, textured, and full of personality, something a flat coat of paint can’t match.
This technique also protects your wallet. Instead of buying expensive vintage furniture, you can give cheap or outdated pieces a high-end, custom look for very little money. It’s a smart way to upcycle and reduce waste, too.
Beyond looks and savings, distressing is genuinely satisfying. You get to control exactly how worn or subtle the finish appears, so the result matches your style perfectly. The contrast between black and white creates striking visual interest, making your furniture a true focal point in any space you choose to display it.
Step-by-Step Guide to How To Distress White Furniture With Black Paint
Follow these seven steps carefully, and you’ll end up with a beautiful, professional-looking finish. Take your time with each stage, since patience really pays off here.
Step 1: Gather Your Supplies
Before you start, set everything out so you’re not scrambling halfway through. You’ll need black paint, white paint, sandpaper in medium and fine grits, paintbrushes, a clear sealer, and some clean rags. A small bucket of water and a drop cloth will keep your workspace tidy.
Choosing quality paint makes a real difference in the final look. Chalk paint works beautifully because it adheres well and sands easily. Lay out your materials in the order you’ll use them. Having everything ready keeps the process smooth and stress-free, so you can focus on the fun, creative part instead of hunting for tools.

Step 2: Prep And Clean The Surface
Good prep is the secret behind every flawless finish. Start by wiping down your furniture with a damp cloth and a mild cleaner to remove dust, grease, and grime. Let it dry completely before moving on.
Next, lightly sand the entire surface to help the paint grip better. You don’t need to strip it bare; just rough it up enough to create texture. Wipe away the sanding dust with a clean, dry rag. If your piece has loose hardware or sticky drawers, fix those now. A smooth, clean base means your black and white layers will go on evenly and last much longer.
Step 3: Apply The Black Base Coat
The black layer is what gives your distressed look its dramatic depth. Brush a smooth, even coat of black paint over the entire surface, paying extra attention to edges, corners, and any detailed areas where natural wear would show over time.
Knowing how to distress white furniture with black paint really starts here, because this base sets the tone for everything that follows. Don’t worry about perfection; small brush strokes add character. Let the black coat dry fully, usually a few hours depending on your paint. A second coat may help if the color looks patchy. Solid coverage now ensures rich contrast later.

Step 4: Add The White Top Coat
Once your black layer is completely dry, it’s time to paint over it with white. Apply the white coat smoothly and evenly, covering the black entirely. You may need two coats for full, opaque coverage, so let each layer dry before adding the next.
Use light, even strokes to avoid drips and heavy buildup. The goal is a clean white surface that hides the black beneath for now. Resist the urge to rush this part. A solid white base gives you more control later when you sand, letting you decide exactly where the black should peek through for that perfect worn look.
Step 5: Sand To Reveal The Black
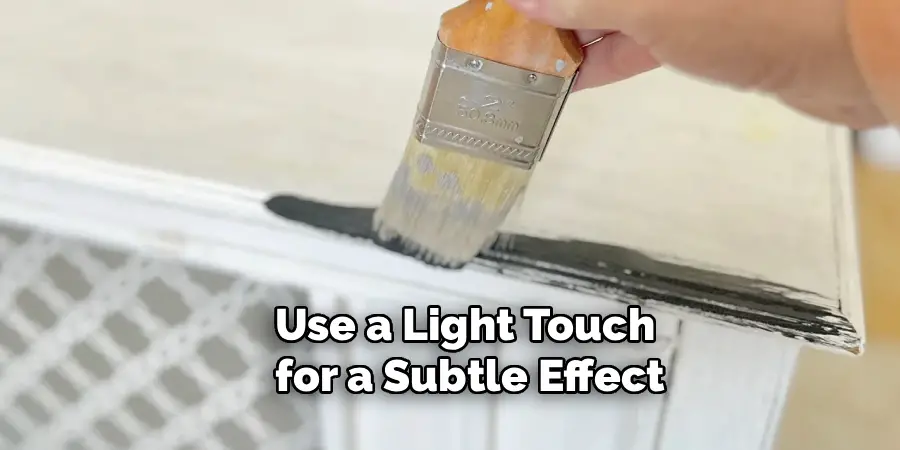
Now comes the most exciting moment. Once your white coat is fully dry, grab your sandpaper and gently sand the areas where natural wear would happen, like edges, corners, raised details, and around handles.
This is the heart of how to distress white furniture with black paint, because the black slowly appears as you remove the white. Work slowly and check often, since you can always sand more but can’t easily add white back. Use a light touch for a subtle effect or press harder for a bolder, rustic finish. Step back frequently to view your progress and keep the distressing balanced across the whole piece.
Step 6: Wipe Down And Inspect
After sanding, your furniture will be covered in fine white dust. Wipe the entire surface with a clean, slightly damp rag to remove every bit of it. This step helps you see the true finish clearly and prepares the surface for sealing.
Take a close look from different angles and in good lighting. Notice any spots that feel too heavy or too light, and make small adjustments by sanding a touch more if needed. This is your chance to fine-tune the look. A careful inspection now guarantees you’re completely happy before you lock everything in with a protective topcoat.
Step 7: Seal And Protect Your Work
To keep your beautiful finish looking great for years, apply a clear sealer over the whole piece. Choose a matte, satin, or glossy sealer depending on the sheen you prefer. Use a clean brush or cloth and work in thin, even layers.
Let the first coat dry, then add a second for extra durability, especially on tabletops or high-use surfaces. Sealing protects the paint from scratches, moisture, and daily wear. Once it’s fully cured, your furniture is ready to enjoy. Allow a day or two before heavy use so the finish hardens properly and stays looking fresh for the long haul.

Frequently Asked Questions
Do I Need To Prime Before Painting?
Priming isn’t always required, especially if you use chalk paint, which sticks well on its own. However, priming can help on glossy, slick, or previously varnished surfaces. If your furniture has stains that might bleed through, a stain-blocking primer is a smart choice. When in doubt, a quick primer coat adds insurance and helps your black base adhere more evenly for lasting results.
What Kind Of Paint Works Best?
Chalk paint is the most popular choice because it adheres easily, dries quickly, and sands beautifully for distressing. Latex paint also works well and comes in many colors. Avoid oil-based paints for beginners, since they take longer to dry and can be tricky to sand. Whatever you pick, choose quality paint, as it gives smoother coverage and a more professional, durable final finish.
How Do I Avoid Removing Too Much White?
The trick is to sand slowly and check your progress often. Start with light pressure and gradually increase it only where needed. Focus on areas that naturally wear over time, like edges and corners. If you remove too much, simply touch up with a little white paint, let it dry, and sand again gently until the balance looks right.
Can I Use This Technique On Any Furniture?
Yes, this method works on wood, MDF, and even some laminate pieces, though slick surfaces benefit from priming first. It’s great for dressers, tables, chairs, frames, and cabinets. Just make sure the piece is sturdy and clean before you begin. Heavily damaged or peeling furniture may need extra repair work, but most solid pieces respond wonderfully to this distressing approach.
How Long Does The Whole Project Take?
Plan for roughly one to two days, mostly due to drying time between coats. The actual hands-on work is fairly quick, but rushing leads to smudges and uneven results. Painting and sanding might take a few hours total, while drying and sealing require patience. Setting aside a relaxed weekend gives you plenty of time to enjoy the process without feeling rushed.
Conclusion
Transforming plain pieces into charming, character-filled treasures is easier than you might think. By following these seven simple steps, you now understand how to distress white furniture with black paint and create a look that’s rich, rustic, and completely your own. From prepping and painting to sanding and sealing, each stage builds toward a finish you’ll be proud to show off.
The beauty of this project lies in its flexibility. You control how subtle or bold the effect looks, so every piece reflects your personal style. Mistakes often blend right into the worn, vintage charm, making this a forgiving technique perfect for beginners and seasoned crafters alike.
Now it’s your turn to give it a try. Pick a piece that needs new life, gather your supplies, and set aside an afternoon to create something special. With a little patience and practice, you’ll turn ordinary furniture into a standout feature that brings warmth and personality to any room. Grab your brushes and start your transformation today.

Rick is a handyman who grew up helping his dad with his business. He learned a lot from him about how to fix things, and also about how to work hard and take care of business. These days, Rick is still into fixing things- only now, he’s doing it for a living.
Rick is always looking for new ways to help people grow and develop. That’s why he started contributing to this blog: to share all his experience and knowledge so that he can help people who are interested in DIY repair.