

Got an old nightstand gathering dust in the corner? You’re sitting on a hidden gem, almost literally. Learning how to turn a nightstand into a chair is one of the most satisfying weekend projects you can tackle, and it costs far less than buying new furniture. Better yet, you don’t need a workshop full of fancy tools or years of carpentry experience to pull it off.
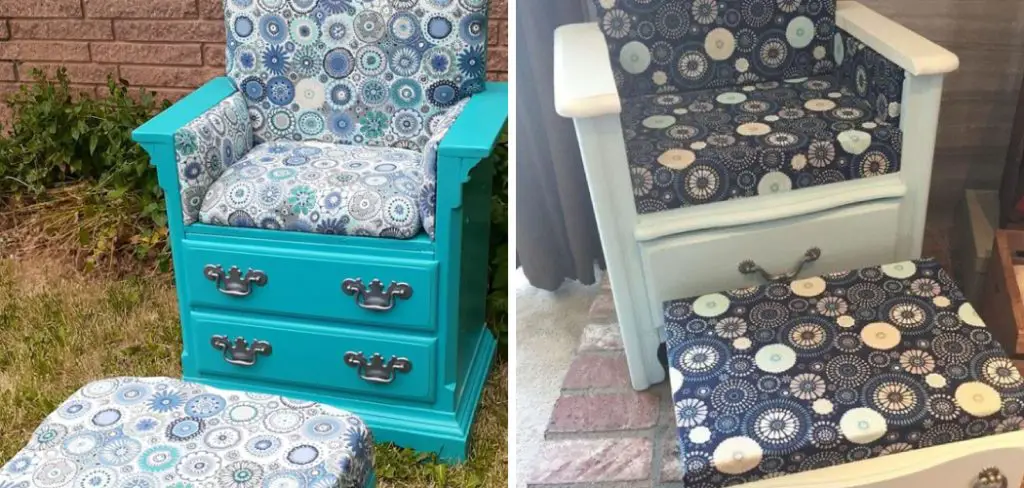
This project gives a tired piece of furniture a fresh purpose. A small nightstand has the perfect bones for a cozy seat, a plant stand with backrest, or an accent chair for a reading nook. With a little planning, some basic supplies, and a bit of patience, you can transform something forgettable into a standout piece you’ll be proud to show off.
In this guide, we’ll walk you through every stage, from picking the right nightstand to adding the finishing touches. Whether you’re a complete beginner or a seasoned DIY fan, you’ll find clear, practical steps that build your confidence at every turn. Ready to get hands-on? Let’s bring that nightstand back to life.
Why Turning a Nightstand Into a Chair Is Worth It
Repurposing furniture saves money and keeps usable items out of landfills, which is a win for your wallet and the planet. Instead of spending hundreds on a new accent chair, you reshape something you already own into a unique piece with character.
There’s also a creative payoff. You control the colors, the cushion, and the finish, so the result matches your space perfectly. No mass-produced item can offer that. On top of that, you build practical skills like sanding, painting, and basic upholstery that carry over to future projects.
Finally, the sense of accomplishment is real. Every time you see your finished chair, you’ll remember you made it yourself. That pride, combined with the savings and sustainability, makes this project genuinely worth your time and effort.
Step-by-Step Guide to How to Turn a Nightstand Into a Chair
Step 1: Choose the Right Nightstand
Start by picking a sturdy nightstand with a solid frame and no major structural damage. Wobbly legs or cracked panels will only cause trouble later, so test it by pressing down on each corner and giving it a gentle shake. A small wobble can be fixed, but deep cracks usually mean more work than it’s worth.
Look for a piece with a flat top, since that surface becomes your seat. Open drawers or a small cabinet space underneath can stay as handy storage. Solid wood nightstands work best because they hold screws well and sand smoothly, but a well-built composite piece can also do the job if you treat it gently.

Step 2: Plan Your Design
Before you touch a single tool, sketch out what you want the finished chair to look like. Decide whether you want a tall backrest, low arms, or a simple stool-style seat. A quick drawing helps you spot problems early and gives you a clear roadmap to follow, which is exactly how to turn a nightstand into a chair without expensive mistakes.
Think about where the chair will live, too. A reading corner might call for a comfy padded seat, while an entryway perch could stay slim and firm. Measure the space so your finished piece fits comfortably. Planning ahead saves you from redoing work and keeps your project moving smoothly from start to finish.
Step 3: Gather Your Tools and Materials
Pulling everything together before you begin keeps the whole process stress-free. You’ll generally need a screwdriver or drill, sandpaper, wood screws, a saw if you plan to cut a backrest, and a small amount of plywood for the backrest panel. For comfort, grab foam, fabric, and a staple gun for the seat cushion.
Don’t forget the finishing supplies. Wood primer, paint or stain, and a clear protective sealer will give your chair a polished, long-lasting look. Lay everything out on a clean workspace so you can find each item quickly. Having your tools within reach means fewer interruptions and a much more enjoyable building experience.

Step 4: Prep and Sand the Surface
Preparation makes or breaks the final result, so give this step your full attention. Wipe down the entire nightstand to remove dust, grime, and any old wax. Then sand every surface you plan to paint or stain, using medium-grit sandpaper first and finishing with a finer grit for a smooth touch.
Sanding does more than smooth rough spots. It scuffs up glossy finishes so primer and paint actually stick, which prevents peeling down the road. Pay extra attention to corners and edges where old finish tends to cling. Once you’re done, wipe away the sanding dust with a slightly damp cloth and let the piece dry completely before moving on.
Step 5: Build and Attach the Backrest
Now for the part that makes it feel like a real chair. Cut your plywood panel to the height and width you sketched earlier, then sand the edges so they’re smooth and splinter-free. This panel becomes the backrest, giving your seat support and that classic chair shape everyone recognizes.
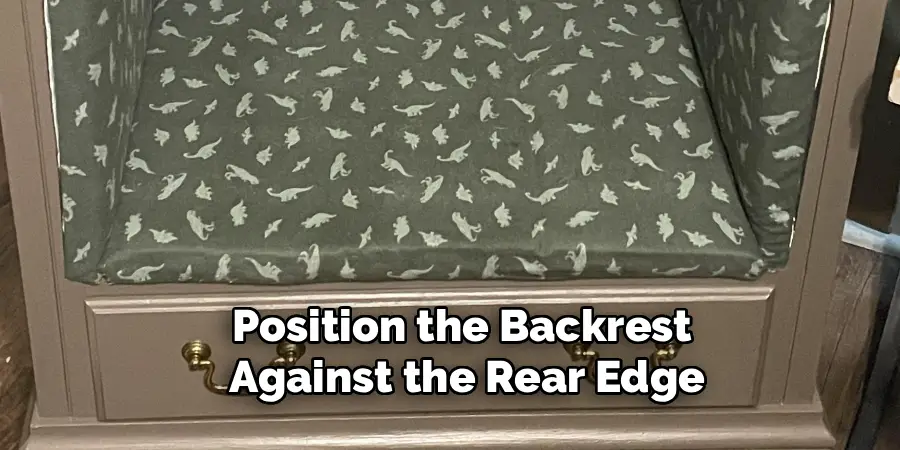
Position the backrest against the rear edge of the nightstand top and secure it with wood screws driven in from underneath or behind. Use a level to keep it straight, and add small corner brackets for extra stability if the panel feels loose. A firm, well-anchored backrest is the secret to how to turn a nightstand into a chair that’s both safe and comfortable to sit in.
Step 6: Add the Seat Cushion
A cushion turns a hard surface into a seat you’ll actually want to use. Cut a piece of foam to match the top of the nightstand, then wrap it in your chosen fabric. Pull the fabric taut and staple it underneath the seat board, folding the corners neatly like you’re wrapping a gift.
If your nightstand top lifts off, cushion it separately and reattach it once covered. For a fixed top, simply staple the fabric-wrapped foam directly onto the surface or onto a thin board placed on top. Choose a durable, easy-to-clean fabric, especially if the chair will see daily use. This small addition delivers a huge boost in comfort and style.
Step 7: Paint, Seal, and Finish
The finishing stage is where your hard work really shines. Apply a coat of primer first to help the paint adhere and to hide the original color. Once it dries, brush or spray on your chosen paint or stain in thin, even layers, letting each coat dry fully before adding the next. Two or three light coats beat one thick, drippy one every time.
When the color looks just right, seal everything with a clear protective topcoat to guard against scratches and moisture. Let the chair cure for a day or two before you sit on it. After that, you’re done, and you’ve got a one-of-a-kind piece ready to enjoy.

Frequently Asked Questions
What Tools Do Beginners Really Need for This Project?
You can complete this project with surprisingly few tools. A drill or screwdriver, sandpaper, a staple gun, and a paintbrush cover the basics. If you plan to add a backrest, a small saw helps you cut plywood to size. Most of these tools are affordable and reusable, so you’ll have them ready for your next furniture makeover.
How Long Does the Whole Project Take?
Plan for a relaxed weekend rather than a quick afternoon. The actual hands-on work takes around four to six hours, but drying times for primer, paint, and sealer stretch the timeline. Spreading the project across two days lets each layer dry properly and gives you better results. Rushing the finish is the most common mistake, so patience truly pays off here.
Will the Chair Be Strong Enough to Sit On?
Yes, as long as you start with a sturdy nightstand and reinforce the joints. Adding corner brackets and using quality wood screws makes a big difference in stability. Test the chair carefully before regular use by applying gentle pressure. If anything feels loose, tighten the screws or add extra support. A solid foundation keeps your finished chair safe and reliable.
Can I Do This Without Painting the Nightstand?
Absolutely. If your nightstand has beautiful natural wood, you can skip paint and use a clear stain or sealer instead to highlight the grain. This approach gives a warm, rustic look and requires less effort. Just make sure you still sand and seal the surface so it stays protected and smooth for years of comfortable use.
What Fabric Works Best for the Seat Cushion?
Choose a durable, tightly woven fabric that resists wear and cleans easily. Cotton blends, canvas, and upholstery-grade fabrics all hold up well to daily use. If the chair will sit in a high-traffic spot or near kids and pets, lean toward stain-resistant or washable options. Avoid delicate materials that snag or fade quickly, since they shorten the life of your cushion.
Conclusion
Transforming forgotten furniture into something functional is one of the most rewarding ways to spend a weekend. Now that you know how to turn a nightstand into a chair, you have a clear path from a dusty corner piece to a custom seat you’ll genuinely love. Each step, from choosing a sturdy base to adding the final sealant, builds your confidence and your skills along the way.
The best part is that this project welcomes all experience levels. You don’t need to be an expert to get great results, just a willingness to take it one step at a time. So pick out that neglected nightstand, gather your supplies, and start building. Your unique, handmade chair is waiting, and the satisfaction of sitting in something you created yourself is absolutely worth it.

Rick is a handyman who grew up helping his dad with his business. He learned a lot from him about how to fix things, and also about how to work hard and take care of business. These days, Rick is still into fixing things- only now, he’s doing it for a living.
Rick is always looking for new ways to help people grow and develop. That’s why he started contributing to this blog: to share all his experience and knowledge so that he can help people who are interested in DIY repair.