

An adjustable bed frame is a wonderful thing for your comfort, but let’s be honest, the metal base, the motor housing, and the chunky legs aren’t exactly easy on the eyes. Those mechanical parts can clash with an otherwise cozy bedroom, leaving your space looking more like a hospital room than a relaxing retreat. The good news is that you can keep all the perks of your adjustable base while making it disappear from view. Learning how to hide adjustable bed frame parts is simpler than you might think, and most fixes won’t cost you a fortune or require any tools.
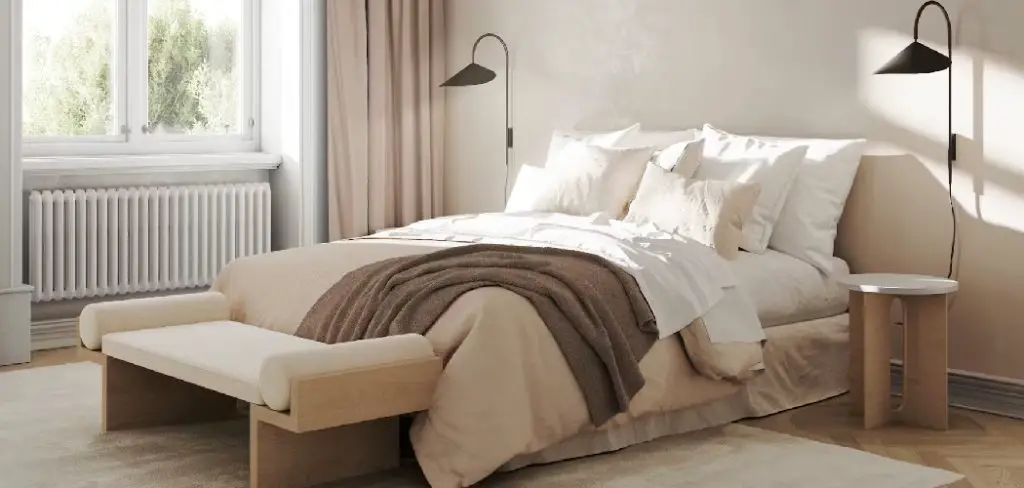
This guide walks you through clear, beginner-friendly steps that anyone can follow, even if you’ve never tackled a decor project before. We’ll cover bed skirts, upholstered frames, decorative panels, and smart styling tricks that cover the base without blocking its movement. Whether you want a polished, finished look or just a way to hide the wires and motor, you’ll find an approach that suits your room and budget. By the end, your bed will look beautiful and work just as well. Let’s get started.
Why Hiding Your Adjustable Bed Frame Matters
Covering up that bulky base does more than just tidy the look of your room. A visible adjustable frame, with its exposed metal and dangling cords, can make even a stylish bedroom feel unfinished and cold. When you conceal those parts, your bed blends into your decor and instantly feels more inviting, warm, and put-together.
There’s a practical side too. Hiding the frame keeps dust, pet hair, and clutter from collecting around the motor and moving parts, which helps your base run smoothly for longer. A clean cover also protects curious kids and pets from reaching wires or pinch points. On top of that, a well-disguised base often boosts the resale appeal of a guest room or rental. Small styling changes here pay off every single day, giving you comfort and good looks in one neat package.
Step-by-Step Guide to How to Hide Adjustable Bed Frame
Step 1: Measure Your Frame and Clearance
Before you buy anything, grab a tape measure and check your frame from every angle. Note the height from the floor to the top of the mattress, the width, and the length. Then measure the gap underneath when the bed sits flat, since this tells you how much room you have for covers, skirts, or storage solutions.
Pay close attention to the motor housing and any cords, as these stick out and need extra clearance. Write down where the moving joints sit so nothing you add will block the bed’s range of motion. A few minutes of careful measuring now saves you from ordering panels or skirts that won’t fit or interfere with the lift function.

Step 2: Use a Bed Skirt Built for Movement
One of the easiest ways of how to hide adjustable bed frame parts is a wraparound bed skirt designed for adjustable bases. Regular skirts that tuck under the mattress often get bunched or torn when the bed bends, so look for ones with elastic bands or a split, adjustable design. These hug the frame and move with it, keeping the metal hidden no matter the position.
Choose a fabric and color that match your bedding for a seamless look. Darker shades hide scuffs and dust well, while lighter tones brighten the space. Slip the skirt around the base, adjust the straps, and watch the bulky frame disappear behind a clean, draping edge.
Step 3: Add an Upholstered Frame or Surround
For a more permanent and luxurious fix, slide your adjustable base inside an upholstered bed frame or surround. Many companies sell open-bottom frames made specifically to hold an adjustable base, hiding the metal behind padded fabric or a tall headboard. This approach gives your bed a designer feel while keeping every mechanical part out of sight.
Make sure the frame you pick allows the base to flex freely without rubbing or catching. Measure twice before buying, and look for models labeled adjustable-compatible. Once assembled, the soft, finished sides wrap your bed in comfort and style, turning a clinical-looking base into a centerpiece you’ll be proud to show off.

Step 4: Install Removable Side Panels
If you’re handy or want a custom touch, removable side panels offer a smart solution. You can cut lightweight wood, foam board, or fabric-covered panels to fit along the sides and foot of the bed. Attach them with hook-and-loop strips or simple clips so they peel away easily whenever the base needs servicing.
The key here is making the panels independent of the moving sections, so place them only where the frame stays still. Paint or wrap them to match your headboard or walls for a built-in look. This method hides the frame completely while giving you full access to the motor and wires whenever you need a quick fix or cleaning.
Step 5: Tuck Away Cords and the Motor
A hidden frame still looks messy if cords snake across the floor. Start by bundling loose wires with reusable ties or a fabric cord sleeve, then route them along a leg or back edge where they stay out of sight. Stick-on clips keep cables tidy and stop them from dragging when the bed moves.
For the motor housing, a small fabric pouch or a discreet box cover works well, as long as it doesn’t trap heat or block ventilation. Always leave a little breathing room around the motor so it stays cool and runs safely. Tidy cords and a covered motor make the whole setup look clean and intentional.

Step 6: Style With a Long Comforter and Throws
Soft furnishings do a lot of heavy lifting when learning how to hide adjustable bed frame edges. Pick an oversized comforter or duvet that drapes well past the mattress sides, letting the fabric fall naturally over the exposed base. The extra length covers the metal while adding a cozy, layered look to your bed.
Layer in a folded throw at the foot and a few plump pillows to draw the eye upward and away from the frame. Choose flowing fabrics that bend with the bed rather than stiff materials that crease awkwardly. These simple styling touches soften the whole look and hide the mechanical bits without you having to build or buy anything structural.
Step 7: Add Storage or Decor Around the Base
Finally, use the space around your bed to disguise the frame and add function. Slide low storage bins, baskets, or drawers into the gap beneath the bed when it rests flat, making sure they don’t block the lift mechanism. These not only hide the legs but also give you handy spots for extra blankets and seasonal items.
You can also place a low bench, a stylish rug, or potted plants near the foot of the bed to draw attention away from the base. Combining smart storage with a few decorative touches finishes the look beautifully, turning the area around your bed into a tidy, welcoming part of the room.

Frequently Asked Questions
Can I Use a Regular Bed Skirt on an Adjustable Base?
A standard bed skirt usually doesn’t work well because it tucks under the mattress and gets crumpled or torn when the bed bends. Instead, choose a wraparound or split-design skirt made for adjustable bases. These attach to the frame with elastic or straps and move along with the bed. They keep the metal hidden in any position without bunching, tearing, or sliding out of place.
Will Covering the Frame Affect How It Works?
It won’t, as long as you cover only the parts that stay still and leave the moving joints free. Avoid wrapping anything tightly around the motor or the hinges where the base flexes. Keep a little space around the motor for ventilation so it doesn’t overheat. When you plan your covers and panels carefully, your bed lifts, reclines, and lowers exactly as it should with no interference.
What’s the Cheapest Way to Disguise an Adjustable Base?
The most budget-friendly option is a combination of a long comforter and a wraparound bed skirt. An oversized duvet drapes over the sides and hides most of the frame for very little money, while an inexpensive elastic skirt covers the rest. Add a few throws and pillows you may already own, and you can transform the look of your bed for under fifty dollars in most cases.
How Do I Hide the Cords and Remote Wires?
Start by bundling loose cords with reusable ties or slipping them into a fabric cord sleeve, then route them along a leg or the back edge. Stick-on cable clips hold everything in place so nothing drags when the bed moves. For the remote wire, tuck it along the headboard side within easy reach. Keeping cables tidy makes the whole setup look polished and prevents tripping hazards.
Do Upholstered Frames Work With Any Adjustable Base?
Not every frame fits every base, so always check compatibility before buying. Look for upholstered frames labeled adjustable-compatible or open-bottom, since these are built to hold the base while allowing full movement. Measure your base height, width, and length, then compare them to the frame’s inside dimensions. When the fit is right, the padded surround hides the metal beautifully and lets the bed flex without rubbing or catching.
Conclusion
Turning a bulky, mechanical-looking base into a stylish, polished bed is easier and more affordable than most people expect. By measuring carefully, choosing a movement-friendly skirt, and adding an upholstered surround or removable panels, you build a clean look that hides the metal without limiting comfort. Tucking away cords, draping a long comforter, and styling the surrounding space pull the whole room together into a cozy, finished retreat you’ll love coming home to.
Now that you know how to hide adjustable bed frame parts the simple way, you can pick the steps that fit your room and budget and start today. Begin with one easy upgrade, like a wraparound skirt or an oversized duvet, then build from there as you go. Grab your tape measure, plan your look, and give your bed the makeover it deserves. Your bedroom will feel more relaxing, and your adjustable base will keep working perfectly behind the scenes.

Rick is a handyman who grew up helping his dad with his business. He learned a lot from him about how to fix things, and also about how to work hard and take care of business. These days, Rick is still into fixing things- only now, he’s doing it for a living.
Rick is always looking for new ways to help people grow and develop. That’s why he started contributing to this blog: to share all his experience and knowledge so that he can help people who are interested in DIY repair.