

Adding LED lights to your TV can transform your entertainment space into a more immersive viewing environment. Not only do LED lights reduce eye strain by providing ambient backlighting, but they also add a modern aesthetic touch to your room.
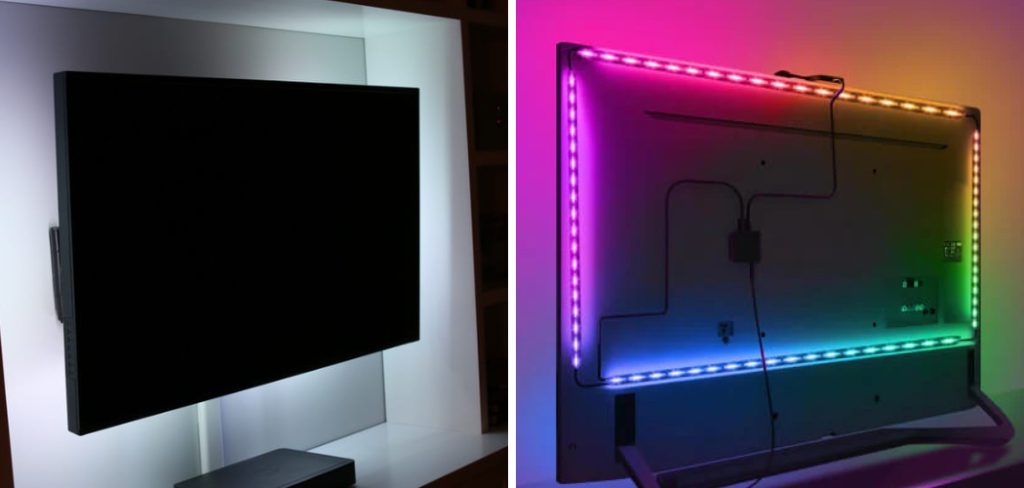
Whether you’re watching movies, gaming, or streaming your favorite shows, LED lights create a captivating atmosphere that enhances your overall experience.
This comprehensive guide on how to put LED lights on tv will walk you through everything you need to know about installing LED lights on your TV. From choosing the right type of lights to following step-by-step installation instructions, you’ll learn how to create a professional-looking setup that elevates your home entertainment system. By the end of this article, you’ll have all the knowledge and confidence needed to put LED lights on your TV like a pro.
Types of LED Lights for TVs
Before you begin the installation process, it’s important to understand the different types of LED lights available for TVs. LED strip lights are the most popular option because they’re flexible, easy to install, and come in various lengths to fit different TV sizes. These strips typically feature adhesive backing that sticks directly to the back of your television.
You’ll also encounter RGB LED lights, which allow you to change colors and create different moods depending on what you’re watching. Some advanced options include smart LED lights that sync with your TV’s content, changing colors based on what’s happening on screen. Standard single-color LED strips are more budget-friendly and provide a consistent backlight that’s perfect for reducing eye strain. Consider your budget, desired features, and the atmosphere you want to create when selecting the right LED lights for your setup.
Tools and Materials You’ll Need
- LED light strips
- Power supply adapter
- Remote control (if not included with LED lights)
- Scissors or a wire cutter
- Adhesive tape or clips for mounting
- Cleaning supplies (optional)
Safety Precautions
Safety should always be your top priority when working with electrical components. Before you begin installing LED lights on your TV, make sure to unplug both your television and the LED light power adapter from any electrical outlets. This prevents any risk of electrical shock during the installation process.
Handle the LED strips carefully to avoid damaging the delicate circuitry inside. When cutting LED strips, only cut along the designated cutting marks—cutting in the wrong place can render sections of the strip useless. Additionally, ensure that the LED lights you’re using are rated for the voltage requirements of your power source. Never overload electrical outlets, and avoid placing LED strips near heat sources or in areas where they might get wet. Taking these precautions will help you complete a safe installation that you can enjoy for years to come.
7 Simple Step-By-Step Guidelines on How to Put LED Lights on TV
Step 1: Measure Your TV
The first step in installing LED lights on your TV is to accurately measure its dimensions. Use a measuring tape to measure the perimeter of your TV’s back panel, including the top, both sides, and the bottom. Write down these measurements so you know exactly how much LED strip you’ll need.

Most LED strip lights come in standard lengths like 6.5 feet, 13 feet, or 16.4 feet, so choose a size that matches or slightly exceeds your TV’s perimeter. If your LED strip is too long, don’t worry—most strips have designated cutting points where you can safely trim them to the perfect length. Having precise measurements ensures that your LED lights will fit properly and provide even illumination around your entire TV.
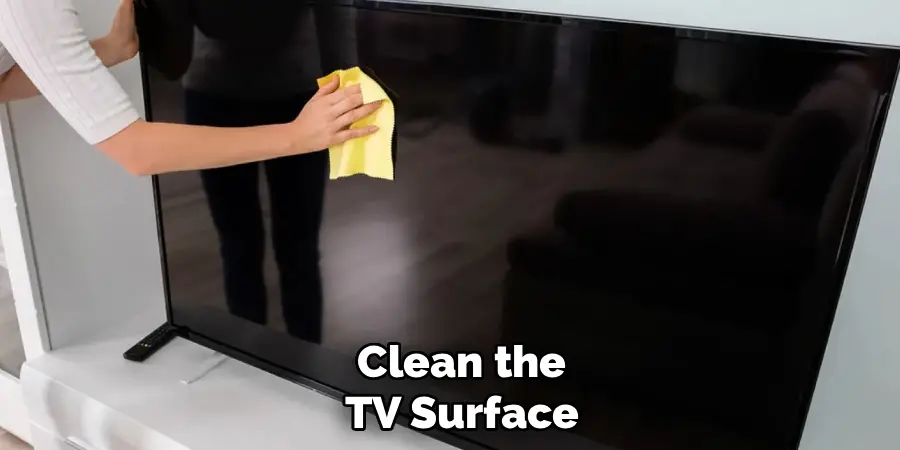
Step 2: Clean the TV Surface
Before applying the LED strips, you need to prepare the surface where they’ll be attached. Unplug your TV and lay it face-down on a soft surface like a blanket or towel to protect the screen from scratches. This position gives you easy access to the back panel where you’ll be installing the lights.
Use isopropyl alcohol and a clean, lint-free cloth to thoroughly wipe down the edges of your TV’s back panel. This removes dust, oils, and any residue that could prevent the adhesive from sticking properly. Allow the surface to dry completely before moving on to the next step—applying LED strips to a damp surface will compromise the adhesive’s effectiveness and could cause the strips to fall off over time.
Step 3: Plan Your LED Strip Placement
Take a moment to plan where you’ll place the LED strips before removing the adhesive backing. Most people prefer to start at the bottom center of the TV and work their way around the perimeter. This approach typically provides the most even lighting and makes wire management easier.
Consider where the power adapter will be located and plan your starting point accordingly—you want the power cable to reach an outlet without stretching or creating unsightly cable runs. Some installations look best with the LED strip positioned right at the edge of the TV, while others benefit from placement slightly inward from the edge. Visualize how the light will project onto the wall behind your TV and adjust your placement strategy to achieve your desired effect.
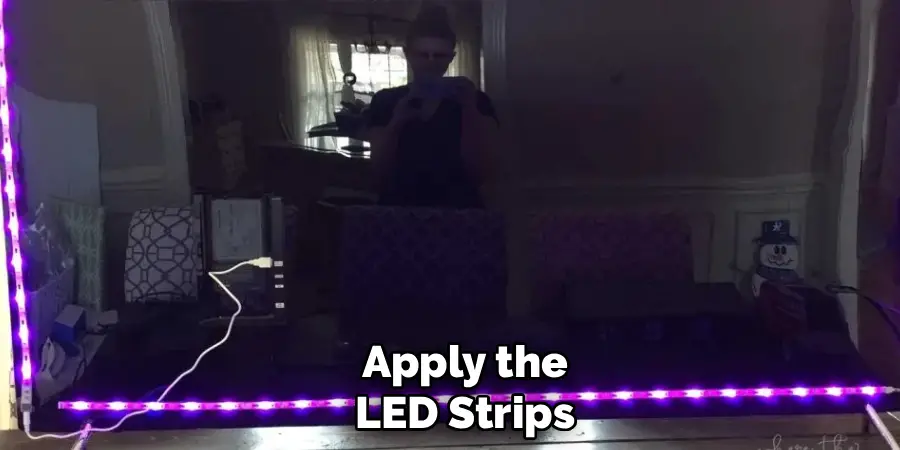
Step 4: Apply the LED Strips
Now it’s time to apply the LED strips to your TV. Carefully peel back a small section of the adhesive backing—about 6 inches at a time—and press the strip firmly onto the back of your TV along your planned route. Work slowly and deliberately, ensuring the strip stays straight and even.
As you progress around the TV’s perimeter, continue peeling the backing and pressing the strip into place. Apply firm, consistent pressure along the entire length to ensure good adhesion. If you reach a corner, gently bend the strip rather than creasing it sharply, as sharp bends can damage the internal circuitry. Take your time with this step—rushing can result in crooked placement or poor adhesion that will require you to start over.
Step 5: Secure the Connections
Once the LED strips are in place, you’ll need to secure all electrical connections. If your LED strip kit includes multiple segments that need to be connected, use the provided connectors to join them together according to the manufacturer’s instructions. Ensure all connections are firmly seated and secure.
Connect the power adapter to the LED strip’s power input, which is typically located at one end of the strip. Double-check that all connections are tight and properly aligned—loose connections can cause flickering or sections of the strip to not light up. If your LED lights came with a controller or remote receiver, mount it in an accessible location where the remote signal can reach it easily.
Step 6: Route and Manage Cables
Proper cable management is essential for a clean, professional-looking installation. Use cable clips, ties, or adhesive cable channels to route the power cable from the LED strip to your nearest power outlet. Try to run cables along the back edge of your TV stand or mount to keep them hidden from view.
If possible, bundle the LED power cable with your TV’s existing cables for a tidier appearance. Avoid letting cables dangle freely or stretch across open spaces where they could become trip hazards. Good cable management not only looks better but also protects your cables from damage and makes it easier to access your setup if you need to make adjustments in the future.
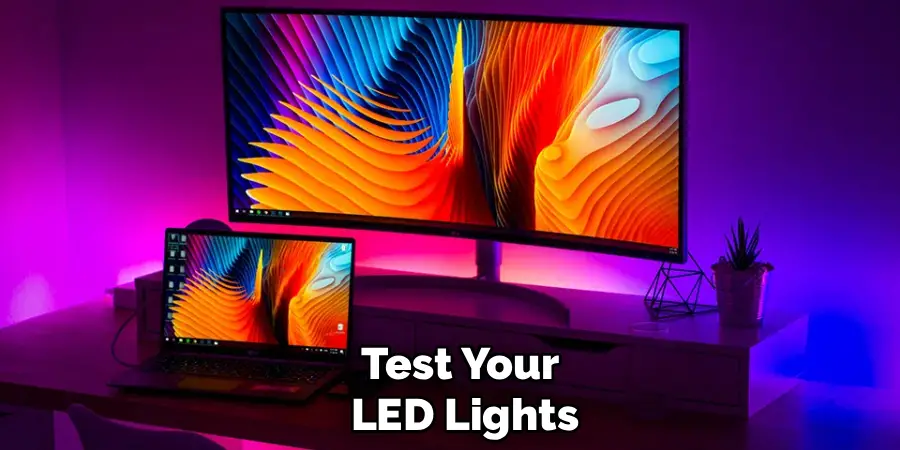
Step 7: Test Your LED Lights
Before remounting or repositioning your TV, plug in the power adapter and turn on your LED lights to test that everything works correctly. Check that all sections of the strip illuminate evenly and that there are no dark spots or flickering areas. If your LED lights have color-changing capabilities, test different colors and modes to ensure all functions work properly.
If you notice any issues, now is the time to troubleshoot and fix them before completing your setup. Once you’ve confirmed that everything works as expected, you can carefully move your TV back into position. Stand back and admire your work—you should see a beautiful glow emanating from behind your TV that enhances your viewing environment.
Following these steps on how to put LED lights on TV, you can easily add a touch of ambiance to your entertainment setup. But why stop at just the TV? LED lights are versatile and can be used in various areas of your home for different purposes.
Tips for a Clean and Safe Setup
Maintaining a clean and safe LED light setup requires attention to detail. Always ensure that LED strips don’t block any ventilation holes on your TV, as this could cause overheating issues. Most modern TVs have ventilation on the back or sides, so be mindful of these areas during installation.
Keep cables organized and secured to prevent them from being accidentally pulled or damaged. If you’re mounting your TV on the wall, make sure the LED setup doesn’t interfere with the mounting brackets or hardware. Finally, consider using a surge protector to plug in both your TV and LED lights, which protects your equipment from power surges and provides convenient on/off control for your entire entertainment system.
Troubleshooting Common Issues
Even with careful installation, you might encounter some common issues with your LED TV lights. If sections of your LED strip aren’t lighting up, check all connections to ensure they’re secure and properly seated. Dark spots or inconsistent lighting often indicate a poor connection or a damaged section of the strip. If your LED lights are flickering, this usually points to an unstable power supply—try using a different outlet or check that your power adapter is properly rated for your LED strips.
Adhesive failure is another common problem, especially if the TV surface wasn’t properly cleaned; if strips start peeling off, remove them completely, clean the surface again, and use additional double-sided tape for reinforcement. For issues with remote controls or smart features, consult your LED light manufacturer’s troubleshooting guide or contact their customer support.
Frequently Asked Questions
Q: Can I Put LED Lights on Any Type of TV?
A: Yes, you can install LED lights on virtually any TV, regardless of whether it’s an LCD, LED, OLED, or plasma display. The installation process remains the same across different TV types because the LED strips attach to the external back panel rather than interfacing with the TV’s internal components.
However, you should verify that your specific TV model doesn’t have any unusual design features that might make adhesive attachment difficult. Some ultra-thin TVs have very minimal bezels or frames, which might require more careful placement of the LED strips. Additionally, if your TV has a curved design, you’ll need flexible LED strips that can accommodate the curve without breaking or causing strain on the adhesive connection.
Q: Will LED Lights Damage My TV?
A: LED strip lights will not damage your TV when installed correctly. These lights operate at low voltages and generate minimal heat, so they won’t cause any harm to your TV’s components or screen. The adhesive backing on LED strips is designed to be removable and typically won’t leave residue or damage the TV’s surface when removed carefully.
However, you should avoid placing LED strips over ventilation holes, as blocking airflow could potentially cause your TV to overheat during extended use. As long as you follow proper installation guidelines and don’t obstruct any important features or vents, your LED lights will safely enhance your viewing experience without any risk to your television.
Q: Do LED TV Lights Use a Lot of Electricity?
A: LED lights are extremely energy-efficient and use very little electricity compared to other lighting options. A typical LED strip used for TV backlighting consumes between 5 to 15 watts of power, which translates to just pennies per month in electricity costs. To put this in perspective, your TV itself uses far more power than the LED lights behind it.
Even if you leave your LED TV lights on for several hours each day, the impact on your electricity bill will be negligible. This energy efficiency is one of the many advantages of choosing LED technology for your TV backlighting setup—you get beautiful ambient lighting that enhances your viewing experience without worrying about increased energy consumption or environmental impact.
Conclusion
Installing LED lights on your TV is a straightforward project that delivers impressive results. By following the steps outlined in this guide on how to put LED lights on TV, you’ve learned how to measure, prepare, install, and test LED strip lights that will transform your viewing experience. The combination of reduced eye strain, enhanced ambiance, and modern aesthetics makes this upgrade well worth the minimal time and investment required.
Now that you know how to put LED lights on your TV, it’s time to take action and create the entertainment space you’ve always wanted. Gather your materials, set aside an hour for installation, and get ready to enjoy movies, shows, and games in a whole new light. Your eyes—and your guests—will thank you for creating such an impressive viewing environment.
Rick is a handyman who grew up helping his dad with his business. He learned a lot from him about how to fix things, and also about how to work hard and take care of business. These days, Rick is still into fixing things- only now, he’s doing it for a living.
Rick is always looking for new ways to help people grow and develop. That’s why he started contributing to this blog: to share all his experience and knowledge so that he can help people who are interested in DIY repair.