

LED strip lights have revolutionized home and commercial lighting, offering versatility, energy efficiency, and stunning visual effects.

However, like any electronic device, they occasionally need to be reset to restore optimal performance. Whether your LED strips are flickering, displaying incorrect colors, or simply not responding to your remote control, knowing how to properly reset them can save you time, money, and frustration.
This comprehensive guide on how to reset LED strip lights walks you through everything you need to know about resetting LED strip lights. From understanding the different types available to following detailed step-by-step instructions, you’ll gain the knowledge and confidence to troubleshoot your lighting issues effectively. By the end of this article, you’ll be equipped with practical solutions to keep your LED strips functioning flawlessly for years to come.
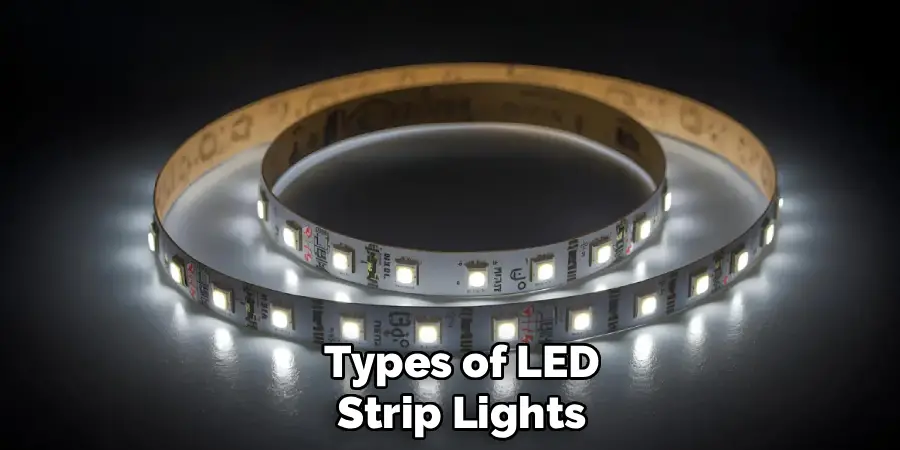
Types of LED Strip Lights
Before diving into the reset process, it’s essential to understand the various types of LED strip lights available on the market. RGB (Red, Green, Blue) strips are among the most popular, allowing users to create millions of color combinations through a controller or smartphone app. These strips are perfect for mood lighting and entertainment spaces.
RGBW strips add a white LED to the standard RGB configuration, providing pure white light alongside color options. This makes them ideal for spaces that require both functional lighting and decorative effects. Smart LED strips connect to Wi-Fi or Bluetooth, enabling voice control through systems like Alexa or Google Home. Each type may require slightly different reset procedures, so identifying your specific model is the first step toward successful troubleshooting.
Tools and Requirements
Resetting LED strip lights doesn’t require an extensive toolkit, but having the right items on hand will make the process smoother. You’ll need your LED strip lights’ original controller or remote, which is essential for accessing reset functions. Keep your smartphone nearby if you’re working with smart LED strips that use dedicated apps.
A small screwdriver set may be necessary to access battery compartments in remotes or to remove controller covers. Having a power outlet tester can help verify that your power source is functioning correctly. Finally, keep your LED strip’s user manual accessible, as it may contain model-specific reset instructions. If you’ve misplaced the manual, most manufacturers provide digital copies on their websites.
Safety Precautions
Working with electrical components requires attention to safety. Always disconnect your LED strip lights from the power source before attempting any reset procedure. This prevents electrical shock and protects both you and your lighting system from potential damage.
Never attempt to reset LED strips with wet hands or in damp environments, as moisture and electricity create dangerous conditions. If your LED strips show signs of physical damage such as exposed wiring, burn marks, or melted components, discontinue use immediately and consult a professional electrician. Additionally, ensure adequate ventilation in your workspace, especially if you’re working with enclosed fixtures or installations that may have accumulated heat.
7 Simple Step-By-Step Guidelines on How to Reset LED Strip Lights
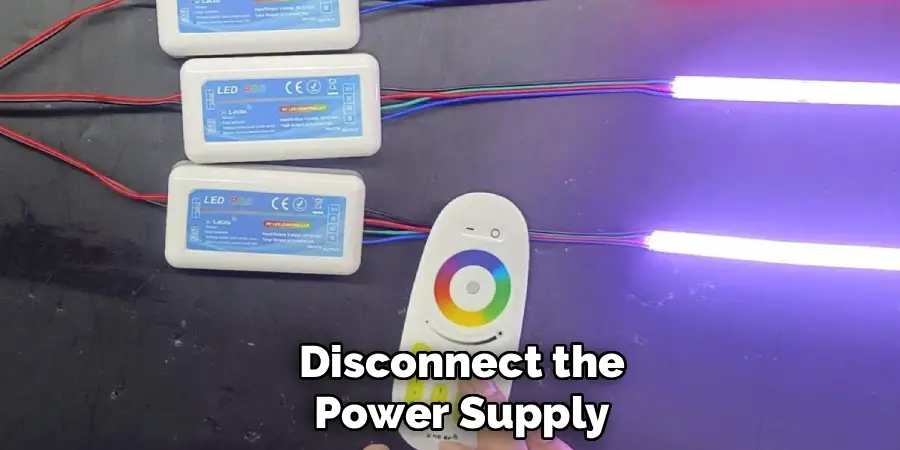
Step 1: Disconnect the Power Supply
The first and most crucial step in resetting your LED strip lights is to completely disconnect them from their power source. Unplug the adapter from the wall outlet and wait at least 30 seconds before proceeding. This waiting period allows any residual electrical charge to dissipate from the system.
For hardwired installations, locate your circuit breaker and switch off the corresponding circuit. Use a voltage tester to confirm that no electricity is flowing to the LED strips before you continue. This step is non-negotiable for your safety and prevents potential damage to the lighting system’s internal components during the reset process.
Step 2: Remove the Controller Connection
Once power is safely disconnected, locate where your LED strip connects to its controller. Carefully unplug this connection, taking note of the orientation and any locking mechanisms. Some controllers feature clips or screws that secure the connection, so handle these components gently to avoid damage.
Inspect the connection points for any signs of corrosion, debris, or damage. Clean the connectors with a soft, dry cloth if necessary. This step not only facilitates the reset but also provides an opportunity to maintain your system and identify potential issues that could affect performance after the reset is complete.
Step 3: Reset the Remote Control
Many LED strip light issues stem from remote control malfunctions rather than problems with the strips themselves. Remove the batteries from your remote and press every button at least once. This drains any remaining power and clears the remote’s memory.
Wait for approximately two minutes before reinserting fresh batteries, ensuring they’re positioned correctly according to the polarity markers. Once the batteries are replaced, point the remote directly at the receiver and press the power button. If your remote features a dedicated reset button (often a small recessed button requiring a pin to press), use this function according to your manufacturer’s instructions.
Step 4: Perform a Controller Reset
The controller serves as the brain of your LED strip system, and resetting it can resolve numerous issues. Locate the reset button on your controller, which is typically a small, recessed button labeled “RESET” or marked with a circular arrow symbol. You’ll need a paperclip or a similar thin object to press this button.
Press and hold the reset button for 5-10 seconds while the controller remains disconnected from power. Some controllers may flash or emit a beep to indicate a successful reset. After releasing the button, reconnect the controller to your LED strips, but keep it unplugged from power for now. This prepares the system for a fresh start when you restore power in subsequent steps.
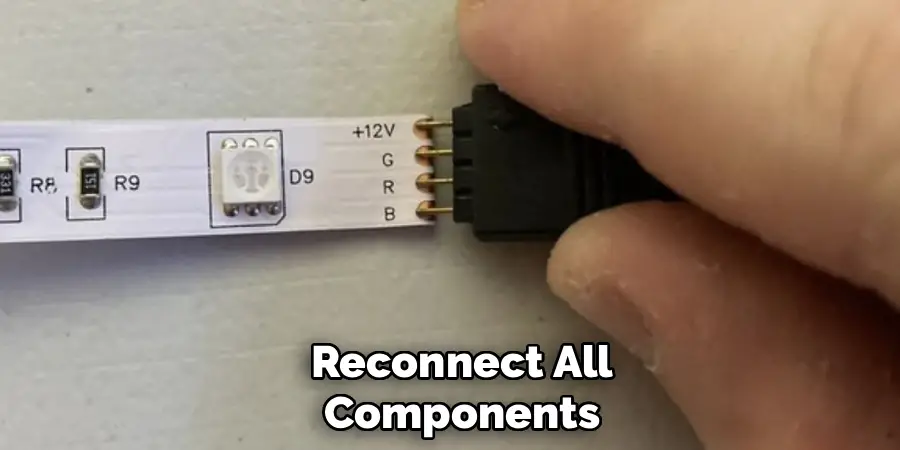
Step 5: Reconnect All Components
With both the remote and controller reset, it’s time to carefully reconnect your system. Start by firmly connecting the LED strip to the controller, ensuring the connection is secure and properly aligned. Double-check that positive and negative terminals match correctly, as reversed polarity can damage your lights.
Next, connect the controller to its power adapter, but don’t plug the adapter into the wall outlet yet. Verify that all connections are tight and properly seated. Loose connections are a common cause of LED strip malfunctions and can prevent a successful reset. Take your time with this step to ensure everything is correctly assembled.
Step 6: Restore Power and Test
Now it’s time to restore power to your LED strip system. Plug the power adapter into the wall outlet and observe the LED strips carefully. They should illuminate immediately, typically displaying their default color (often white or red). If the strips don’t light up, verify that your power outlet is functioning by testing it with another device.
Once the strips are illuminated, test your remote control by attempting to change colors, adjust brightness, and switch between different modes. If you’re using a smart LED system, open the corresponding app and attempt to control the lights through your smartphone. Successful control at this stage indicates that your reset has been effective.
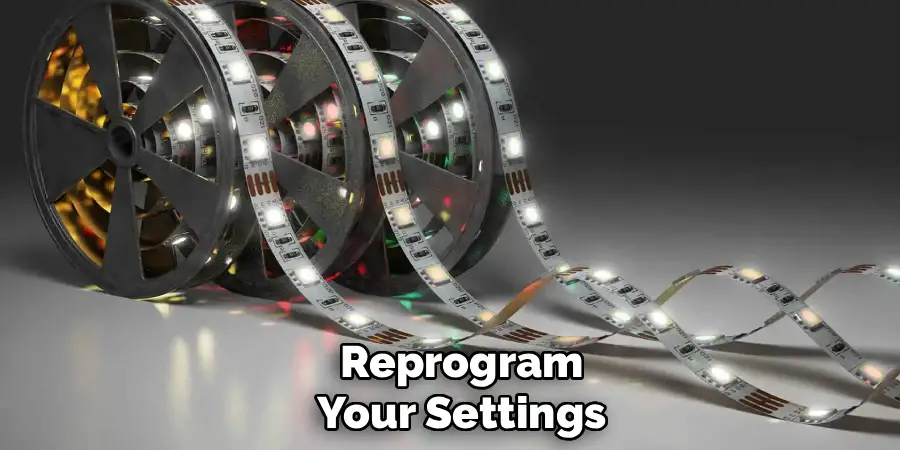
Step 7: Reprogram Your Settings
After confirming that your LED strips are responding to commands, it’s time to reprogram any custom settings you had configured. For smart LED strips, you may need to reconnect them to your Wi-Fi network by following the pairing process in your app. This typically involves putting the lights in pairing mode and selecting them from your available devices.
Restore your preferred colors, brightness levels, and custom scenes. If you use voice control, you may need to rediscover devices in your smart home app. Take this opportunity to organize your settings thoughtfully, perhaps improving upon your previous configuration. Document your preferred settings for future reference, making any future resets or adjustments more straightforward.
Following these steps on how to reset LED strip lights can save you time and frustration in the long run. Remember that LED strip lights are delicate electrical devices, so handle them with care to prevent any damage during the reset process. With a little bit of patience, you can have your LED strip lights back up and running in no time.
Preventing Future Issues
Regular maintenance significantly reduces the need for frequent resets. Keep your LED strips clean by gently dusting them with a soft, dry cloth every few months. Dust accumulation can cause overheating and affect performance. Ensure your LED strips aren’t bent beyond their recommended minimum radius, as this can damage the internal circuitry and cause connection failures.
Monitor your power supply to ensure it’s providing consistent voltage. Fluctuating power can cause erratic behavior in LED strips. Consider using a surge protector to guard against power spikes. Additionally, avoid installing LED strips in areas with extreme temperatures or high humidity unless they’re specifically rated for such conditions. Proper installation and environmental considerations will extend the lifespan of your LED strips and minimize technical issues.
Common Mistakes to Avoid
One of the most frequent errors people make when resetting LED strip lights is rushing through the process without allowing adequate time for electrical discharge. Always wait at least 30 seconds after disconnecting power before proceeding.
Another common mistake is forcing connections or pressing reset buttons too aggressively, which can cause permanent damage to delicate components. Finally, many users neglect to check their power supply when troubleshooting, assuming the issue lies solely with the LED strips themselves. Always verify that your outlet and adapter are functioning correctly before concluding that your strips need replacement.
Frequently Asked Questions
Q: Why Won’t My LED Strip Lights Turn On After Resetting?
A: If your LED strips remain unresponsive after a reset, several factors could be at play. First, verify that your power outlet is functioning by plugging in another device. Check that all connections between the LED strip, controller, and power supply are secure and properly aligned.
Examine your power adapter with a multimeter to confirm it’s outputting the correct voltage. If you’ve recently moved or reinstalled your LED strips, ensure they haven’t been damaged during handling. In some cases, the controller itself may have failed and require replacement rather than just a reset.
Q: How Often Should I Reset My LED Strip Lights?
A: Under normal circumstances, LED strip lights should not require frequent resets. If you find yourself resetting your lights more than once every few months, this indicates an underlying issue that needs addressing.
Common culprits include poor-quality power supplies, loose connections, or environmental factors like excessive heat or moisture. Rather than repeatedly resetting your lights, investigate the root cause of the problem. Quality LED strips with proper installation should operate reliably for years without requiring intervention beyond occasional cleaning and maintenance.
Q: Can Resetting LED Strip Lights Damage Them?
A: When performed correctly, resetting LED strip lights poses no risk of damage. The reset process is designed by manufacturers as a safe troubleshooting method.
However, improper handling during the reset process can cause problems. Forcing connections, using excessive pressure on reset buttons, or failing to disconnect power before handling components can result in damage. Always follow manufacturer instructions carefully and handle all components gently. If you’re unsure about any step in the reset process, consult your user manual or contact the manufacturer’s customer support for guidance.
Conclusion
Resetting LED strip lights is a straightforward process that can resolve most common issues without requiring professional assistance or expensive replacements. By following the seven steps outlined in this guide on how to reset LED strip lights, you can restore your LED strips to optimal performance and enjoy the ambiance and functionality they provide. Remember that proper maintenance and careful installation are your best defenses against future problems.
Don’t let minor technical difficulties diminish your enjoyment of these versatile lighting solutions. Bookmark this guide for future reference, and share it with friends or family members who might benefit from this knowledge. If you’ve successfully reset your LED strips using these instructions, consider leaving a comment below sharing your experience or any additional tips you discovered along the way. Your insights could help others facing similar challenges with their LED lighting systems.
Rick is a handyman who grew up helping his dad with his business. He learned a lot from him about how to fix things, and also about how to work hard and take care of business. These days, Rick is still into fixing things- only now, he’s doing it for a living.
Rick is always looking for new ways to help people grow and develop. That’s why he started contributing to this blog: to share all his experience and knowledge so that he can help people who are interested in DIY repair.