

LED light strips bring color and warmth to any room, but what happens when you redecorate or move to a new place? You don’t have to leave them behind or toss them in the trash. Learning how to move LED lights the right way means you can keep those strips working like new, no matter where life takes you. The trick is patience and a gentle touch, because the adhesive backing can tear if you rush. Whether you’re shifting strips from one wall to another or packing them for a big move, this guide walks you through every step.

We’ll cover removing the strips safely, cleaning the surfaces, storing them properly, and sticking them back up so they hold tight. By the end, you’ll feel confident handling your lights like a pro, even if this is your first time. No fancy tools, no stress, just clear steps that anyone can follow. Let’s get your lights ready for their new home.
Why Moving LED Lights Matters
Relocating your light strips saves money and reduces waste. A quality LED strip can cost a fair bit, so peeling it off carefully instead of buying new ones keeps cash in your pocket. There’s also the environmental win, since fewer discarded strips mean less plastic and electronic waste piling up in landfills.
Beyond savings, doing it correctly protects the lights themselves. Yanking strips off a wall can snap the delicate circuits inside, leaving you with dead sections that never light up again. When you take your time and follow the proper method, your strips stay bright and reliable. You also avoid damaging your walls, paint, or furniture in the process, which keeps both your old and new spaces looking clean.
Step-by-Step Guide to How to Move Led Lights
Step 1: Turn Off and Unplug the Power
Safety comes first, so always cut the power before you touch anything. Unplug the strip from the wall outlet or switch off the power supply at its source. This protects you from any small shocks and stops the adhesive from heating up, which can make removal messier. Give the strip a minute or two to cool down completely if it has been running for a while. Working with cool, powered-off lights makes the whole job easier and far safer. Once everything is dark and disconnected, you can move forward knowing there’s no electricity flowing through the strip in your hands.

Step 2: Warm the Adhesive Gently
The sticky backing on LED strips holds tight, especially after months on a wall. A hairdryer set to low or medium heat is your best friend here. Hold it a few inches away and move it slowly along the strip for about thirty seconds per section. The warmth softens the glue, making it release without a fight. Don’t overheat any spot, as too much heat can damage the diodes or melt the plastic coating. You’re aiming for warm, not hot. This simple trick is the secret to peeling strips off cleanly, and it prevents the tearing that ruins so many lights during removal.
Step 3: Peel Slowly From One End
Start at one corner and lift the edge gently with your fingernail or a plastic card. Pull at a low angle, keeping the strip close to the wall rather than yanking it straight out. Move slowly and steadily, peeling just an inch at a time. If you feel resistance, pause and reheat that section with your hairdryer. Rushing is the number one mistake people make when they figure out how to move LED lights, and it almost always leads to bent or broken strips. Stay calm, take your time, and let the warmth do most of the work for you.

Step 4: Clean the Strip and Surfaces
Once the strip is free, you’ll likely find old adhesive residue clinging to both the strip and the wall. Wipe the back of the strip with a soft cloth dampened with a little rubbing alcohol. This lifts away grime and leftover glue without harming the electronics. For the wall, use a gentle cleaner and let it dry fully before doing anything else. Clean surfaces matter a lot, because dust and oil stop new adhesive from sticking properly. Take a few extra minutes here, and your strips will bond much better when you reinstall them in their new location.
Step 5: Coil and Store Carefully
If you’re not reinstalling right away, proper storage keeps your strips safe. Coil the strip loosely into a wide circle, never folding it sharply, since hard creases can crack the internal wiring. Wrap the coil in its original packaging if you still have it, or use a soft cloth and a sealable bag. Keep the connectors and power adapter together in the same spot so nothing goes missing. Store the bundle somewhere cool and dry, away from direct sunlight. Treating your strips with this kind of care means they’ll be ready to shine the moment you want to put them up again.

Step 6: Apply Fresh Adhesive
Old adhesive rarely sticks well after removal, so plan to add new mounting tape. Double-sided foam tape made for LED strips works wonderfully and is cheap to buy. Cut it to match the length of your strip, then press it firmly onto the clean back of the strip. For corners and tricky spots, small mounting clips give extra hold. Many people who learn how to move LED lights skip this step and wonder why their strips droop within days. Fresh tape makes all the difference, creating a strong bond that keeps your lights firmly in place for the long haul.
Step 7: Reinstall and Test
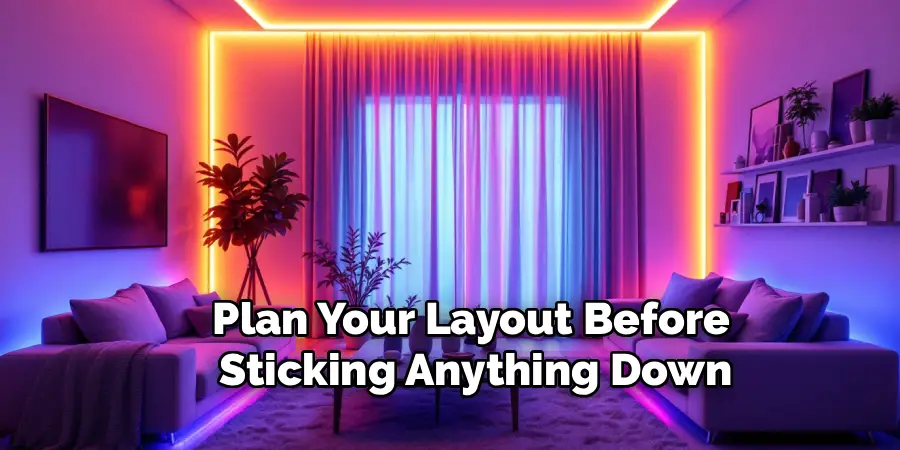
Now comes the fun part. Plan your layout before sticking anything down, measuring the space and marking where the strip will go. Peel the backing off your fresh tape a little at a time, pressing the strip firmly against the surface as you move along. Smooth out any bumps with your fingers for an even line. Once it’s all in place, reconnect the power and switch it on. Check that every section lights up properly and the colors look right. If a part stays dark, gently press the connectors to make sure they’re seated. Enjoy your relocated lights glowing exactly where you want them.
Frequently Asked Questions
Can You Reuse LED Light Strips After Removing Them?
Yes, you can absolutely reuse them. The strips themselves stay fully functional as long as you peel them off gently and avoid bending or tearing the circuits. The only part that usually needs replacing is the adhesive backing, which loses its stickiness once removed. Pick up some double-sided mounting tape made for LED strips, apply it to the clean back of your strip, and you’re ready to install them again in a brand new spot.
Will Removing LED Strips Damage My Walls?
When done correctly, removal causes little to no damage. The key is warming the adhesive with a hairdryer first, then peeling slowly at a low angle. This softens the glue so it lets go without pulling paint or leaving marks. If some residue stays behind, a soft cloth with rubbing alcohol wipes it away easily. Rushing the process is what usually chips paint, so patience truly protects your walls.
What Tools Do I Need to Move LED Lights Safely?
You need very little to get started. A hairdryer warms the adhesive, while a plastic card or your fingernail helps lift the strip’s edge. Keep a soft cloth and some rubbing alcohol handy for cleaning, plus fresh double-sided mounting tape for reinstalling. Optional mounting clips help with corners and curves. That’s the whole kit. Most of these items are already in your home, making this a budget-friendly project for anyone.
How Do I Store LED Strips Without Damaging Them?
Coil the strip loosely into a wide circle, never folding it sharply, as tight creases can crack the internal wiring. Wrap the coil in a soft cloth or its original packaging, then place it in a sealable bag. Keep the connectors and power adapter together so nothing gets lost. Store everything in a cool, dry place away from sunlight and heat, and your strips will stay in great shape until you need them.
Why Won’t My LED Strips Stick After Reinstalling?
The most common reason is leftover dust, grease, or old adhesive on the strip or surface. New tape can’t bond properly to a dirty area. Clean both the strip back and the wall thoroughly with rubbing alcohol, then let them dry completely. Cold surfaces also weaken adhesion, so work in a warm room. Pressing the strip firmly for a few seconds after applying fresh tape helps create a strong, lasting hold.
Conclusion
Moving your light strips doesn’t have to be stressful or wasteful. With a little patience and the right approach, you can peel, clean, store, and reinstall your strips so they look and work like new. The whole process comes down to going slowly, warming the adhesive, keeping everything clean, and using fresh mounting tape when you put your lights back up. Now that you know how to move LED lights properly, you can redecorate or relocate with total confidence, knowing your favorite glow will follow you anywhere. So grab your hairdryer, take your time, and give it a try. Your lights are ready for their next adventure, and you have everything you need to make the move a success.

Rick is a handyman who grew up helping his dad with his business. He learned a lot from him about how to fix things, and also about how to work hard and take care of business. These days, Rick is still into fixing things- only now, he’s doing it for a living.
Rick is always looking for new ways to help people grow and develop. That’s why he started contributing to this blog: to share all his experience and knowledge so that he can help people who are interested in DIY repair.