

A new garage door can significantly enhance your home’s security, energy efficiency, and curb appeal. While installing one may seem like a job reserved only for professionals, it is a project that a skilled and prepared DIY enthusiast can accomplish. Wayne Dalton doors, in particular, are known for their quality and innovative features, but proper installation is key to ensuring they function safely and effectively. This guide is designed to provide a clear overview of the process, but it is not a replacement for the manufacturer’s official manual. This article will explain how to install a Wayne Dalton garage door, giving you the confidence and knowledge to tackle this rewarding home improvement project.

Installing a garage door can seem like a daunting task, but with the right tools and a step-by-step approach, it’s a manageable project for many homeowners. Before starting, it’s important to familiarize yourself with the components of the door and ensure you have all necessary parts and tools ready. Taking the time to prepare thoroughly will not only make the process smoother but also ensure a safe and proper installation. With a Wayne Dalton garage door, you’ll benefit from premium materials and design, making your efforts worthwhile in enhancing both the functionality and appearance of your home.
Why Choose a Wayne Dalton Garage Door?
These doors are crafted with precision and high-quality materials, ensuring durability and longevity. Beyond their robust construction, Wayne Dalton doors are designed to enhance the aesthetic appeal of your home, offering a variety of styles, colors, and finishes to complement any architectural design. Additionally, their innovative features, such as superior insulation and advanced safety mechanisms, make them a practical and reliable choice. Investing in a Wayne Dalton garage door means prioritizing both functionality and style for your home.
8 Step-by-Step Guide on How to Install a Wayne Dalton Garage Door
Step 1: Read the Manual
Before you unbox a single component, your first and most crucial step is to read the official Wayne Dalton installation manual from cover to cover. This document contains model-specific instructions, safety warnings, and parts lists that are essential for a successful installation. Once you understand the process, prepare the garage door opening. Ensure the wood jambs are plumb and level, and check that the header is structurally sound. The dimensions of the opening must match the specifications for the door you purchased. Proper preparation of the frame is foundational to a smooth and secure installation.
Step 2: Attach Weather Stripping
With the opening prepared, you can begin work on the first door panel. This is the bottom section that will sit on the garage floor. Following your manual, carefully attach the vinyl weather stripping along the bottom edge of this panel. This seal is critical for keeping out water, drafts, and pests. Next, locate the bottom brackets and secure them to the left and right sides of the panel using the provided fasteners. These brackets are what will hold the lift cables and connect the door to the vertical tracks, so ensure they are tightened securely.

Step 3: Set the First Panel
Place the prepared bottom panel into the center of the garage door opening. It should be level and centered, with the weather stripping resting firmly on the floor. To hold it in place temporarily, you can drive a nail partway into the jamb on each side, just above the top of the panel, to prevent it from tipping over. This first section serves as the foundation for the rest of the door, so taking the time to position it perfectly now will prevent alignment issues later in the process.
Step 4: Install the Vertical Tracks
Now you will begin building the framework that guides the door. Attach the vertical track sections to the wall jambs on both sides of the door. Do not tighten the lag screws completely just yet; you need to leave them slightly loose for future adjustments. As you install each new door panel, you will need to slide the rollers into the hinges and then into these vertical tracks. Carefully place the rollers into the tracks as you stack each subsequent panel, ensuring they move freely. This process connects the door panels to the track system.
Step 5: Stack the Remaining Door Panels
With the bottom panel in place and the vertical tracks loosely attached, you can now stack the remaining door sections. Place the second panel on top of the first, ensuring they align properly. Attach the hinges that connect the two panels according to your manual’s instructions. Insert the rollers into the side hinges and guide them into the vertical tracks. Repeat this process for each subsequent panel, stacking and hinging them one by one until the entire door is assembled in the opening. The door will be heavy, so having an assistant is highly recommended for this stage.
Step 6: Install the Horizontal Tracks
The horizontal tracks guide the door into its open position along the ceiling. Attach the horizontal track sections to the top of the vertical tracks and lift the other end up toward the back of the garage. You will need to install a rear support system, typically made of angle iron, hanging from the ceiling joists. Secure the back of the horizontal tracks to this support system. It is absolutely critical that the horizontal tracks are level with each other and have a slight slope down toward the back of the garage for smooth operation.
Step 7: Critical Spring System Installation
This is the most dangerous part of the installation and requires extreme caution. Wayne Dalton offers different spring systems, such as the TorqueMaster system. You must follow the manual’s instructions for your specific system with no deviation. This typically involves sliding a torsion tube through the springs and mounting the entire assembly to the header above the door. You will then attach the lift cables to the bottom brackets and wind them onto the cable drums. The process of tensioning the springs creates enormous force and must be done exactly as described in the manual.

Step 8: Final Adjustments and Hardware Installation
With the spring system installed, you can now make final adjustments. Go back and tighten all the lag screws holding the vertical and horizontal tracks, ensuring the tracks are plumb and properly spaced from the door. Install any reinforcing struts if required by your model. Attach any exterior handles or decorative hardware. Test the door’s balance by lifting it manually. It should open smoothly with minimal effort and stay in place when you let go at any point. If it falls or shoots up, the spring tension needs to be adjusted by a professional.
Frequently Asked Questions
Is It Safe to Install a Garage Door Myself?
Installing a garage door can be dangerous, primarily due to the high tension in the spring system. While a skilled DIYer can do it by carefully following the manufacturer’s manual, safety must be the top priority. If you are not comfortable working with high-tension springs or lifting heavy objects, it is always safest to hire a professional installer.
What Is a Wayne Dalton TorqueMaster Spring System?
The TorqueMaster is a unique Wayne Dalton spring system where the torsion springs are housed inside the torsion tube itself. It’s designed to be a safer and cleaner-looking alternative to traditional exposed torsion springs. Tensioning is done with a standard power drill and a socket, which can be safer than using winding bars, but the instructions in the manual must still be followed precisely.

How Much Headroom Do I Need for a Wayne Dalton Garage Door?
The required headroom (the space between the top of the door opening and the ceiling) varies by door model and spring system. A standard torsion spring system typically requires about 12 inches of headroom. However, systems like Wayne Dalton’s TorqueMaster or low headroom track kits can often be installed with as little as 4-5 inches of headroom. Always check the specific requirements for your door model.
How Do I Know if My Garage Door Is Properly Balanced?
To test the balance, first, disengage the garage door opener. Manually lift the door until it is about halfway open and let go. A properly balanced door should stay in that position without assistance. If it slams shut or flies open, the spring tension is incorrect and needs to be adjusted. An improperly balanced door puts significant strain on the garage door opener and can be a safety hazard.
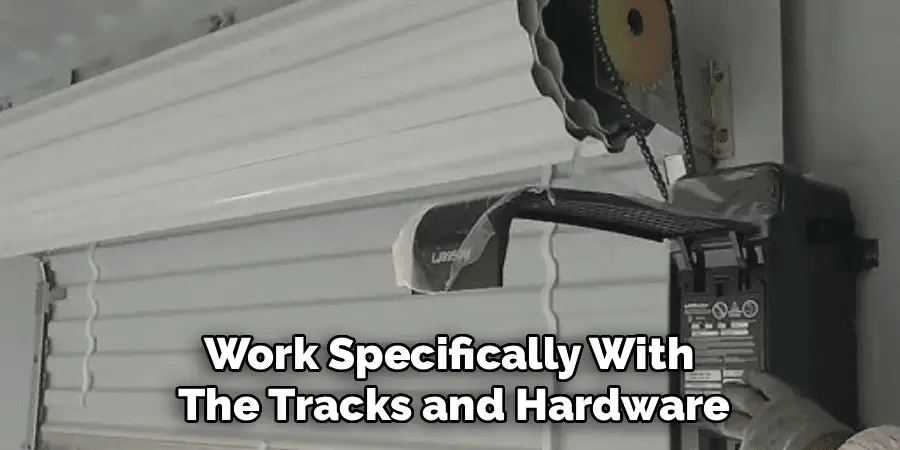
Can I Reuse My Old Garage Door Tracks?
No, you should never reuse old tracks when installing a new garage door. The new door is engineered to work specifically with the tracks and hardware it comes with. Using old tracks can lead to improper fit, poor operation, and potentially dangerous situations. The tracks are designed to match the weight, thickness, and roller placement of the new panels.
Conclusion
Installing a new garage door is a substantial project that offers significant rewards in both function and aesthetics. The key to success is a combination of careful preparation, meticulous attention to detail, and an unwavering commitment to safety. By thoroughly reading the manufacturer’s instructions and working methodically through each step, you can successfully complete the installation. From preparing the opening to the final balance test, every stage is crucial. Now that you have a better understanding of how to install a Wayne Dalton garage door, you are better prepared to decide if this is a DIY project for you or if it’s time to call in a professional.
About
Angela is the chief editor of Indoorense. She began her career as an interior designer before applying her strategic and creative passion to lifestyle and home.
She has close to 15 years of experience in creative writing and online content strategy for housekeeping and cleaning,home decorations as well as other efforts.
She loves her job and has the privilege of working with an extraordinary team. She lives with her husband, two sons, and daughter in Petersburg. When she’s not busy working she spent time with her family.