

Garage doors are important for the security of your home or business premises. To ensure that no unauthorized individual can enter your property, ensure the bottom seal is in good condition and functioning properly. This will help keep out water, dirt, dust, insects, and other pests trying to gain access through any gaps in the seal.
When it comes to garage door bottom seals, there are many advantages. It helps prevent dust, dirt, and water from entering your garage. This also makes the area much quieter and more secure, preventing outside noise or threats from entering your home. A properly sealed bottom will also help reduce drafts and air leakage in the winter months. In this blog post, You will learn in detail how to fix garage door bottom seal.
Materials You Will Need
- Hammer
- Screwdriver and screws
- Tape measure
- Level
- Caulking gun
- Caulk
- Extension ladder
- Broom or brush
- Utility knife
- Replacement garage door bottom seal kit (if applicable)
- Gloves (optional but recommended)
Step-by-Step Processes for How to Fix Garage Door Bottom Seal
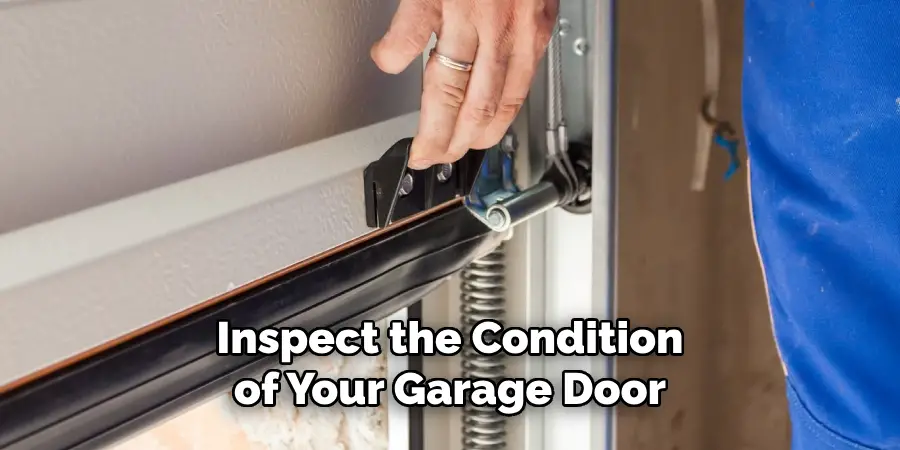
Step 1: Inspect
Inspect the bottom seal of your garage door and see if it is damaged or worn out. If so, then you need to replace it before proceeding. Measure the size of your garage door opening and purchase a replacement bottom seal that matches those dimensions. It is important to get the right size for a proper fit.
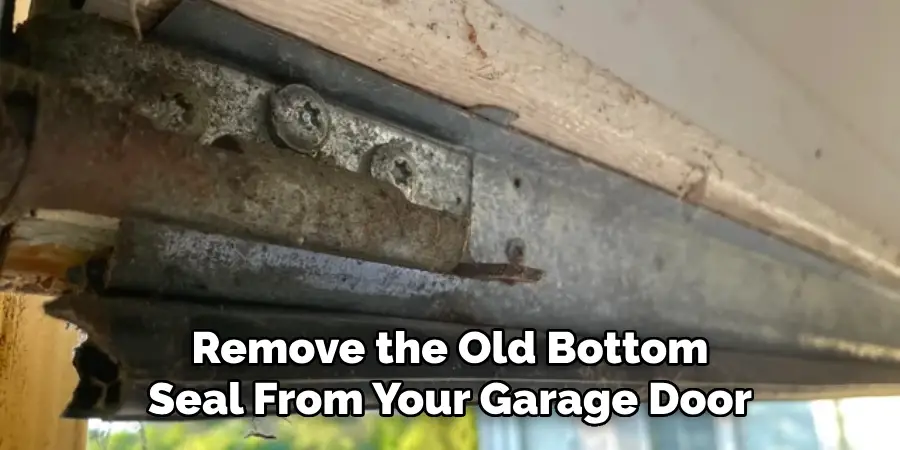
Step 2: Remove
Remove the old bottom seal from your garage door by unscrewing or cutting it away. Make sure to remove all of the pieces to avoid any future problems with your new seal. Clean up any debris or dirt that may have been left behind when you removed your old bottom seal. This will make it easier for the new seal to be installed and work properly.
Step 3: Prepare
Prepare the area where you will install your new bottom seal by wiping down any grease or oil that may have been left behind from your old one. Apply an adhesive along the edge of your garage door to help secure the new seal. Most adhesives work best if applied when the temperature is above 70 degrees Fahrenheit.
Step 4: Install
Install the new bottom seal by pressing it firmly into the groove that lines up with your garage door opening. Make sure to press down firmly so that it is secure. Secure the new bottom seal using tape or nails to keep it in place while the adhesive dries. This will help ensure that the seal stays put and does not move around.
Step 5: Finishing Touches
Once your new bottom seal has been installed, add a few finishing touches to ensure it looks great and is secure. This could include caulking or painting the seal to match your garage door. Test the new bottom seal by opening and closing your garage door a few times to ensure it works correctly. If all goes well, you should be good to go.
Following these steps, you should have no problem fixing your garage door bottom seal. With some patience and some elbow grease, you can get it looking like new in no time.
Tips for How to Fix Garage Door Bottom Seal
- Before attempting to fix the garage door bottom seal, ensure all power sources are disconnected and disabled. This will help prevent electric shock or other accidents.
- Always wear safety goggles when working on any type of door seal to protect your eyes from flying debris and dust particles.
- Wear work gloves to protect your hands from sharp edges and tools.
- Work in a well-ventilated area to avoid inhaling chemical fumes when using sealants or adhesives.
- Make sure you have the right size and type of materials for your garage door bottom seal before beginning the repair process.
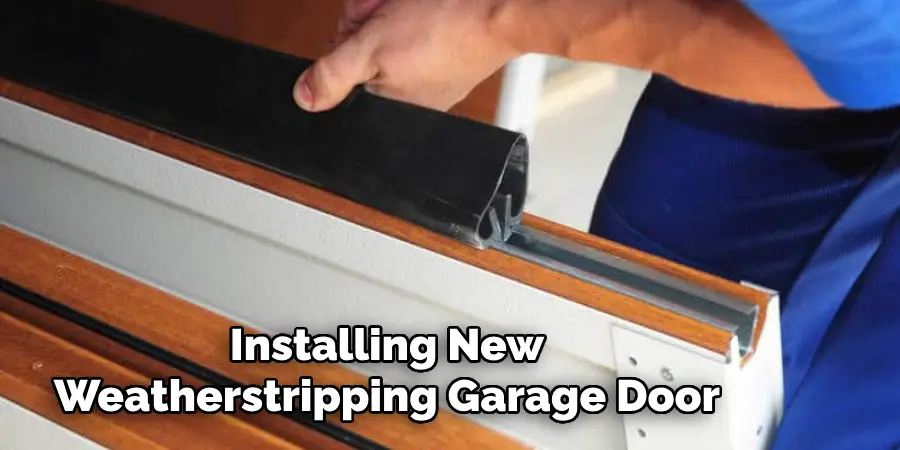
- When installing new weatherstripping, make sure to measure twice and cut once. This will ensure that the seal is properly fitted and sealed.
- After the repair process, test the seal by closing and opening the door a few times to ensure it is secure.
With these safety tips in mind, you can rest assured that your garage door bottom seal repair project will be successful and safe.
How Can You Ensure a Tight Seal After Repairing Your Garage Door Bottom Seal?
After the repair, it is important to ensure that a tight seal is maintained between your garage floor and the weatherstripping of your garage door. To do this, you should replace any loose screws or bolts with new ones and secure them tightly. Additionally, you can use caulk around any gaps that might have been created during the repair process. Once everything is in place, check the seal for any signs of air leaks and adjust as needed.
Finally, you can use a sealant over the weatherstripping to ensure it remains secure and protects your garage from the elements. With these steps, you can rest assured that your garage door bottom seal is fixed and will keep working properly for years.
It is also important to regularly check your garage door bottom seal for signs of wear and tear. If the weatherstripping starts to show any cracks or peeling, it is best to replace it as soon as possible with new seals that are made explicitly for your type of garage door.
How Often Should You Check Your Garage Door Bottom Seal for Damages or Signs of Wear and Tear?
Your garage door bottom seal should be checked at least once a year. You should look for any signs of wear and tear, such as cracks or fraying, that could indicate damage to the seal. If you notice any damage, take corrective measures immediately to ensure your garage door operates safely and efficiently.
It’s also important to check your garage door bottom seal after any weather-related events, such as heavy rain or snow storms, that could have caused the seal to become worn or damaged.
If you’re uncertain about inspecting your garage door bottom seal, it’s best to call a professional for assistance. They can inspect the condition of your garage door and advise you on any necessary repairs or replacements. Once you have inspected your garage door bottom seal, taking prompt measures to repair any damages or signs of wear and tear is important.
If left unattended, these issues can lead to further damage. To fix your garage door bottom seal, you’ll need a few tools and supplies, including a screwdriver, duct tape or gasket material, and weatherstrip adhesive.
How Can You Prevent Future Damage When It Comes to Your Garage Door Bottom Seal?
Once you have fixed your garage door bottom seal, you must take steps to prevent further damage. Here are a few tips for protecting the seal from additional wear and tear:
- Inspect the seal routinely to ensure no new cracks or rips have appeared. If any damage is noticed, address it as soon as possible before it worsens.
- Apply a protective coating to the seal to help protect it against the elements. This is especially important if you live in an area with severe weather.
- Make sure that all of the moving parts of your garage door are well-lubricated and that they are working properly. Any friction could damage or wear down the seal over time.
- Keep an eye out for any pests or animals trying to access your garage door through the bottom seal, which could cause damage.
- If you know that a storm is coming, take the time to prepare your garage door and bottom seal by reinforcing it with extra weather stripping and caulking. This will help protect against strong winds and rain.
By following these tips, you can help ensure that your garage door bottom seal remains in good condition for years. Taking the time to inspect and maintain your garage door will help protect against wear and tear, saving you money in the long run.
What Type of Maintenance Should You Do Regularly to Extend the Life of Your Garage Door Bottom Seal?
- Keeping your garage door bottom seal in tip-top shape requires maintenance and care. Regular checks ensure it is always functioning optimally and won’t need replacing too soon. Here are some of the things you should do regularly:
- Check for holes or any kind of damage to the seal. If you find any, it’s best to replace the seal immediately.
- Wipe down the garage door’s surface with a damp rag and mild soap to remove any dirt or debris that might be stuck on it. This will help keep your seal in good condition for longer.
- Ensure there is no water seeping through the seal, which can be caused by rain or melting snow.
- Grease the rollers and tracks of the garage door to keep them operating smoothly.
- Check the weatherstripping and lubricate it if necessary. This will help prevent air drafts from coming through the seal and into your home, saving energy costs.
- Inspect the seal regularly for wear and tear and any other signs of damage. If you see that it needs to be replaced, do so right away.
- Ensure that all screws in the garage door system are tightened and secure. Loose screws can cause damage and make your garage door bottom seal less effective.
- Regularly inspect the bottom of the door for any signs of damage or wear. If necessary, replace the bottom seal with a new one specifically designed for your garage door.
By doing these regular maintenance tasks, you can extend the life of your garage door bottom seal and ensure it is always functioning properly.
Conclusion
In conclusion, fixing a garage door bottom seal is not as difficult. Following the steps outlined above, you can get your garage door back in working order and keep out any pesky drafts or pests. Always consult a professional if you feel uncomfortable attempting a repair yourself.
With some basic DIY knowledge and an understanding of fixing garage door bottom seals, you can confidently take on this project. This article has been beneficial for learning how to fix garage door bottom seal. Make Sure the preventive measures are followed chronologically.
Rick is a handyman who grew up helping his dad with his business. He learned a lot from him about how to fix things, and also about how to work hard and take care of business. These days, Rick is still into fixing things- only now, he’s doing it for a living.
Rick is always looking for new ways to help people grow and develop. That’s why he started contributing to this blog: to share all his experience and knowledge so that he can help people who are interested in DIY repair.