

Game nights can fizzle or shine, depending, of course, on the atmosphere. There’s nothing wrong with playing cards at the kitchen table—but let’s be honest, a dedicated table with some flair makes the whole experience feel different. Something about the felt under your knuckles and soft glow around the edge nudges your friends to lean in, as if high stakes were suddenly on the line.
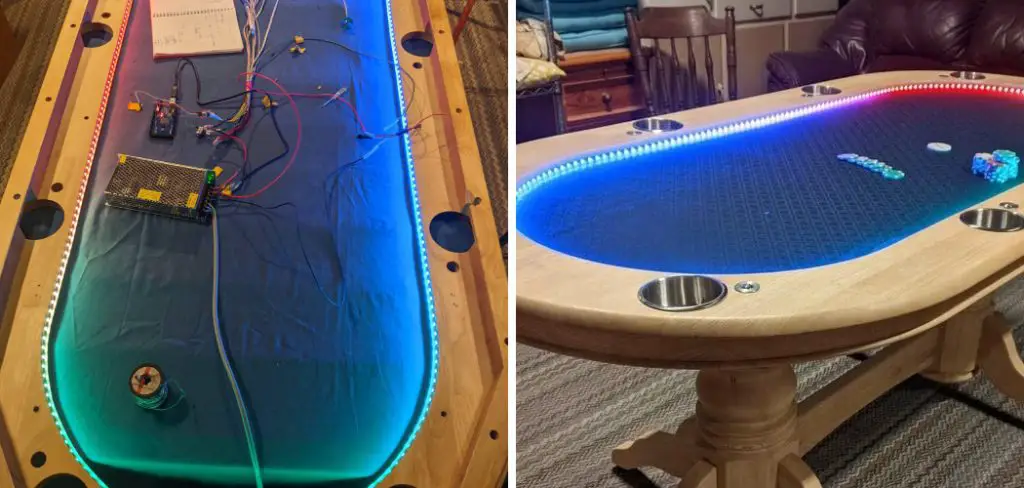
Adding lights isn’t just a decorative touch. Illumination matters for practical reasons too; nobody wants to squint at their pocket aces. As for the building itself, you don’t have to be a master carpenter—basic woodworking helps, true, but patience probably matters more. In the end, you wind up with something that’s equal parts furniture and showpiece. People will notice. In this guide on how to build a poker table with lights, we’ll cover the materials, tools, and steps you need to create your very own customized poker table with lights.
Tools and Materials You’ll Need
First things first: don’t guess at supplies. Get your gear in order before you pick up a saw or staple gun. Here’s what actually comes into play:
- Two 4×8 sheets of 3/4-inch plywood (avoid warped lumber if you can)
- Poker table felt or a decent speed cloth (colors are up to you)
- Quarter-inch high-density foam for the playing surface
- 1-inch thick, high-density foam for the armrail (it really makes a difference in comfort)
- Vinyl or leather upholstery for the rail (black hides wear best)
- LED strip kit—look for one with a dimmer, and make sure the remote works from across the room
- Wood glue, a can of spray adhesive, and a full sleeve of staples
- Jigsaw, power drill, staple gun (manual or electric), and the usual measuring tape
- Short screws (buy them a bit shorter than you think you need)
7 Step Guide on How to Build a Poker Table With Lights
Step 1: Cutting Out the Base and Playing Surface
Drag out those plywood sheets and set them up on sawhorses or a solid workbench—something that doesn’t wobble. Shape is key. For an oval, anchor a string at the center, attach a pencil, and draw out the curve, nudging and checking until it looks, well, correct enough to satisfy your eye. Chalk lines don’t lie, but if you mess up, start over—nobody wants a lopsided table.
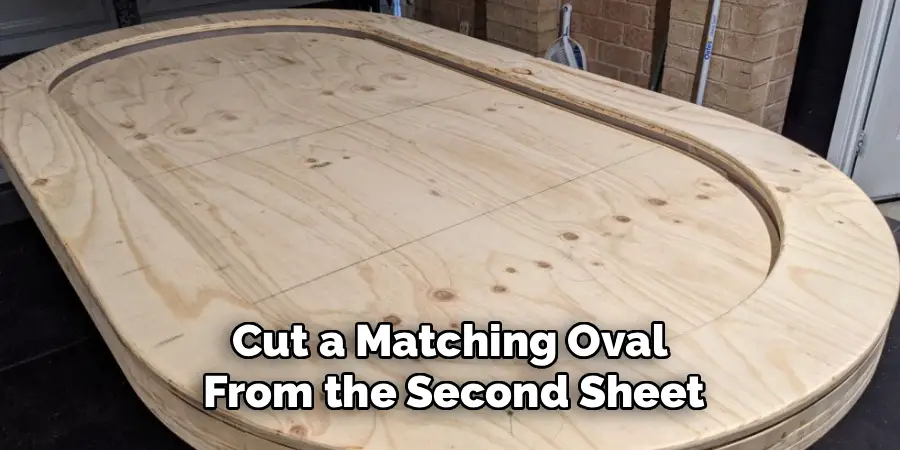
Take a jigsaw and run it just outside your markings. Save any big leftover pieces; they’ll come in handy. Cut a matching oval from the second sheet, then take its center section out to make a ring—this becomes your armrest. The actual center gets recycled into the raised playing field itself.
Step 2: Foam and Felt for the Playing Area
Lay the center playing board out flat. Generously spray adhesive up top, then smooth on your quarter-inch foam. Some people like to roll a bottle over it, pressing lightly for an even bond. Don’t rush trimming the extra foam; let it dry or it’ll tear, and you’ll need to fix your work.
Unroll your chosen felt or speed cloth, snapping it out to keep wrinkles at bay. Work one edge at a time, pulling taut and stapling from beneath, spacing staples about an inch apart at first, then doubling back for a tighter fit. If it looks wavy, pause and gently stretch as you go. There’s an art to getting it smooth; you’ll probably feel it in your thumbs.
Step 3: Armrail Padding
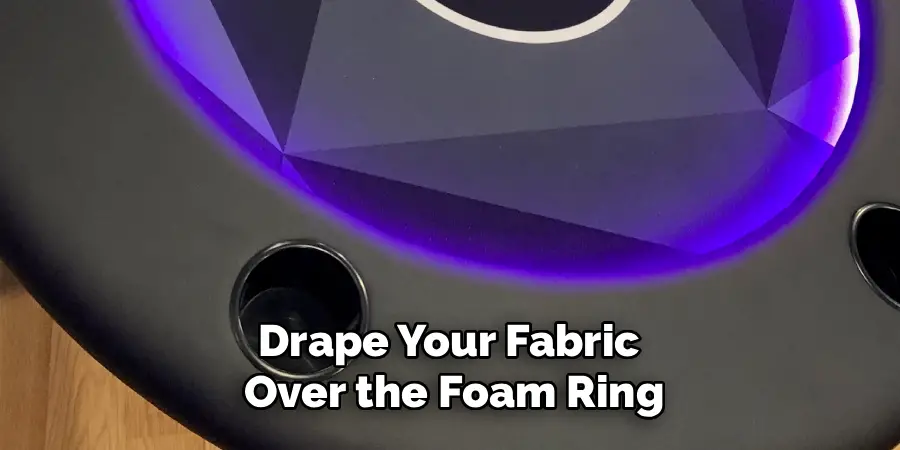
Turn to the wooden ring you made before—the armrest. Spray, press, wait. The thick rail foam can be stubborn, sometimes refusing to sit flat until coaxed. Walk away and let it cure. Now comes upholstery: drape your fabric over the foam ring, working inside-out for the first round of staples. Pull, hug it around the bend, staple the outside, and try not to curse if you have to undo a section. Lumps and folds in the vinyl stand out, so go slow. With leather, keep an eye out for stretch marks.
Step 4: Assembling the Base and Adding the Riser
Back to the base now. Fix a riser block—something sturdy, centered in the middle—onto the bottom board. A lump of wood glue and a few short screws do the job. Triple-check your centering; a shifted riser means an off-kilter playing field. This lift is what lets the LED strip’s glow skim under the edge, so fudge it and the effect’s lost. Besides, a wobbly table is the surest way to annoy every guest.
Step 5: Setting Up the LED Strips
Planning is your friend here. Test your lights before you drill holes or commit to any layout. Run the LED strip just inside the edge of the bottom oval, keeping it snug beneath where the padded rail sits. Most strips use peel-and-stick backing these days, but if yours keeps falling off (and some will), you’re better off with a few zip ties or discreet cable clips.
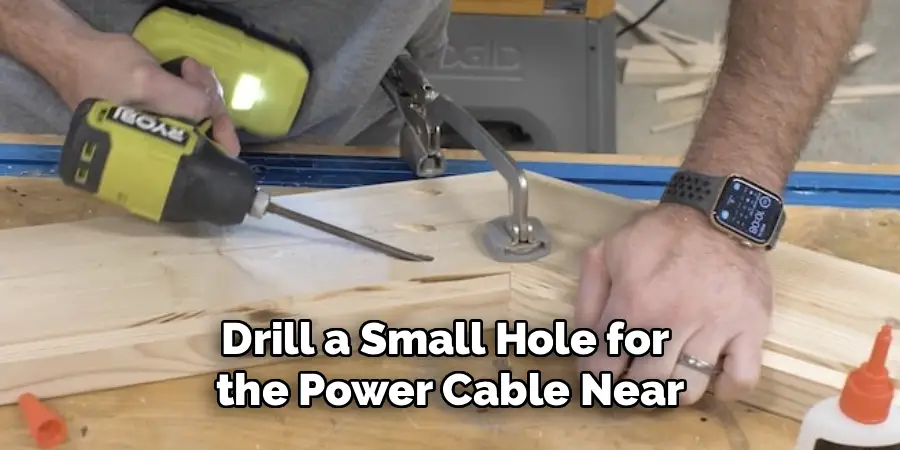
Drill a small hole for the power cable near where a wall outlet will be; ugly extension cords trailing across the room are nobody’s idea of a good night in. Check twice—that all connections work before encasing them forever under arm rests and layers of vinyl.
Step 6: Attaching the Playing Surface
Only once the light test passes should you move to assembly. The felted playing surface drops onto your riser, but don’t rush past centering. The gap between the board edge and the armrail is where your lighting makes its mark; uneven spacing kills the effect. Use a few short screws to secure the board from underneath (if you’re wondering, yes, the length matters—puncture the felt, and the whole top is ruined). This step is one time to measure three times.
Step 7: Fixing the Armrail in Place
Final lap. Lightly lower the upholstered armrest around the playing field. It should nestle in naturally, just barely overlapping the glowing gap. If it’s a squeeze, don’t force it; go back and shave the rail down a hair. Secure it up from below, spacing screws every few inches. No need for overkill, but don’t skimp or you’ll hear the rail creak every time someone leans in for the pot. Once you’re satisfied it’s sturdy, stand back and switch the lights on. There’s a real sense—the sort you can’t buy—when it all clicks together.
Following these steps on how to build a poker table with lights, you’ll have not only a functional table but also a stylish addition to your game room. But don’t stop there; get creative and personalize your table with custom felt, chip racks, and cup holders. You can even add LED lights in different colors or patterns to enhance the atmosphere of your poker nights.
Common Trip-Ups and Annoyances
People—myself included—often fudge measurements when eager to get cutting. Even a little slack turns your armrests asymmetric. Rushed upholstery leads to wrinkled felt, puckered vinyl, or (worse) creased playing areas where cards refuse to slide.
Neglecting to test your LEDs before assembly is a silent killer; nobody’s happy taking a finished table apart to chase a bad wire. Screws that are too long? You’ll wish you’d double-checked their length when you feel a rough bump poking through the felt you just labored over.
Should You Bother with a Pro?
You might wonder if you’re biting off more than you can chew. Most folks with a steady hand and a few tools can muddle through, and there’s no shortage of YouTube guides these days. If your garage is full of every tool known to man, you’re probably set.
Without them, you’ll lose a weekend and a fair bit of patience. Pros, obviously, have skills and equipment, stretching felt tight as a drum and wiring lights in their sleep, but it’s not always money well spent—unless you want that showroom finish, or just don’t have time for tedium.
What’s the Price Tag? DIY vs Professional
Truthfully, the cost of building a custom table yourself lands somewhere between $200 and $400—assuming you dodge mistakes and source materials with care. Most of the price comes down to your choice of foam, felt, and lighting; skimp here, and you’ll regret it later. DIY mainly soaks up your evenings and a Saturday or two.
Hiring a pro? The cost jumps—easily $1,000 and up, sometimes triple that. But factor in time, stress, and material wastage, and some may find the check worth it for the perfection and lack of headaches.
Frequently Asked Questions
Q1: Best Fabric for the Playing Surface?
Short answer: Speed cloth, if you can get it. The stuff is water-resistant and slick, letting cards glide with almost no friction. Craft felt is cheaper, but it pills up after a few rowdy nights and drinks don’t bounce off. Casinos opt for high-weave, commercial fabrics built for abuse and endless shuffling.
Q2: Powering the LED Lights?
Most off-the-shelf LED kits draw juice from a wall socket. Once you’ve drilled a path, you can run a cable discreetly down a table leg. If you’re allergic to visible cords or plan on moving the table around, you could always try battery-powered strips, though honestly, they don’t last nearly as long or shine as bright.
Q3: Possible to Add Cup Holders?
Absolutely. If you’re adding them, mark spots evenly on your armrail ring before the foam and vinyl go on. Use a hole saw and drill for nice, clean cutouts. After upholstery, just drop in your cup holder inserts—metal or plastic, both work—and a dab of adhesive at the base keeps them from popping out mid-hand.
Conclusion
There’s almost nothing like the feeling of finishing—and then actually using—something you constructed. If you follow each step on how to build a poker table with lights, resist hurrying through the upholstery, and check your measurements twice, there’s little that can go wrong that you can’t fix. The finished table becomes an anchor for evenings you’ll remember—win or lose.
Invite the crew, shuffle up, and hit the lights. If this project gives you the itch, you might be tempted to keep going: custom chips, personalized cards, maybe even new chairs to complete the setup. One build often sparks another.
Rick is a handyman who grew up helping his dad with his business. He learned a lot from him about how to fix things, and also about how to work hard and take care of business. These days, Rick is still into fixing things- only now, he’s doing it for a living.
Rick is always looking for new ways to help people grow and develop. That’s why he started contributing to this blog: to share all his experience and knowledge so that he can help people who are interested in DIY repair.