

Your garage door is the largest moving part of your home, and it’s often the biggest source of energy loss and a major entry point for dust, pests, and drafts. An unsealed door can make your garage uncomfortably hot in the summer and frigid in the winter, driving up your energy bills. Sealing those gaps not only creates a more comfortable space but also protects your stored belongings from the elements. This is a highly effective DIY project that any homeowner can tackle in an afternoon. This guide will provide clear, beginner-friendly instructions on how to make garage door airtight, improving your home’s energy efficiency and comfort.

An airtight garage door is an essential step toward enhancing your home’s overall efficiency and durability. By addressing common issues such as gaps and leaks around the door, you can prevent energy loss, maintain a stable temperature, and safeguard against dust, pests, and moisture. With a few basic tools and materials, you can seal your garage door effectively and enjoy long-lasting benefits.
Why Seal Your Garage Door?
Sealing your garage door is crucial for several reasons. First, it helps to reduce energy loss by preventing drafts and minimizing temperature fluctuations, which can lower heating and cooling costs. Second, it protects your garage and home from external pollutants, including dust, dirt, and harmful allergens, creating a cleaner and healthier environment. Third, a sealed garage door acts as a barrier against pests like insects and rodents, which often find their way into small gaps. Lastly, it prevents moisture intrusion, which can cause mold, mildew, and structural damage over time. Addressing these issues not only improves the comfort of your home but also extends the life and efficiency of your garage space.
7 Step-by-Step Guide on How to Make Garage Door Airtight
Step 1: Perform a Visual Inspection for Gaps
The first step is to identify where air is getting in. Close your garage door during the daytime and turn off all the lights inside the garage. Look carefully around the entire perimeter of the door—the top, the bottom, and both sides. Anywhere you see daylight filtering through is a gap where air, water, and pests can enter. Pay close attention to the corners and the area where the door meets the concrete floor. You can also use a flashlight at night from the outside while someone inside looks for light. This simple inspection will create a clear roadmap for your project.
Step 2: Replace the Bottom Seal
The rubber gasket on the bottom of your garage door, known as the bottom seal or astragal, takes the most abuse and is often the main culprit for drafts. Old seals can become brittle, cracked, or compressed. To replace it, open the garage door and slide the old seal out of the tracks on the bottom edge. You may need pliers to crimp the track ends to get it started. Clean the tracks thoroughly, then lubricate them with a little dish soap. Slide the new rubber seal into the tracks, cutting it to length, and then crimp the ends to hold it in place.
Step 3: Install or Replace the Garage Door
A threshold seal is a rubber strip that adheres directly to the garage floor, creating a raised barrier that the bottom seal of the door closes against. This is an excellent solution for uneven concrete floors and provides a superior seal against wind-driven rain and pests. To install one, first clean the concrete floor area thoroughly where the seal will sit. Lay the threshold in place, close the door on it to get the perfect position, and mark its location. Apply a strong construction adhesive, press the threshold firmly into place, and let it cure completely.

Step 4: Install Stop Molding Weatherstripping
The vinyl or rubber weatherstripping attached to the wood door stop molding on the sides and top of your garage door frame is another critical barrier. Over time, this weatherstripping can get torn, worn out, or stiff. To replace it, gently pry off the old door stop molding. Cut your new pieces of vinyl-flapped stop molding to size for the top and side jambs of the door frame. Loosely nail the top piece in place first. Then, nail the side pieces so the vinyl flap presses gently against the face of the garage door, creating a firm but flexible seal.
Step 5: Seal the Gaps Between Door Panels
For sectional garage doors, the joints between each horizontal panel can also be a source of air leakage, especially on older or non-insulated doors. You can address this by applying weather-seal tape or specialized V-shaped vinyl weatherstripping designed for panel joints. These products have an adhesive backing and are applied to the inside of the door along the top or bottom edge of each panel. When the door is closed, the strips compress against each other, effectively blocking airflow between the sections and making the door assembly itself more airtight.
Step 6: Install a Garage Door Insulation Kit
If your garage door is not insulated, adding an insulation kit is a fantastic way to improve its thermal performance and reduce air leakage. These kits typically come with large foam board or reflective foil panels that are cut to fit into the rectangular sections of your garage door. The panels not only add a significant R-value to reduce heat transfer but also help to deaden sound and reduce drafts that might come through the panel surfaces themselves. This makes the entire door structure a more formidable barrier against the outside elements.
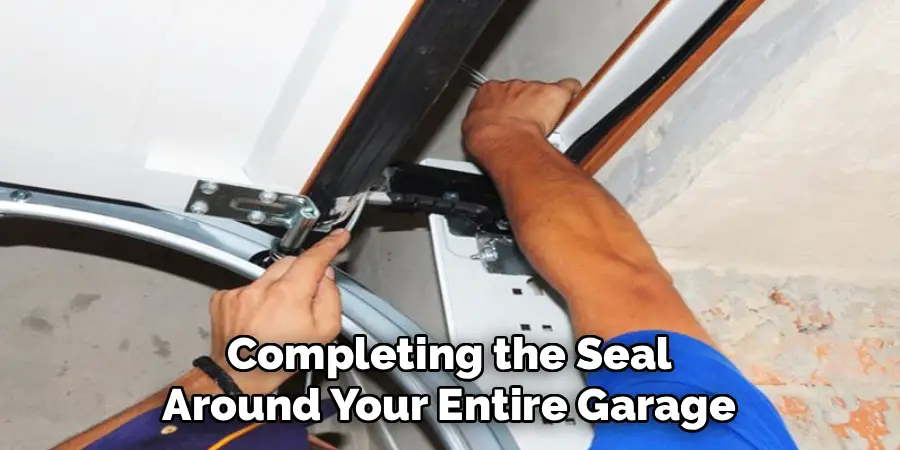
Step 7: Caulk the Exterior Trim
The final step is to seal the perimeter of the garage door frame itself. The wood trim or brickmolding that frames the outside of your garage door can often have gaps between it and the siding or brick of your house. Use a high-quality exterior-grade silicone or polyurethane caulk to fill these gaps. Apply a neat bead of caulk into the seam, then smooth it with a wet finger or a caulking tool. This simple step prevents air and water from getting behind the door frame, completing the seal around your entire garage door opening.
Tools for Installation
To ensure a smooth and effective installation process, having the right tools at hand is essential. Here are some key tools you may need:
- Caulking Gun: A caulking gun is necessary for applying the sealant smoothly and evenly into the seams. Choose a sturdy, easy-to-use model for better control.
- Utility Knife: A sharp utility knife is helpful for precisely cutting the tip of the caulk tube to the desired bead size.
- Caulking Tool or Putty Knife: These can be used to create a smooth, professional finish after applying the caulk.
- Drop Cloth or Tarp: To protect the ground or floor around your workspace from accidental drips or spills.
- Wet Rag or Bucket of Water: Useful for cleaning up excess caulk or keeping your tools clean during the process.
- Masking Tape: Great for ensuring clean lines, especially if you’re working near delicate surfaces.
These tools will help make your caulking project more efficient and result in a clean, polished seal around your garage door frame.
Frequently Asked Questions
Why Is My Garage So Drafty?
Garages are often drafty because the garage door, being so large, has numerous potential points for air leakage. The most common culprits are:
- A worn-out or damaged rubber seal on the bottom of the door.
- Hardened or torn weatherstripping along the sides and top of the door frame.
- Gaps between the individual panels of a sectional door.
- An uneven concrete floor that doesn’t allow the bottom seal to make full contact.
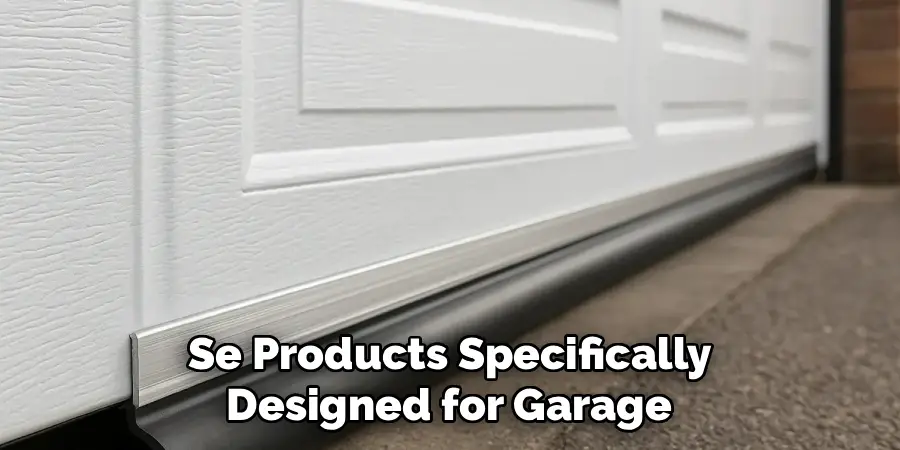
What Is the Best Material for Garage Door Weatherstripping?
Vinyl and rubber are the two most common and effective materials. Vinyl weatherstripping, often used on door stop molding, is durable and holds its shape well. Rubber is typically used for the bottom seal and threshold seals because it is more flexible and can conform to uneven surfaces to create a tighter seal. For the best results, use products specifically designed for garage doors.
How Much Does It Cost to Make a Garage Door Airtight?
This is a relatively inexpensive DIY project. A replacement bottom seal typically costs between $20 and $50. A full kit of stop molding weatherstripping for the sides and top might cost between $30 and $60. A threshold seal can range from $40 to $100 depending on the length and quality. You can significantly improve your garage’s seal for around $100-$200 in materials.
Will Sealing My Garage Door Really Save Money on Energy Bills?
Yes, it can make a noticeable difference, especially if your garage is attached to your home. An airtight garage acts as a buffer zone, reducing the amount of unconditioned air that infiltrates the walls connected to your living space. This means your home’s heating and cooling system doesn’t have to work as hard to maintain a stable temperature, leading to lower energy consumption.
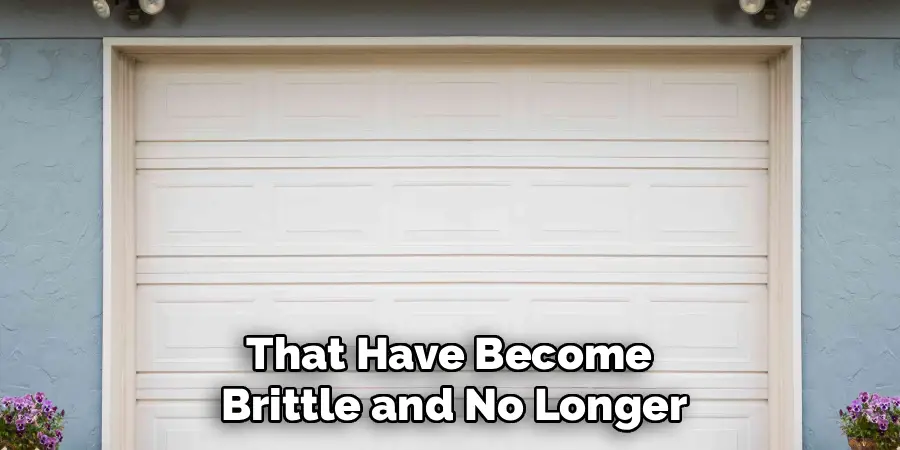
How Often Should I Replace My Garage Door Seals?
You should inspect your garage door seals at least once a year. Depending on your climate and how much use the door gets, a high-quality rubber bottom seal can last 5-10 years. The weatherstripping on the sides and top may last even longer. If you see any cracks, tears, or areas that have become brittle and no longer make a good seal, it’s time for a replacement.
Conclusion
Creating a more comfortable and energy-efficient garage is an achievable goal for any homeowner. By systematically inspecting and addressing all the potential sources of air leaks, from the bottom seal to the exterior trim, you can create a formidable barrier against the elements. The process involves replacing worn-out seals, installing new weatherstripping where needed, and ensuring all components work together to close every gap. Now that you have this comprehensive guide on how to make garage door airtight, you are ready to tackle this rewarding project and enjoy the benefits of a well-sealed garage.
About
Angela is the chief editor of Indoorense. She began her career as an interior designer before applying her strategic and creative passion to lifestyle and home.
She has close to 15 years of experience in creative writing and online content strategy for housekeeping and cleaning,home decorations as well as other efforts.
She loves her job and has the privilege of working with an extraordinary team. She lives with her husband, two sons, and daughter in Petersburg. When she’s not busy working she spent time with her family.