

Installing security cameras on your property is a great way to keep an eye on things when you’re not home. So whether you’re looking for surveillance of your front porch or backyard, there are a few tips you’ll want to follow to make sure the job goes smoothly. In this blog post, we’ll outline how to install security camera on brick wall. So whether you’re a beginner or an experienced DIY-er, read on for some helpful tips!

What Causes a Security Camera Installation to Fail?
There are a few main reasons why a security camera installation might fail. The most common reason is that the camera isn’t properly secured to the wall. This can be due to several factors, including using the wrong type of screws or anchors, not drilling into the studs, or simply not using enough screws. Another common reason for failure is that the wires aren’t properly connected. Again, this can be due to several factors, including using the wrong type of connectors, not stripping the wires correctly, or not connecting the wires to the correct terminals.
Additionally, many people forget to add a surge protector to their system, which can cause the system to fail if there’s a power surge. Another common reason for failure is that the DVR or NVR isn’t properly configured. This can be due to several factors, including not setting up the system correctly, not updating the firmware, or not configuring the cameras properly. Finally, many people forget to test their system before they leave for vacation, which can lead to a false sense of security.
Why is it Important to Use the Right Screws and Anchors?
One of the most common reasons why a security camera installation fails is that the wrong type of screws or anchors is used. It’s important to use the right type of screws or anchors because they need to be able to hold the camera’s weight. If they’re not installed correctly, the camera can fall and break, which can cause expensive repairs. Additionally, using the wrong type of screws or anchors can damage the wall, which can be difficult to repair.
Another reason to use the right type of screws or anchors is that they need to be able to hold the camera in place during high winds or severe weather. Again, if they’re not installed correctly, the camera can be knocked over, damaging the camera and the wall. Lastly, using the wrong type of screws or anchors can void the warranty on the camera.
Step by Step How to Install Security Camera on Brick Wall
1. Gather Your Supplies
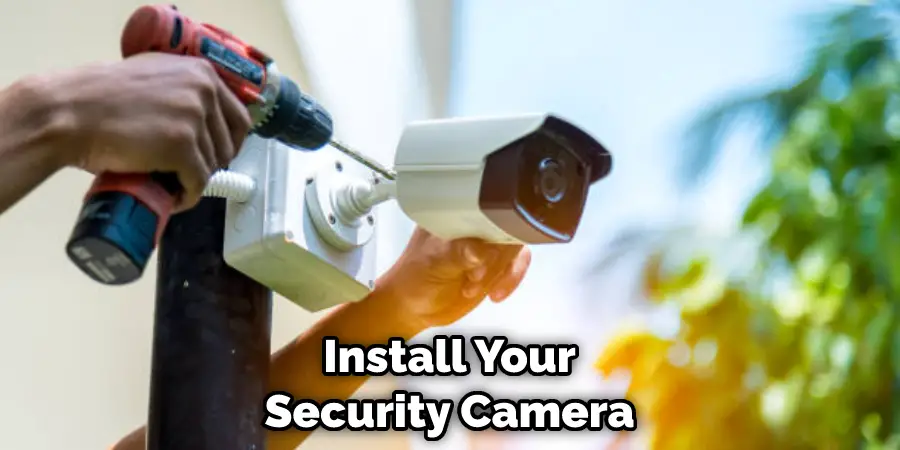
In order to install your security camera on a brick wall, you’ll need a few supplies. First, you’ll need a drill. Second, you’ll need the right type of screws or anchors. Third, you’ll need a ladder. Fourth, you’ll need wire cutters. Fifth, you’ll need a screwdriver. Sixth, you’ll need wire strippers. Seventh, you’ll need a hammer. Eighth, you’ll need a chisel. Ninth, you’ll need a level. Tenth, you’ll need a tape measure. Gather all of these items before beginning the installation process. If you don’t have all of the supplies, you can purchase them at your local hardware store.
2. Select the Right Location
The first step in how to install security camera on brick wall is to select the right location. You’ll want to choose a location that’s out of reach so that intruders can’t disable the camera. You’ll also want to choose a location with a good view of your property. Try to select a location that’s close to an electrical outlet so that you don’t have to use extension cords. If you’re installing the camera outdoors, you’ll want to choose a location that’s sheltered from the elements. Avoid locations where the camera will be exposed to direct sunlight, wind, or rain.
3. Measure the Wall
Once you’ve selected the location for your camera, you’ll need to measure the wall. Measure the width and height of the area where you’ll be installing the camera. Then, use a tape measure to measure the distance from the floor to the ceiling. First, mark the top corner of the wall with a pencil. Then, measure from the floor to the ceiling. Finally, mark the bottom corner of the wall with a pencil. Make sure to write down these measurements so that you don’t forget them. If you’re installing the camera on an exterior wall, you’ll also need to measure the thickness of the wall.
4. Drill the Holes

Once you’ve marked the wall, you’ll need to drill the holes. To do this, you’ll need a drill and the right type of drill bit. If you’re installing the camera on an exterior wall, you’ll need to use a masonry drill bit. You can use a regular drill bit if you’re installing the camera on an interior wall. Start by drilling a pilot hole at the top corner of the wall. Then, drill a hole in the bottom corner of the wall. If you’re installing the camera on an exterior wall, drill the holes deep enough so the anchors will fit.
5. Install the Anchors
After drilling the holes, you’ll need to install the anchors. If you’re using screws, skip this step. To install the anchors, first insert them into the holes. Then, use a hammer to tap them into place. Be careful not to overdo it, or you could damage the wall. If you’re using expansion anchors, you’ll need to use a screwdriver to expand them. Turn the anchor until it’s flush with the wall.
6. Run the Wire
Once the anchors are in place, you’ll need to run the wire. First, cut a length of wire that’s long enough to reach from the camera to the power source. Then, strip 1/2 inch of insulation from each end of the wire. Next, thread the wire through the wall. Start by feeding it through the hole at the top of the wall. Then, pull it through the hole at the bottom of the wall. If you’re installing the camera on an exterior wall, you’ll need to use a wire snake to pull the wire through the wall.
7. Connect the Camera
Now, it’s time to connect the camera. If you’re using a wireless camera, skip this step. First, strip 1/2 inch of insulation from the end of the power cord to connect the camera. Then, twist the wires together and screw on a wire connector. Attach the power cord to the camera. If you’re using a wired camera, connect the video cable to the camera. If you’re using a wireless camera, connect the antenna to the camera.
8. Mount the Camera
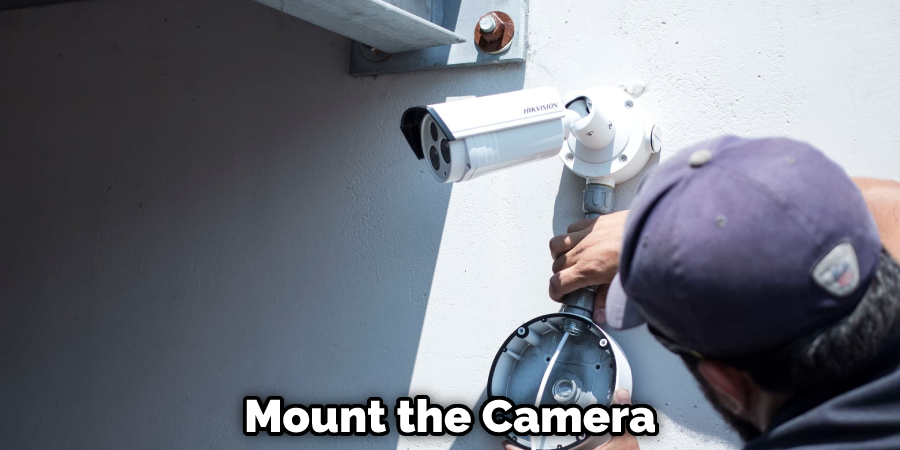
Next, you’ll need to mount the camera. To mount the camera, first, hold it up to the wall. Then, use a pencil to mark the location of the holes. Remove the camera from the wall and drill pilot holes at the marks. Next, insert the screws into the holes and tighten them with a screwdriver. Be careful not to overtighten the screws, or you could damage the camera. Once the screws are in place, reattach the camera to the wall.
9. Connect the Power Source
Finally, you’ll need to connect the power source. If you’re using a wired camera, connect the power cord to an outlet. If you’re using a wireless camera, insert the batteries. Once the power source is connected, your camera should be up and running. If you’re using a wireless camera, you’ll need to sync it with your security system.
10. Test the Camera
Once you’ve installed the camera, it’s important to test it. First, check the video quality. Make sure the image is clear, and there’s no static. Next, check the audio quality. Make sure you can hear clearly. Finally, test the motion detection. Walk in front of the camera and see if it triggers the recording. If everything looks and sounds good, your camera is ready to use. If you’re having any problems, consult the manual or contact the manufacturer.
How Much Does It Cost to Install Security Camera on Brick Wall?
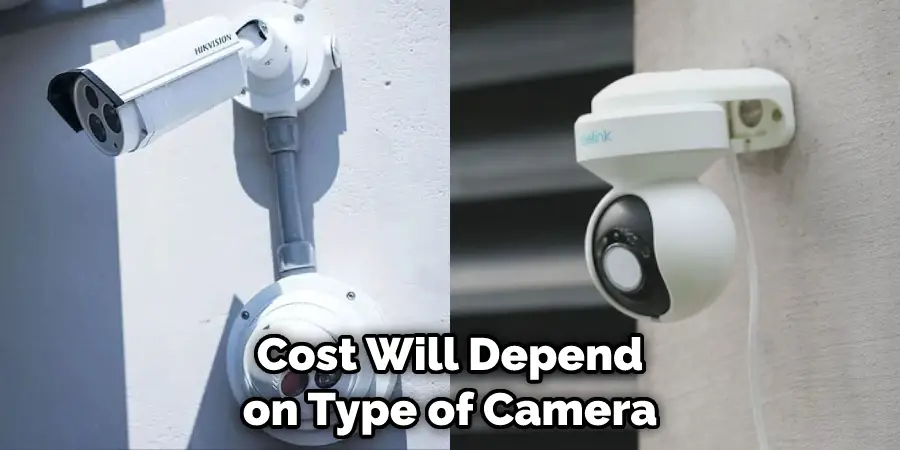
The cost of installing a security camera on a brick wall varies depending on the type of camera you choose. A wired camera will be more expensive to install than a wireless camera. The cost also depends on the number of cameras you’re installing and the size of your home. You can generally expect to pay between $100 and $500 to install a security camera on a brick wall. If you’re installing multiple cameras, the cost will be higher. If you hire a professional, the cost will be even higher.
Conclusion
So there you have it! That’s how to install security camera on brick wall. With these simple instructions, you can keep an eye on your home, even when you’re not there. We hope this guide has been helpful. If you have any questions, please feel free to contact us. Thanks for reading!
Michael has always been interested in security and safety. When he was younger, he loved reading books about espionage and crime. This led him to develop a fascination with surveillance systems and home security systems.
He has 8 years of expertise installing, fixing camera problems and door locks. He also gained knowledge by helping homeowners to stay safe and secure in their homes.
Over the years, Michael has gained a great deal of experience in this field. He is responsible for the content development on this blog.