
Sloped ceilings and slanted corners can make a room feel tricky to style. That angled surface above your sofa or beside your staircase often gets ignored simply because it looks hard to work with. The good news is that learning how to decorate an angled wall in living room spaces is easier than most people think. With a few smart choices, that awkward slant can become the most eye-catching part of your home.
An angled wall is any wall that leans, slopes, or sits at a diagonal instead of running straight up and down. You often find them under stairs, in attic conversions, or in rooms with vaulted ceilings. Rather than fighting the shape, you can lean into it and turn it into a feature. This guide walks you through simple, beginner-friendly steps and answers common questions along the way. By the end, you will feel confident about styling any slanted surface with ease and personality.
Why Decorating an Angled Wall in Your Living Room Matters
A slanted wall adds character that flat walls simply cannot offer. When you style it well, you draw the eye upward and make the whole room feel taller and more spacious. Ignoring the space, on the other hand, leaves a blank gap that can make a room feel unfinished.
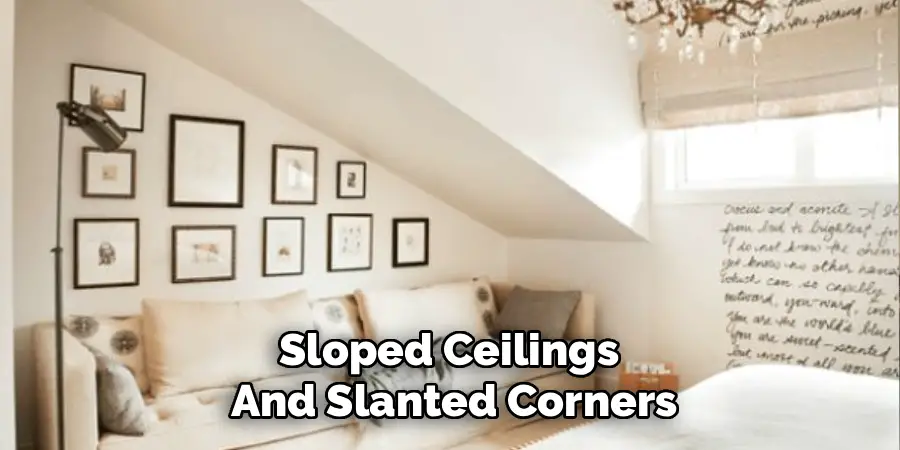
Thoughtful decor also solves practical problems. It hides awkward angles, balances uneven proportions, and creates a natural focal point. This helps your furniture and lighting feel intentional rather than squeezed in. Best of all, a well-styled slope reflects your personality and boosts the value people place on your space. A little effort here pays off with a room that feels polished, cozy, and uniquely yours every single day.
Step-by-Step Guide to How to Decorate an Angled Wall in Living Room
Step 1: Measure and Understand the Space
Before you buy or hang anything, grab a tape measure and study the slope carefully. Note the height at both the tallest and shortest points, along with the angle of the slant. This tells you how much usable area you have and where items will fit comfortably. A quick sketch on paper helps you plan without guesswork.
Knowing your exact measurements saves you from costly mistakes later. You avoid buying oversized art or shelving that overwhelms the space. Take a photo too, so you can visualize ideas while shopping. When you understand the dimensions clearly, every choice you make afterward feels intentional and stress-free.
Step 2: Choose a Clear Focal Point
Every well-styled wall needs one main feature that grabs attention. On a slanted surface, this could be a large piece of art, a bold mirror, or a striking light fixture. Pick something that matches the mood you want, whether calm and minimal or lively and colorful. This anchor guides everything else you add.
Placing your focal point at eye level, or slightly below the steepest part of the slope, keeps it balanced. Avoid crowding it with too many small items at first. Let the star of the space breathe. Once your focal point feels right, the rest of your decisions fall into place naturally.
Step 3: Play With Height and Layers
Slanted walls have varying heights, so use that to your advantage. Group objects that follow the line of the slope, starting tall at the high side and stepping down toward the low side. This creates a natural rhythm that feels pleasing to the eye. Layering also adds depth, making the wall feel rich rather than flat.
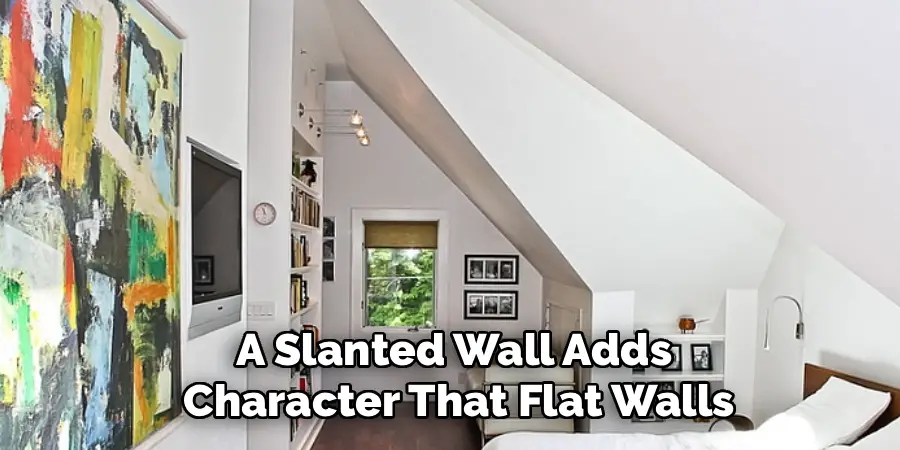
Learning how to decorate an angled wall in living room settings often comes down to embracing this staggered look. Mix framed prints, small shelves, and hanging plants to build gentle layers. Keep spacing consistent so the arrangement looks planned. When your items echo the wall’s shape, the whole design feels effortless and harmonious.
Step 4: Add the Right Lighting
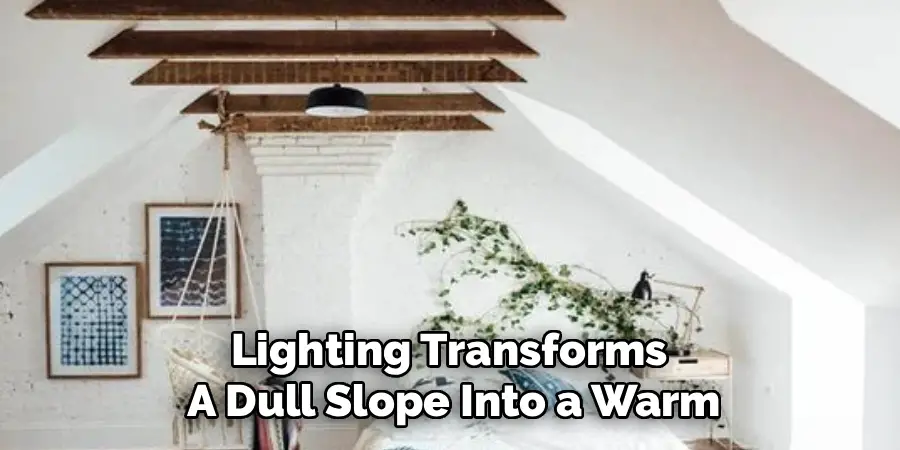
Lighting transforms a dull slope into a warm, inviting feature. Since slanted walls can cast shadows, choose fixtures that brighten the area evenly. Wall sconces angled toward the surface work beautifully, as do slim track lights that follow the slope. Soft, warm bulbs create a cozy glow, while brighter ones highlight art and texture.
If wiring feels complicated, battery-powered puck lights or plug-in options give you flexibility without an electrician. Position lights to wash gently over your focal point, drawing attention exactly where you want it. Good lighting not only shows off your decor but also makes the whole room feel larger and more welcoming after the sun goes down.
Step 5: Use Mirrors to Open Up the Space
Mirrors are a clever trick for any tricky wall. They bounce light around the room, making tight or sloped areas feel more open and airy. A single large mirror placed along the slant reflects your window or lighting, instantly brightening the corner. Smaller mirrors grouped together create a fun gallery effect too.
Angle your mirror so it catches something pleasant, like a plant or a colorful piece of furniture. This adds interest without extra clutter. When you master how to decorate an angled wall in living room corners, mirrors quickly become one of your most reliable tools. They cost little, take minutes to hang, and deliver a big visual payoff.
Step 6: Bring in Greenery and Texture
Plants soften hard angles and add life to any space. Trailing vines draped from a high shelf follow the slope beautifully, while a tall potted plant fills the lower corner. If you worry about upkeep, high-quality faux plants offer the same look with zero maintenance. Either way, greenery warms up the wall instantly.
Texture matters just as much as color. Woven baskets, fabric wall hangings, or a chunky knit throw nearby add cozy contrast against smooth paint. These small touches invite people to relax and feel at home. Mixing natural materials with your existing decor keeps the slanted wall feeling grounded, comfortable, and full of personality.
Step 7: Step Back and Refine
Once everything is in place, take a break and view the wall from across the room. Sit on your sofa and notice how the arrangement feels from where you actually spend time. Sometimes an item looks great up close but feels off from a distance. This final check helps you spot small tweaks that make a big difference.
Adjust spacing, swap a frame, or shift a plant until the whole scene clicks. Ask a friend for a fresh opinion if you feel stuck. Styling is a process, and small refinements over a few days often lead to the best results. Trust your eye, and enjoy the finished look you created.
Frequently Asked Questions
What Is the Best Way to Hang Art on a Slanted Wall?
Use adhesive strips or angled hooks designed for uneven surfaces so your frames sit flush against the slope. Position each piece to follow the line of the slant rather than fighting it. Start with your largest item as an anchor, then build around it. Check the arrangement from your seating area to make sure it looks balanced and level to the eye.
Can I Use Wallpaper on an Angled Wall?
Yes, wallpaper works wonderfully on sloped surfaces and can highlight the shape in a bold way. Choose a vertical pattern to draw the eye upward, or a soft print for a calmer feel. Peel-and-stick options make the job simple for beginners since you can reposition them easily. Measure carefully and smooth from top to bottom to avoid bubbles for a clean, professional finish.

How Do I Stop the Wall From Feeling Cluttered?
Less is often more with sloped surfaces. Pick one focal point and surround it with just a few supporting pieces that share a color or theme. Leave breathing room between items so each one stands out. Consistent spacing and a limited palette keep things tidy. If the wall feels busy, remove one object at a time until the balance feels right and calm.
What Colors Work Best for Sloped Walls?
Light, neutral shades like soft white, warm beige, or pale gray make a slanted area feel open and bright. If you want drama, a deep accent color can turn the slope into a striking feature. Match the tone to your room’s overall mood and existing furniture. Testing a small paint sample first helps you see how the color shifts under your specific lighting throughout the day.
Do I Need Special Tools to Decorate a Sloped Surface?
Not usually. A tape measure, a level, and quality adhesive hooks cover most projects. For heavier items, use wall anchors rated for the weight to keep everything secure. A pencil helps you mark placement before committing. If you plan to add hardwired lighting, an electrician can help, but many plug-in and battery options let you finish the whole look with basic supplies alone.
Conclusion
Styling a slanted surface no longer has to feel like a puzzle. When you measure carefully, choose a strong focal point, and layer in lighting, mirrors, and greenery, that awkward slope becomes a genuine highlight of your home. Each step builds on the last, so even total beginners can achieve a polished, welcoming result with a little patience and creativity.
Remember that the best designs come from small refinements over time, so trust your eye and adjust as you go. Now that you know how to decorate an angled wall in living room spaces, grab your tape measure and start experimenting today. Your slanted wall is ready to shine, and the finished look will make your whole room feel warmer, brighter, and truly yours.

Rick is a handyman who grew up helping his dad with his business. He learned a lot from him about how to fix things, and also about how to work hard and take care of business. These days, Rick is still into fixing things- only now, he’s doing it for a living.
Rick is always looking for new ways to help people grow and develop. That’s why he started contributing to this blog: to share all his experience and knowledge so that he can help people who are interested in DIY repair.