
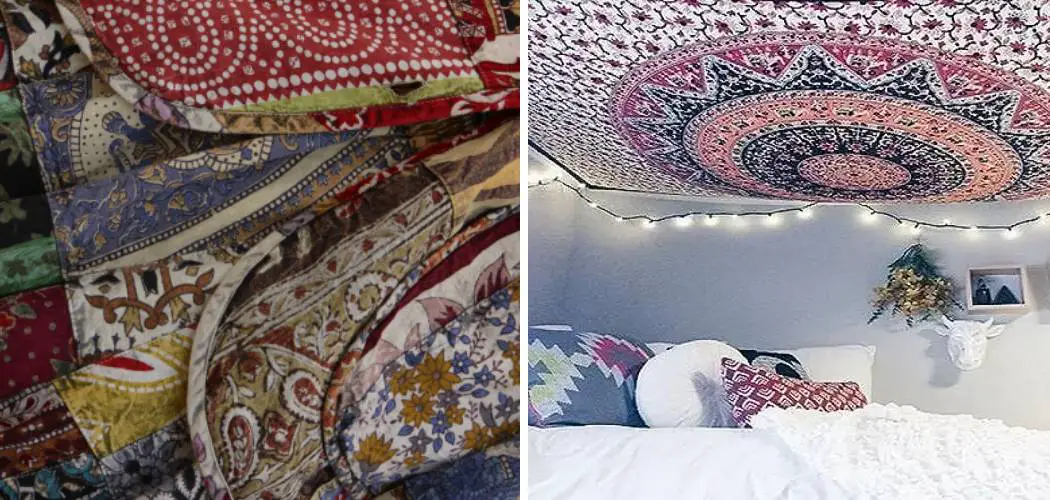
Have you ever wanted to spruce up your bedroom and add a touch of your style and personality without breaking the bank? Hanging a tapestry from your ceiling is an easy way to make any room feel unique. Not only are they inexpensive and eye-catching, but hanging tapestries can also serve as a statement piece for all who enter transfixed.

Whether you’re looking to hang up a tapestry for the first time or give your existing one a facelift, here are the steps to install it from your ceiling. Always remember to remember safety when attempting any sort of home project.
In this blog post, we’ll be walking through some helpful tips on how to hang tapestry from ceiling for maximum effect!
Why Do People Put Tapestries on the Ceiling?
Hanging tapestries from the ceiling is an often overlooked way to bring beauty and style to a room. Not only are they visually stunning, but they can also add texture, color, and softness to any space. Tapestries are great for creating a focal point in your bedroom or living area and can even act as an acoustic barrier between you and the neighbors when hung in an outdoor space.
Also, hanging tapestries from the ceiling can make a statement and give your home an extra personality.
What Will You Need?
Before you begin, make sure to have the following items handy:
- Tapestry
- Hooks of your choice
- Hammer
- Tape measure
- Pencil or marker
- Screwdriver (Optional)
Once you have these items, you should be good to go.
10 Easy Steps on How to Hang Tapestry From Ceiling:
Step 1: Preparing The Area
The first step to hanging a tapestry from the ceiling is to ensure that the area you plan on hanging it in is clean and free of dust. This will prevent dirt or lint from getting onto your tapestry while working. If you’re hanging it outside, make sure that the area is free of debris.

Step 2: Choosing Your Hooks
The next step is to choose your hooks. There are various types of hooks available, each with its own advantages and disadvantages. Make sure to pick secure ones that won’t damage your tapestry or ceiling.
Step 3: Measuring The Area
Once you have your hooks, use a tape measure to measure the area where you want to hang your tapestry. Make sure to double check these measurements so that you get the perfect fit for your tapestry. If you’re hanging the tapestry outside, also make sure to measure twice so that it won’t be too small or too large for the area.
Step 4: Marking The Spot
Once you have your measurements, use a pencil or marker to mark where the hooks will go. Make sure the marks are small and inconspicuous. You don’t want them to be too obvious when the tapestry is in place.
Step 5: Installing The Hooks
Now it’s time to install the hooks. If you’re using screws, use a screwdriver to make sure they are secure and won’t come loose. Hammer them in until they are flush with the ceiling. If you’re using adhesive strips to hang your tapestry, ensure it is properly secured before moving on to the next step.

Step 6: Hanging The Tapestry
Once your hooks are installed, you can move on to hanging up the tapestry. Place the top of your tapestry over the hooks and ensure it is secure before hanging the rest. This will ensure the bottom and sides are even when you’re done.
Step 7: Adjusting The Tapestry
Once you have finished hanging up your tapestry, take a step back to check its placement. Make sure that it is even and not crooked before moving on to the next step. If needed, use small tacks or pins to make minor adjustments.
Step 8: Securing The Tapestry
To ensure your tapestry stays in place, secure it with either tacks or pins along the edges of the fabric. Make sure that they are not too close together, as this could cause damage to your tapestry. Additionally, you may want to consider using adhesive strips on the back of the fabric to keep it in place.
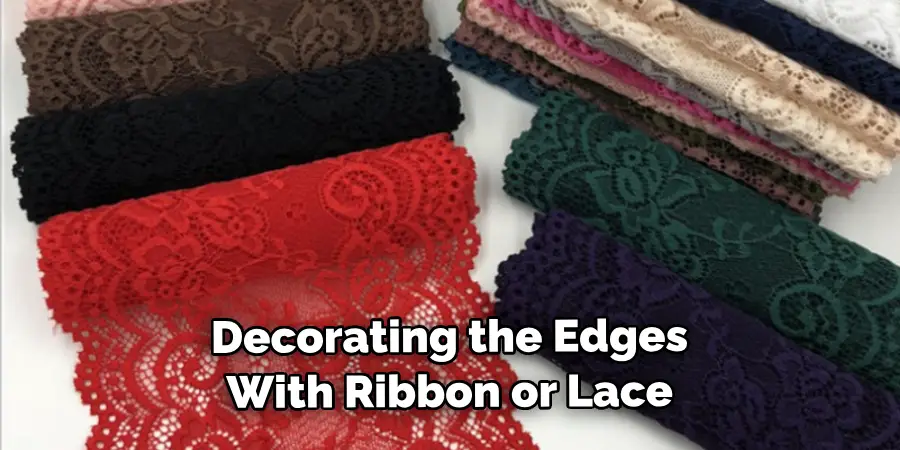
Step 9: Adding Finishing Touches
If desired, you can add any finishing touches you would like to your tapestry. This could include adding decorative trim or tassels or decorating the edges with ribbon or lace. Another option is to add fabric dye or paint to create a unique look.
Step 10: Admiring Your Work
The final step is to admire your work and enjoy your newly-hung tapestry. No matter what type of design you choose, it will be sure to make any room more interesting and inviting! Remember always to use caution when hanging any type of home decor to ensure that it is secure and won’t cause any damage.
Hanging a tapestry from your ceiling can be an enjoyable, inexpensive way to give your room a facelift. You can quickly create an eye-catching focal point with just a few simple steps! Give it a try today and see how much impact a tapestry can have in any room.
5 Additional Tips and Tricks
- It is important to ensure your tapestry is securely fastened so that it does not move or fall down. Consider adding tacks or pins along the edges of the fabric and/or adhesive strips on the back to secure it further.
- If you are using screws to hang your tapestry, always ensure they are flush with the ceiling and secure. This will ensure that your tapestry does not move or come loose over time.
- Consider using multiple hooks to hang your tapestry from different points on the ceiling to create a more dramatic look.
- If you’re looking for an extra touch of glamour, consider adding decorative trim or tassels or decorating the edges with ribbon or lace.
- Step back and check your work once you’re done to ensure the tapestry is even and not crooked. If needed, use small tacks or pins to make minor adjustments.

Hanging a tapestry from your ceiling can be a great way to add some personality and interest to your home. You can create a beautiful feature for any room with just a few simple steps! Have fun with it, and enjoy the process of transforming your space.
5 Things You Should Avoid
- Avoid using nails, tacks, or pins that are too close to each other. This could cause puncture holes in your tapestry and ruin its overall appearance.
- Ensure you are using the right hooks for your specific type of ceiling. Using the wrong type could result in damage to either your tapestry or ceiling.
- Be careful when installing hooks to ensure they are secure and won’t come loose over time.
- Avoid hanging your tapestry too low, as this can make it look crowded and take away from its overall effect in the room.
- Make sure to double check all of your measurements before putting up a tapestry so that it fits perfectly. You may need to start over if it is too small or too large for the area.
Hanging a tapestry from your ceiling can be a great way to add style and charm to your home. Make sure to take your time when hanging up your tapestry so that it looks its best.
How Do You Hang a Tapestry on the Ceiling Without Nails?
If you don’t want to use nails or screws to hang up your tapestry, other options are available. Adhesive strips can be used to hold the fabric securely in place without damaging the ceiling or tapestry.
These strips can often be found at most home improvement stores and come in different sizes and shapes for various projects. Another option is to use suction cups, which can be used to secure the fabric without causing any damage. However, these aren’t recommended for heavier tapestries as they may not be able to hold the weight for a long period of time.
Additionally, you can use clips to hang your tapestry. This is a great option if you don’t want to cause any damage to the ceiling or fabric. However, make sure that the clips are secure and won’t come loose over time.

No matter what method you choose to hang your tapestry from the ceiling, it is important to ensure it is properly secured so it won’t move or come loose over time. With the right supplies and a little patience, you can create a gorgeous focal point for any room! Good luck and happy decorating!
Conclusion
The most important thing to hang a tapestry from the ceiling is to pick the right supplies and prep the room. Once you have your supplies ready, it’s time to get creative! You can take a few extra steps, such as adding hooks or adhesives to give your design an extra level of sophistication. But even if you don’t go all out, hanging a tapestry on your ceiling is a great way to add style and texture to any space.
Not only can it provide a beautiful ambiance, but it also makes for amazing backdrops for selfies or other photos! Best of all, depending on your needs and budget, there are so many great options available that will help you bring your vision to life with ease. So why not explore the world of tapestries today? Your friends certainly won’t regret it.
The article on how to hang tapestry from ceiling has given you all the information you need to get started. Enjoy decorating your space!
Happy hanging!
About
Angela is the chief editor of Indoorense. She began her career as an interior designer before applying her strategic and creative passion to lifestyle and home.
She has close to 15 years of experience in creative writing and online content strategy for housekeeping and cleaning,home decorations as well as other efforts.
She loves her job and has the privilege of working with an extraordinary team. She lives with her husband, two sons, and daughter in Petersburg. When she’s not busy working she spent time with her family.