
String lights add a cozy, magical glow to bedrooms, patios, and party spaces, but sometimes their brightness feels a little too intense. Maybe you want a soft, romantic mood for dinner or a gentle nightlight that won’t keep you awake. Knowing how to dim LED string lights gives you full control over the atmosphere in any room. The good news is that adjusting the brightness isn’t complicated, even if you’ve never tinkered with lighting before. With a few simple tools and a bit of know-how, you can take your lights from blinding to beautifully soft in minutes.
This guide breaks the whole process down into easy steps that anyone can follow. We’ll cover checking your lights for compatibility, picking the right dimmer, wiring things safely, and testing your setup. Whether you’re working with battery-powered fairy lights or plug-in strands, you’ll find practical tips that actually work. By the end, you’ll feel confident creating exactly the ambiance you want, whenever you want it.
Why Dimming LED String Lights Matters
Adjusting your lights does more than set a nice mood, though that alone is a great reason. Lower brightness reduces eye strain, making your space more comfortable during late nights or quiet evenings. Softer lighting also helps you wind down before bed, since harsh light can mess with your natural sleep rhythm.
There are practical perks too. Dimming your lights cuts down on energy use, which trims your electricity bill and extends the lifespan of the LEDs. Bulbs that run cooler and softer simply last longer. You also gain flexibility, letting one set of lights work for a lively gathering or a calm solo night. Instead of buying separate lighting for different occasions, you adapt what you already own. That’s both budget-friendly and convenient, and it makes your space feel thoughtfully designed.
Step-by-Step Guide to How to Dim Led String Lights
Step 1: Check Your Lights for Dimmable Compatibility
Before you do anything, find out whether your lights can actually be dimmed. Not every strand supports it, and forcing the issue can damage them. Look at the packaging or the small tag near the plug for the word “dimmable.” If you tossed the box, check the manufacturer’s website using the model number. Some cheaper lights have fixed brightness and simply won’t respond to a dimmer. Taking five minutes to confirm this saves you from frustration and wasted money later. Once you know your lights are dimmable, you can move forward with confidence, choosing the right method for your specific setup.
Step 2: Choose the Right Dimmer Type
Picking a compatible dimmer is the heart of learning how to dim LED string lights successfully. There are a few main options to consider. Plug-in dimmers are the easiest, sliding between your light’s plug and the wall outlet with zero wiring needed. Inline dimmers attach directly to the cord and work well for permanent setups. For battery-powered lights, look for models that come with a built-in remote or app control. Match the dimmer’s wattage rating to your lights to avoid flickering or buzzing. When in doubt, choose a dimmer made specifically for LEDs, since older dimmers built for incandescent bulbs often cause problems.
Step 3: Gather Your Tools and Materials
Set yourself up for a smooth project by collecting everything first. For most plug-in solutions, you really just need the dimmer itself, so the setup stays simple. If you’re doing an inline or hardwired option, grab a screwdriver, wire strippers, electrical tape, and wire connectors. Keep a small flashlight handy for seeing into tight spaces. It also helps to have the lights’ manual nearby for quick reference. Lay everything out on a clean, flat surface so nothing gets lost. Being prepared means you won’t have to stop halfway through to hunt for a tool, which keeps the whole process quick and stress-free.
Step 4: Power Down Before You Begin
Safety always comes first, so never work on lights that are plugged in or switched on. Unplug the strand completely from the wall, or remove the batteries if you’re using a portable set. This protects you from any risk of shock and prevents accidental short circuits while you handle the wiring. Give the lights a moment to cool if they’ve been running for a while. Double-check that the power is truly off by trying the switch. Working with cold, disconnected lights makes everything safer and easier. This simple habit takes seconds but protects both you and your equipment throughout the entire job.
Step 5: Connect Your Dimmer Properly
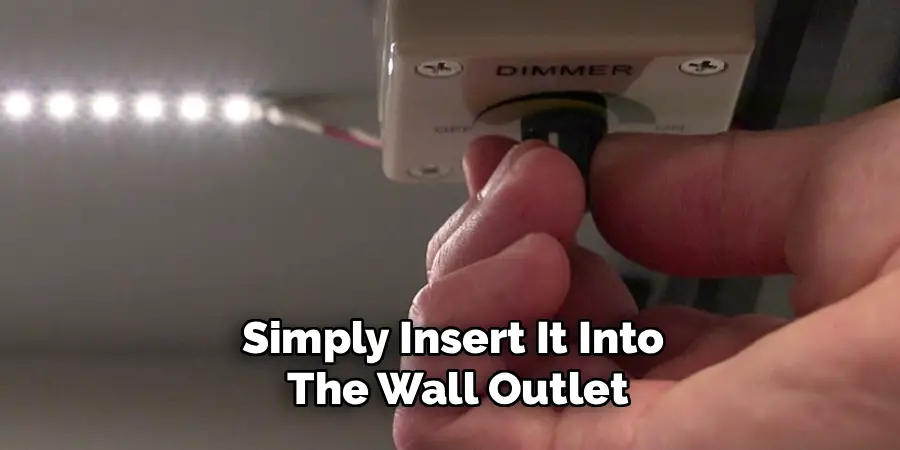
Now comes the main event. For a plug-in dimmer, simply insert it into the wall outlet, then plug your lights into the dimmer. That’s it, no wiring required. For inline dimmers, follow the included diagram carefully, matching the wires by color and securing each connection with a connector or tape. Make sure no bare wire is exposed once you’re done. If your lights use a remote or app, install the receiver according to the instructions and pair it with your device. Take your time here and avoid rushing, since solid connections are what make dimming work smoothly without any annoying flicker or interruption.
Step 6: Test the Brightness Range
With everything connected, restore power and try out your new control. Slowly move the dimmer from its lowest setting to its highest, watching how the lights respond. A good setup should glide smoothly through the range without flickering, buzzing, or sudden jumps. If you notice any of those issues, the dimmer may not be fully compatible, so revisit your earlier choices. Pay attention to the lowest level too, since some lights cut out before reaching total darkness. Testing now lets you catch problems early, while everything is still easy to access. Once it works perfectly, you’ll know your effort paid off.
Step 7: Set Your Perfect Ambiance
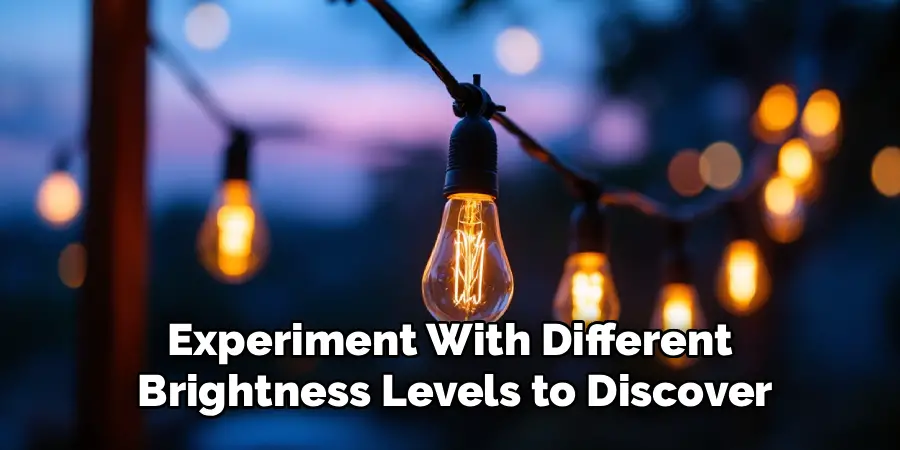
This final step is all about enjoying your results. Experiment with different brightness levels to discover what suits each moment. A low glow feels wonderful for movie nights, while a brighter setting works for reading or hosting friends. If your dimmer has memory or preset functions, save your favorite levels for quick access later. Consider how the light interacts with your room’s colors and furniture, then adjust until it feels just right. Take a moment to step back and appreciate the cozy atmosphere you’ve created. With your dimmer in place, you can shift the mood anytime with a simple turn or tap.
Frequently Asked Questions
Can All LED String Lights Be Dimmed?
No, not every set supports dimming. Many budget or basic strands have fixed brightness built into their circuitry, which means a dimmer won’t affect them and could even cause damage. Always check the packaging or product listing for the word “dimmable” before buying a dimmer. If you’re unsure, look up the model number on the manufacturer’s site. Confirming compatibility first saves you money and prevents harming your lights.
What Type of Dimmer Works Best for String Lights?
The best choice depends on your setup. Plug-in dimmers are ideal for beginners because they require no wiring and simply sit between the plug and outlet. Inline dimmers suit permanent installations, while remote or app-controlled options work great for battery-powered fairy lights. Whatever you pick, make sure it’s rated specifically for LEDs and matches your lights’ wattage. Using an old incandescent dimmer often causes flickering and buzzing.
Why Do My Lights Flicker When I Dim Them?
Flickering usually points to a compatibility mismatch between your lights and the dimmer. Older dimmers designed for incandescent bulbs frequently struggle with low-wattage LEDs, causing that annoying flutter. A loose wire connection can also be the culprit. Try switching to a dimmer labeled specifically for LED loads, and double-check that all connections are tight and secure. In most cases, upgrading to the right dimmer solves the problem completely.
Is It Safe to Dim LED Lights Myself?
Yes, it’s generally safe when you follow basic precautions. Always unplug the lights or remove batteries before handling any wiring. For plug-in dimmers, the process involves no exposed wires at all, making it very beginner-friendly. If you’re doing an inline connection, insulate every wire properly and never leave bare metal exposed. When a project involves household electrical wiring beyond the cord itself, it’s wise to consult a licensed electrician.
Will Dimming My Lights Save Energy?
Yes, lowering the brightness reduces the amount of power your lights draw, which can trim your electricity costs over time. Running LEDs at a softer level also keeps them cooler, helping them last longer before burning out. While the savings on a single small strand may be modest, the benefits add up across multiple sets or with daily use. It’s a small habit that helps both your wallet and your bulbs.
Conclusion
Creating the perfect glow in your space is easier than you might have thought. By checking compatibility, choosing the right dimmer, connecting it safely, and testing your range, you gain complete control over the mood in any room. Each step builds on the last, taking you from a too-bright strand to a soft, adjustable light you can fine-tune for any occasion. The whole project requires only a little patience and a few basic tools, making it perfect even for total beginners.
Now that you understand how to dim LED string lights, there’s nothing stopping you from transforming your favorite spaces. Grab your dimmer, follow the steps, and start experimenting with different brightness levels tonight. Whether you want a calm reading nook or a festive party vibe, your lights are ready to deliver exactly the atmosphere you crave. Go ahead and give it a try, then enjoy the cozy, customized glow you’ve created.

Rick is a handyman who grew up helping his dad with his business. He learned a lot from him about how to fix things, and also about how to work hard and take care of business. These days, Rick is still into fixing things- only now, he’s doing it for a living.
Rick is always looking for new ways to help people grow and develop. That’s why he started contributing to this blog: to share all his experience and knowledge so that he can help people who are interested in DIY repair.