

Platform beds look sleek and modern, but those exposed wooden slats can cause a few headaches. They might dig into your mattress, let cold air sneak through, or create annoying gaps that make your bed feel less comfortable than it should. If you’ve ever wondered how to cover slats on platform bed frames the right way, you’re in good company. Many people search for a simple fix that protects their mattress and boosts comfort without spending a fortune. The good news is that this project is beginner-friendly and takes very little time.

Covering your slats does more than improve looks. It adds a layer of support that helps your mattress last longer, keeps it from sagging between the gaps, and creates a smoother sleeping surface. Whether you have a foam, hybrid, or spring mattress, a proper slat cover makes a noticeable difference. In this guide, we’ll walk through measuring, choosing materials, and securing everything in place. By the end, you’ll feel ready to tackle it yourself.
Why Covering Slats on a Platform Bed Matters
Leaving your slats bare might seem harmless, but it can quietly wear down your mattress over time. The gaps between slats allow parts of your mattress to dip and bulge, which leads to uneven support and early sagging. A solid cover spreads your weight evenly, protecting both your comfort and your investment.
There are practical perks too. A covered base blocks drafts from below, keeping your bed warmer on chilly nights. It also stops slats from shifting or squeaking when you move around. For foam mattresses, a cover prevents that uncomfortable ridged feeling you get when foam sinks into the gaps. On top of all that, a neat cover hides the slats and gives your bed a cleaner, more finished look. Small effort, big reward for your sleep quality.
Step-by-Step Guide to How to Cover Slats on Platform Bed
Step 1: Measure Your Bed Frame and Slats
Start by grabbing a tape measure and checking the full surface area of your slat base. Measure the length and width from edge to edge, then jot the numbers down so you don’t forget them. Take note of how wide each slat is and how big the gaps between them are, since wider gaps need a sturdier cover.
Accurate measurements save you time and money later. If you buy a board or panel that’s too small, you’ll be left with exposed edges that defeat the purpose. Add an extra inch on each side if you want a snug, fully covered fit. A little planning here keeps the whole project smooth.

Step 2: Choose the Right Covering Material
Now decide what material best suits your needs and budget. A sheet of plywood offers firm, flat support and works well for heavier mattresses. Thin MDF boards, bunkie boards, or a fabric slat cover are great softer options that still protect your mattress nicely. If you want breathability, look for boards with small ventilation holes to reduce moisture buildup.
Think about weight, comfort, and airflow as you compare choices. Plywood gives the strongest base but can trap heat, while a padded cover feels softer underfoot. For most sleepers, a bunkie board strikes a happy balance. Pick the option that matches your mattress type and how firm you like your bed.
Step 3: Gather Your Tools and Supplies
Before you begin building, collect everything in one spot so you won’t pause halfway through. Depending on your chosen material, you might need a saw, sandpaper, a measuring tape, a pencil, and either screws or strong adhesive strips. A drill speeds things up if you plan to fasten panels directly to the frame.
Quality supplies matter more than you’d think. Cheap, flimsy boards can crack under pressure, while solid materials last for years. If you’re cutting wood yourself, keep safety goggles handy and work on a stable surface. Having the right tools ready makes learning how to cover slats on platform bed setups far easier and faster for any first-timer.

Step 4: Cut and Prepare Your Cover
With your measurements and material ready, mark your cutting lines clearly using a pencil and a straightedge. Cut slowly and steadily to keep the edges clean, then sand down any rough or splintered spots. Smooth edges protect both your mattress and your hands during installation.
If you chose a fabric cover or bunkie board, you may not need to cut at all, which makes this step quick. For wood panels, test the fit by laying the piece across your slats before securing anything. It should rest flat without rocking or overhanging too far. Make small adjustments now, because trimming after installation is far trickier and more frustrating.
Step 5: Position the Cover Over the Slats
Lift your prepared cover and lay it gently across the slat base, lining up the edges with the frame. Take your time centering it so the weight sits evenly and no slats peek out from the sides. If you’re using more than one panel, butt them together tightly so there are no gaps in the middle.
This is the moment where careful measuring pays off. A well-fitted cover should sit flush against the frame and feel stable when you press down on it. Walk around the bed and check each side for overhang or wobble. Getting the placement right now ensures your mattress will rest on a smooth, supportive surface every single night.
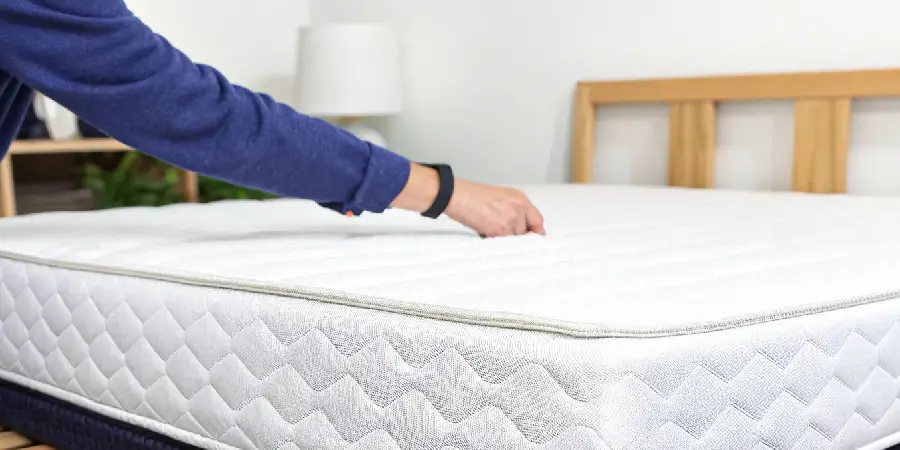
Step 6: Secure the Cover in Place
A loose cover can shift and slide, so fasten it down for lasting stability. For wood panels, drive a few screws through the cover into the slats or frame at the corners and center. If drilling isn’t an option, heavy-duty adhesive strips or non-slip rubber pads work well to hold lighter covers steady without damage.
Knowing how to cover slats on platform bed frames securely keeps your mattress from sliding around during sleep. After fastening, press firmly across the whole surface to test for movement. Nothing should rock, creak, or shift under pressure. If you notice any wobble, add another screw or pad until everything feels completely solid and quiet beneath you.
Step 7: Add the Mattress and Final Check
With your cover locked in, carefully place your mattress back on top and center it so the weight spreads evenly across the new surface. Smooth out your sheets, then sit and lie down to test how it feels. The bed should feel firmer, flatter, and free of those uncomfortable dips between slats.
Take a moment to inspect the finished result. Run your hand along the edges to confirm nothing sticks out, and give the mattress a gentle push to check for stability. If everything holds firm and feels comfortable, you’re done. Enjoy your upgraded bed, knowing your mattress now has the steady support it needs.

Frequently Asked Questions
What Is the Best Material to Cover Bed Slats?
The best choice depends on your mattress and comfort needs. Plywood offers firm, durable support and suits heavier mattresses well. Bunkie boards provide a slimmer, lighter option that still protects against sagging, while a padded fabric cover adds softness. If moisture is a concern, pick a breathable board with ventilation holes. For most sleepers, a bunkie board balances support, comfort, and easy installation nicely.
Do I Need to Cover the Slats on My Platform Bed?
You don’t always have to, but covering your slats brings real benefits. It prevents your mattress from sinking into the gaps, which reduces sagging and uneven wear over time. A cover also blocks drafts, stops squeaking, and creates a smoother sleeping surface. If you use a foam mattress or notice ridges forming, covering the slats is especially worthwhile for better comfort and longer mattress life.
How Far Apart Should Slats Be Before Covering?
Most experts recommend keeping slats no more than two to three inches apart for proper support. Wider gaps allow your mattress to dip, which causes discomfort and early sagging. If your slats sit farther apart than this, a solid cover becomes even more important. Adding a firm board or panel bridges those gaps, spreads weight evenly, and gives your mattress the stable foundation it needs.
Will Covering Slats Affect Mattress Breathability?
It can, but smart choices keep airflow healthy. Solid plywood traps more heat and moisture, so look for boards with ventilation holes if breathability matters to you. Fabric covers and bunkie boards tend to allow better airflow than thick wood. To stay safe, occasionally lift your mattress to let it air out, and use a breathable mattress protector to reduce moisture buildup over time.
Can I Cover Slats Without Using Any Tools?
Yes, you can. If you prefer a no-tool approach, choose a bunkie board or fabric slat cover that simply lays across the base. Non-slip rubber pads or heavy-duty adhesive strips can hold lighter covers in place without drilling. This tool-free method works great for renters or anyone who wants a quick fix. Just make sure the cover fits snugly so it won’t shift while you sleep.
Conclusion
Upgrading your bed doesn’t have to be complicated or expensive. By measuring carefully, picking the right material, and securing everything firmly, you can enjoy a smoother, more supportive sleeping surface in just an afternoon. Along the way, you protect your mattress from sagging, block chilly drafts, and silence those annoying squeaks that interrupt your rest. The whole process really comes down to patience and a few simple supplies.
Now that you know how to cover slats on platform bed frames the easy way, you have everything you need to get started. Grab your tape measure, choose your favorite covering material, and give your bed the solid foundation it deserves this weekend. Your mattress will last longer, your sleep will feel better, and your bedroom will look more polished. Why wait any longer to enjoy a comfier night’s sleep?

Rick is a handyman who grew up helping his dad with his business. He learned a lot from him about how to fix things, and also about how to work hard and take care of business. These days, Rick is still into fixing things- only now, he’s doing it for a living.
Rick is always looking for new ways to help people grow and develop. That’s why he started contributing to this blog: to share all his experience and knowledge so that he can help people who are interested in DIY repair.