

Lost your LED light remote or dealing with dead batteries at the worst possible moment? You’re not alone. Thousands of homeowners face this frustrating scenario every day, staring at their LED light strips, wondering how to bring them back to life without that tiny piece of plastic they’ve misplaced.
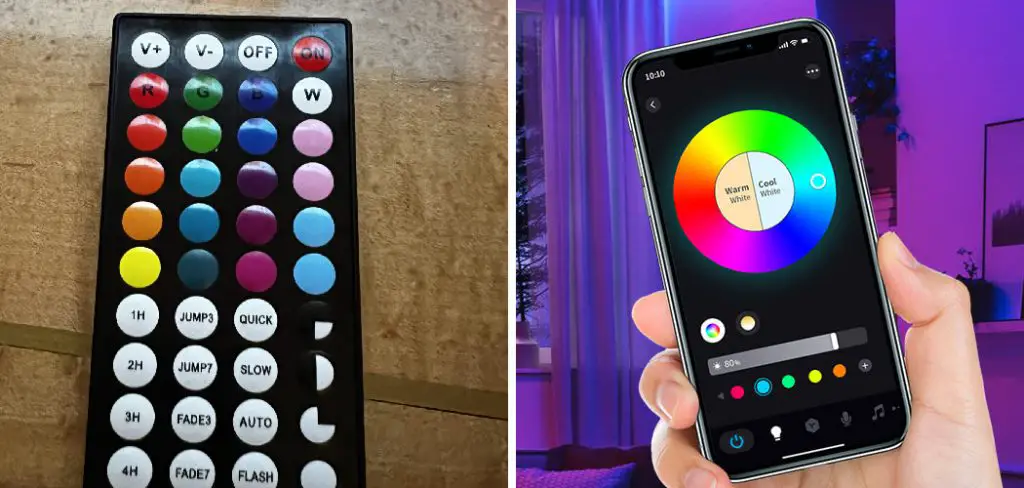
The good news is that you don’t need to stay in the dark or rush out to buy a replacement remote. Modern LED lighting systems come with multiple control options, and understanding these alternatives can save you time, money, and frustration. Whether you’re dealing with strip lights in your bedroom, accent lighting in your living room, or decorative LEDs anywhere in your home, this comprehensive guide on how to turn on LED lights without remote will walk you through several proven methods to regain control of your lighting setup. From using physical control boxes to leveraging smartphone apps, you’ll discover practical solutions that work with most LED light systems available today.
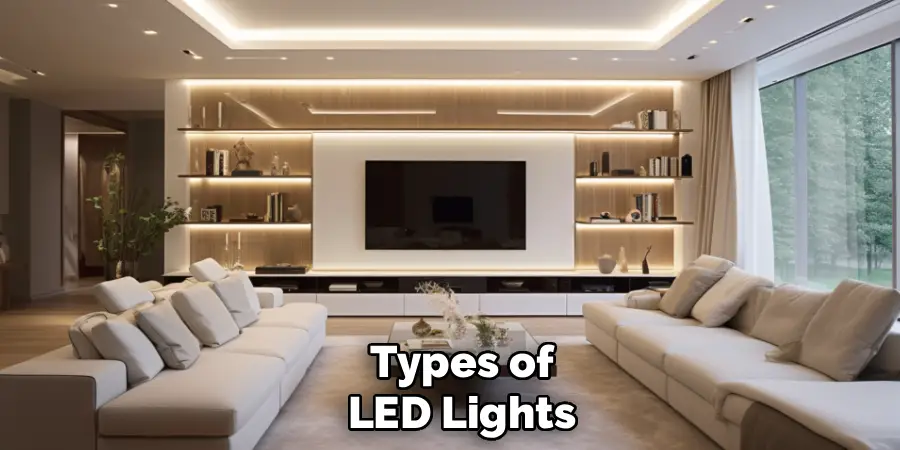
Types of LED Lights
Before diving into solutions, it’s important to understand what type of LED lighting system you’re working with, as different systems offer different control options. LED strip lights are the most common variety found in homes, typically adhering to surfaces and controlled via infrared or RF remotes. These flexible strips often come with a control box that serves as the brain of the operation.
Smart LED bulbs represent another category, designed to integrate with home automation systems and controlled primarily through smartphone applications. These bulbs connect via WiFi or Bluetooth and rarely depend solely on physical remotes. RGB LED controllers, often used for color-changing setups, typically include both remote and manual control options built into the control box itself.
Finally, some LED systems feature integrated touch controls or physical buttons directly on the fixture or power adapter. Identifying which type you have will determine which methods below will work best for your situation.
Tools and Materials You’ll Need
- LED bulb or fixture with remote control
- Smartphone or tablet with WiFi or Bluetooth capability
- Home assistant app (e.g., Google Home, Amazon Alexa)
- WiFi or Bluetooth-enabled hub (optional)
Safety Precautions
Working with electrical components always requires attention to safety protocols. Before attempting any hands-on solutions, ensure your LED lights are unplugged from the power source or that the circuit breaker controlling them is switched off. While LED systems operate at low voltages, the power adapters they connect to use standard household current.
Never attempt to open or modify sealed electrical components unless you’re qualified to do so. If your LED system shows any signs of damage such as exposed wiring, burning smells, or scorch marks, discontinue use immediately and consult a professional electrician. When handling control boxes or power adapters, make sure your hands are completely dry to prevent any risk of electrical shock.
Keep in mind that repeatedly plugging and unplugging devices to turn them on and off can wear out both the plug and the socket over time. Always use gentle, controlled movements when connecting or disconnecting power. If you’re working with LED strips mounted in hard-to-reach places, use a stable ladder or step stool rather than stretching or balancing precariously.
7 Simple Steps on How to Turn on LED Lights Without Remote
Step 1: Locate the Control Box
The control box is your primary alternative to the remote control, and it’s typically installed between your LED strip and the power adapter. This small rectangular device usually measures between two and four inches and will have wire connections on both ends. Start by tracing the wires from your LED light strip back toward the power source.
In most installations, you’ll find the control box mounted on a wall, tucked behind furniture, or secured to a surface near where the LED strips begin. The box may be hidden from view for aesthetic reasons, so check behind mounted surfaces or inside cable management channels. Some control boxes are integrated directly into the power adapter, forming a single unit.
Once located, examine the control box carefully. Many models feature small buttons or touch-sensitive areas on their surface, though these might not be immediately obvious. Look for any raised sections, small circular indentations, or labeled areas that might indicate control buttons. The most common button arrangements include a power button, brightness adjustment buttons, and mode selection buttons.
Step 2: Use the Manual Control Buttons
After identifying your control box, familiarize yourself with any physical buttons it contains. Most LED control boxes include at least a power button, typically marked with the universal power symbol or simply labeled “ON/OFF.” Press this button firmly to toggle your lights on or off.
If your control box has multiple buttons, experiment with each one to understand its function. Brightness buttons usually display plus and minus symbols or up and down arrows. Mode buttons often cycle through pre-programmed lighting effects like flashing, fading, or color transitions. Some advanced control boxes include dedicated color buttons that allow you to select specific colors without needing the remote.
The tactile feedback from these buttons may vary. Some provide a distinct click, while others use touch-sensitive technology that responds to finger pressure without any mechanical movement. If the buttons seem unresponsive, try pressing firmly for a full second, as some systems require a sustained press to register input. Keep in mind that certain control boxes may require you to hold buttons for several seconds to access specific functions or enter programming modes.

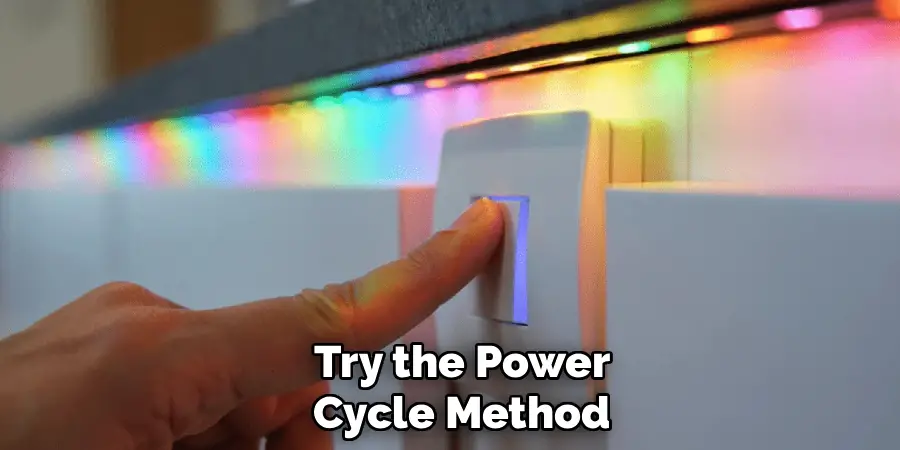
Step 3: Try the Power Cycle Method
When manual buttons aren’t available or aren’t working, the power cycle method offers a reliable alternative. This technique involves turning your LED lights on and off using the main power source in a specific sequence. Start by unplugging the power adapter from the wall outlet completely.
Wait for approximately ten seconds to allow the system to fully power down and clear any stored states. Then plug the power adapter back in. Many LED systems are programmed to turn on automatically when power is restored, illuminating at their default settings. If your lights don’t turn on immediately, try unplugging and replugging one more time.
Some LED systems include memory functions that remember their last state before power is cut. In these cases, if your lights were on when you unplugged them, they’ll turn on again when reconnected. Conversely, if they were off, they’ll remain off until you use another control method. Experiment with this behavior to understand how your specific system responds to power cycling. While this method works well for basic on/off control, it typically won’t allow you to adjust brightness or change colors without additional steps.
Step 4: Install the Manufacturer’s App
Modern LED lighting systems increasingly offer smartphone app control as a standard feature. Begin by checking the packaging or instruction manual for your LED lights to identify the manufacturer and model number. Search your smartphone’s app store using the manufacturer’s name followed by keywords like “LED control” or “smart light.”
Download and install the official app from the verified publisher to avoid security risks from third-party applications. During installation, the app will request various permissions such as Bluetooth, WiFi, or location access. These permissions are typically necessary for the app to detect and communicate with your LED system.
After installation, open the app and follow the setup wizard. Most apps will guide you through connecting your smartphone to your LED lights, which usually involves putting the lights into pairing mode. This pairing process varies by manufacturer but often requires pressing and holding a button on the control box or power cycling the lights in a specific pattern. Once connected, the app will provide full control over your lighting, including power, brightness, colors, and effects, essentially replacing your physical remote with a virtual one.
Step 5: Connect Via Bluetooth or WiFi
If your LED system supports wireless connectivity, establishing this connection opens up convenient control options. For Bluetooth-enabled systems, ensure Bluetooth is activated on your smartphone, then open the manufacturer’s app. The app should automatically scan for nearby devices, displaying your LED lights in a list of available connections.
Select your LED system from this list and follow any prompts to complete the pairing process. Some systems require you to enter a PIN code, typically “0000” or “1234,” though this information should be in your product documentation. Bluetooth connections work well within a range of about 30 feet, though walls and other obstacles can reduce this distance.
WiFi-enabled LED systems require a connection to your home network. After installing the manufacturer’s app, navigate to the device addition or setup section. The app will typically instruct you to put your LED controller into pairing mode, then temporarily connect your phone to a WiFi network broadcast by the LED system itself. Once this temporary connection is established, you’ll enter your home WiFi credentials, allowing the LED system to join your main network. WiFi connections offer the advantage of remote control from anywhere with internet access, not just within your home.
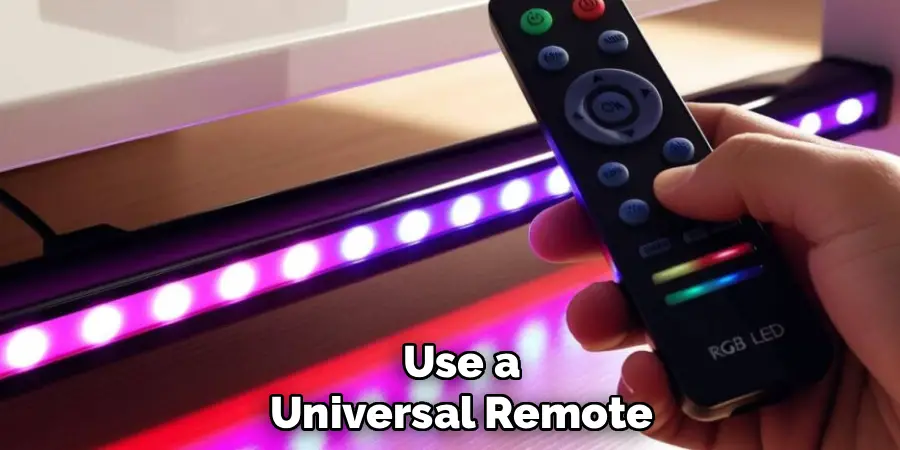
Step 6: Use a Universal Remote
If you have a universal remote control lying around from other electronics, it may be compatible with your LED lights. Universal remotes designed for LED lighting systems are available at most electronics stores and online retailers, typically ranging from $10 to $30. These remotes work with infrared or radio frequency signals that are standardized across many LED manufacturers.
To use a universal remote, you’ll first need to put it into programming mode according to its instructions. This usually involves holding down a specific button combination until an indicator light flashes. Then point the remote at your LED control box and press the power button. If the lights respond, you’ve successfully paired the universal remote. If not, try the next code in the universal remote’s programming sequence.
Some universal remotes come pre-programmed with codes for popular LED light brands. Consult the universal remote’s manual for a code list, then enter the appropriate code for your LED brand. Be patient during this process, as you may need to try multiple codes before finding one that works. Once successfully programmed, the universal remote should provide the same functionality as your original remote, including power control, brightness adjustment, and color selection.
Step 7: Install a Physical Wall Switch
For a permanent solution that doesn’t rely on remotes, apps, or control boxes, consider installing a physical wall switch. This option requires some basic electrical knowledge, though it’s straightforward for anyone comfortable with simple home improvement projects. The switch gets installed in the power line feeding your LED system, giving you standard on/off control like any traditional light switch.
Purchase a wall switch rated for the voltage and amperage of your LED system, which you can find on the power adapter’s label. Turn off the circuit breaker controlling the outlet or circuit where your LED lights are plugged in. Install the switch according to the manufacturer’s instructions, ensuring all connections are secure and properly insulated.
This method works exceptionally well for permanently installed LED strip lighting in kitchens, closets, or under cabinets. While a physical switch provides reliable on/off control, it won’t offer the advanced features like dimming or color changing that remotes and apps provide. However, many users find that basic on/off control meets their needs, and the simplicity and reliability of a physical switch outweigh the lost features. If you’re uncomfortable working with electrical wiring, hire a licensed electrician to install the switch safely and in compliance with local building codes.
Following these steps on how to turn on LED lights without remote can definitely help you in situations where your remote is lost or not working. However, there are also other options available for controlling your LED lights without a remote.
Tips for Smooth Operation
Maintaining your LED system properly ensures reliable operation even without the original remote. Keep the control box accessible and dust-free, as accumulated dust can interfere with button responsiveness. If your LED system uses Bluetooth or WiFi connectivity, keep your router firmware updated and maintain a strong signal in the area where your lights are installed.
Periodically check all wire connections, ensuring they remain secure and haven’t loosened over time. Loose connections can cause intermittent operation or complete failure. Create a dedicated folder on your smartphone for lighting control apps and keep them updated to the latest versions, as manufacturers frequently release updates that improve functionality and fix bugs.
Troubleshooting Common Issues
When your LED lights won’t turn on using any of the methods described, start with the most basic troubleshooting. Verify that the power outlet is functioning by plugging in another device. Check that the power adapter’s indicator light is on, confirming it’s receiving electricity and functioning properly.
If the control box buttons feel unresponsive, they may require cleaning. Gently wipe the surface with a slightly damp cloth and ensure it’s completely dry before attempting to use it again. For connectivity issues with apps, try deleting the device from the app and re-pairing it from scratch. This reset often resolves communication problems.
Sometimes LED systems enter a locked or protected state after power surges or irregular power cycles. Consult your product manual for reset instructions, which typically involve holding specific button combinations for extended periods. If all else fails, the issue may be a hardware failure in the control box or power adapter, requiring replacement parts from the manufacturer.
Creative Alternatives
Think beyond traditional control methods by exploring unexpected solutions. Smart plugs offer an affordable way to add app and voice control to any LED system. Simply plug your LED power adapter into a smart plug, then control the power to your entire lighting system through the smart plug’s app or voice commands. While this method only provides on/off control, it works universally regardless of your LED system’s brand or features.
For those comfortable with technology, programmable timers can automatically turn your LED lights on and off at scheduled times. This solution works particularly well for accent lighting or holiday decorations that you want operating during specific hours without manual intervention. Mechanical or digital timers are available at hardware stores for $10-30 and require no special setup beyond setting your desired schedule.
Some enthusiasts even create custom control solutions using Arduino or Raspberry Pi microcontrollers, programming these devices to send the appropriate control signals to LED systems. While this approach requires technical knowledge and programming skills, it offers unlimited customization potential for those willing to invest the time.
Frequently Asked Questions
Q: Can I Use Any Remote with My LED Lights?
No, not every remote will work with every LED light system. LED lights typically respond to specific infrared or radio frequency signals that vary by manufacturer and model. However, universal remotes designed specifically for LED lighting systems can work with many brands after proper programming.
These universal remotes come with instructions for programming them to work with different manufacturers’ protocols. If you’ve lost your original remote, your best options are purchasing a replacement remote from the original manufacturer, buying a universal LED remote, or using the manufacturer’s smartphone app if available. Some experimentation with universal remotes may be necessary to find one compatible with your specific LED system.
Q: Why Won’t My LED Lights Respond to the Control Box Buttons?
Several factors can cause control box buttons to become unresponsive. The most common issue is that the buttons have accumulated dirt, dust, or moisture that interferes with their operation. Try cleaning the control box surface gently with a dry cloth, then test again. If the control box has been exposed to humidity or moisture, allow it to dry completely in a well-ventilated area before testing.
Another possibility is that the control box has entered a locked or sleep mode, which some models implement as a safety feature. Unplugging the entire system for 30 seconds, then plugging it back in, can often reset the control box to normal operation. If the buttons still don’t work after these steps, the control box itself may have failed and require replacement from the manufacturer.
Q: Are There Any Risks to Constantly Unplugging LED Lights to Control Them?
While using the power cycle method occasionally won’t cause immediate problems, relying on it as your primary control method does carry some long-term risks. Repeatedly plugging and unplugging electrical connections causes physical wear on both the plug prongs and the outlet receptacle, potentially leading to loose connections over time.
Loose connections can create arcing, which generates heat and poses a fire hazard. Additionally, the electronic components inside LED power adapters and control boxes are designed for a limited number of power cycles. Excessive power cycling may shorten the lifespan of these components. If you find yourself regularly using the power cycle method because you lack other control options, consider investing in a universal remote, using the manufacturer’s app, or installing a wall switch as a more permanent and safer solution for daily operation.
Conclusion
Losing your LED light remote doesn’t mean losing control of your lighting. As we’ve explored throughout this guide, modern LED systems offer numerous alternative control methods, from physical buttons on control boxes to sophisticated smartphone apps and voice control integration. Each method has its advantages, whether you prioritize convenience, reliability, or advanced features.
The key is understanding your specific LED system and identifying which control methods it supports. Start with the simplest solution, such as locating manual buttons on your control box, then progress to more advanced options like app installation or universal remotes if needed. Remember that proper maintenance and occasional troubleshooting can keep your LED lights operating smoothly for years to come.
Ready to take back control of your lighting? Start by locating your LED control box today and testing which buttons it offers. If you’re ready for a more permanent solution, download your manufacturer’s app or browse universal LED remotes to find one that fits your needs and budget. Don’t let a missing remote keep you in the dark—you now have the knowledge to illuminate your space on your own terms. Thanks for reading this guide on how to turn on LED lights without remote.
Rick is a handyman who grew up helping his dad with his business. He learned a lot from him about how to fix things, and also about how to work hard and take care of business. These days, Rick is still into fixing things- only now, he’s doing it for a living.
Rick is always looking for new ways to help people grow and develop. That’s why he started contributing to this blog: to share all his experience and knowledge so that he can help people who are interested in DIY repair.