

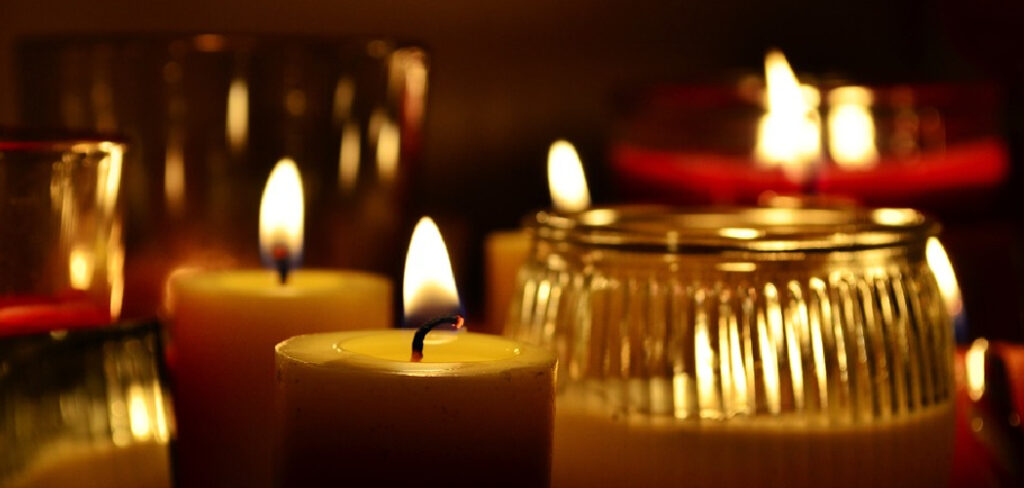
There’s something about dream candles that makes them so special. Maybe it’s because they allow you to bring a few dreams into the real world, or maybe it’s because they’re just so darn fun to make. No matter what the reason, dream candles are a great way to relax and enjoy some time for yourself. In this article, we’ll show you how to make dream candles using simple ingredients that you can find at home. So please sit back, relax, and let’s get started!
What Causes Candlewick to Smoke?
There are a few reasons why your candlewick might smoke. The most common reason for a candle wick to smoke is that the flame is too big. If the flame on your candle is too big, it will cause the wax to melt too quickly and produce a lot of soot. Another reason why your candlewick might smoke is that there is too much wax on the wick. If there is too much wax on the wick, it will cause the flame to flicker and produce a lot of soot.
Additionally, if your candle is placed in a drafty area, this can also cause the candlewick to smoke. The other main reason for a candlewick to smoke is that the wick is too long. If the wick is too long, it will cause the flame to be too big and produce a lot of soot. Lastly, if you use a lower-quality wax, this can also cause your candlewick to smoke.
Benefits of Making Dream Candles
There are many benefits of dream candles. One of the main benefits is that they can help you relax and fall asleep. If you have trouble sleeping, dream candles can be a great way to help you relax and fall asleep. Additionally, dream candles can also help you remember your dreams. If you forget your dreams, dream candles can help you remember them. Another benefit of dream candles is that they can help you manifest your dreams.
If you have a dream that you want to come true, dream candles can help you manifest that dream. Dream candles can also help you with stress relief. Dream candles can help you relax and feel better if you’re stressed out. Lastly, dream candles can also help you connect with your subconscious mind. If you want to connect with your subconscious mind, dream candles can help you do that.

Things You’ll Need
For this project, you’ll need the following supplies:
- 1 pound of beeswax
- 1 cup of jojoba oil
- 1 tablespoon of dried lavender
- 1 tablespoon of dried chamomile
- 1 teaspoon of vanilla extract
- 30 drops of lavender essential oil
- 30 drops of chamomile essential oil
Step by Step How to Make Dream Candles
1. Choose Your Candle Type
The first step is to choose the type of candle you want to make. There are two main types of candles: paraffin wax candles and beeswax candles. Paraffin wax is a type of petroleum-based wax, and beeswax is a natural wax made by bees. So beeswax is the way to go if you’re looking for a natural option. However, paraffin wax is a good choice if you’re looking for a cheaper option.
2. Choose Your Container
The next step is to choose your container. You can use any container you want, but we recommend using a glass container. Glass containers are best because they’re easy to clean and won’t absorb the wax scent. Avoid using plastic containers because they can melt when exposed to heat.
3. Choose Your Wick and Mold
The next step is to choose your wick and mold. You can use any wick you want, but we recommend using a cotton wick. Cotton wicks are best because they’re easy to light and don’t produce much soot. For the mold, you can use any mold you want. We recommend using a silicone mold because they’re easy to use and comes in various shapes and sizes. Avoid using aluminum molds because they can react with the wax.
4. Melt the Wax
The next step is to melt the wax. Using beeswax, you can melt it in a double boiler. First, fill the bottom pot of the double boiler with water and bring it to a boil. Then, place the beeswax in the double boiler’s top pot and on the boiling water. Stir the wax until it’s completely melted. If you’re using paraffin wax, you can melt it in a saucepan. Place the wax in the saucepan and heat it over low heat until it’s melted. Avoid using high heat because it can cause the wax to smoke.

5. Add the Oil
Once the wax is melted, it’s time to add the oil. This is because oils help to keep the wax from hardening too quickly. If you’re using beeswax, add the jojoba oil and stir until it’s combined. If you’re using paraffin wax, add the mineral oil and stir until it’s combined. First, add the jojoba oil or mineral oil to the melted wax. Then, add the essential oils and stir until they’re combined. Avoid adding too much oil because it can make the candles difficult to light.
6. Add the Fragrance
The next step is to add the fragrance. This is completely optional, but it can make your candles smell great. If you’re using beeswax, add the vanilla extract and stir until it’s combined. If you’re using paraffin wax, add the fragrance oil and stir until it’s combined. First, add a small amount of fragrance and then smell the wax. If you want it to be stronger, add more until it’s at the desired strength. Avoid adding too much, as this can make the candle unpleasant.
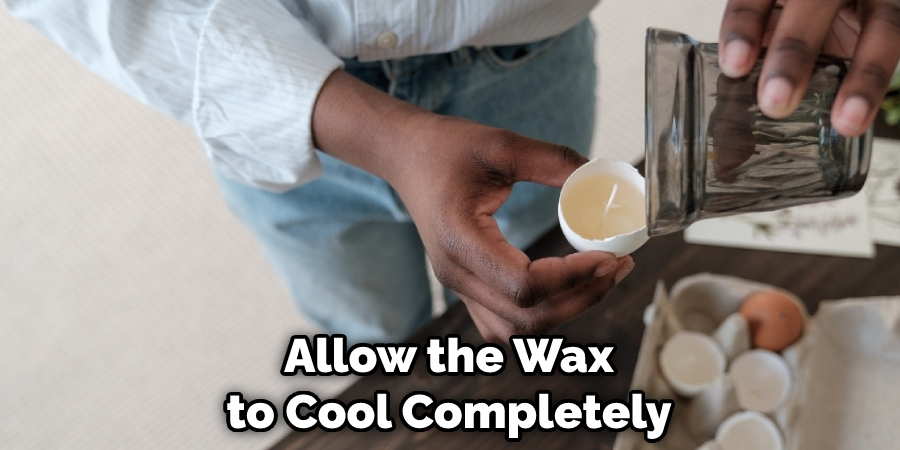
7. Pour the Wax
Once the wax has melted, you’re ready to pour it into the container. If you’re using a glass container, be sure to pour slowly so that the wax doesn’t crack the glass. Fill the container until it’s about ¾ full. Then, place the wick in the center of the container and allow the wax to cool completely. If the wax cools too quickly, you can place the container in the refrigerator for a few minutes. Avoid using the freezer, as this can cause the wax to crack.
8. Remove the Candle
Once the wax has cooled, it’s time to remove the candle from the mold. This is because the wax will be very hard and difficult to remove the candle. First, place the mold in the freezer for about 15 minutes. Then, remove the mold from the freezer and turn it upside down. The candle should easily fall out of the mold. If it doesn’t, you can place the mold back in the freezer for a few more minutes.
9. Trim the Wick
The next step is to trim the wick. This is because the wick will be too long and will make the candle difficult to light. First, find a sharp pair of scissors. Then, cut the wick to be about ¼ inch from the wax. Be sure to trim the wick before each use. Avoid trimming the wick too short, as this can make the candle difficult to light.
10. Test Your Candle
Once you’ve made your candles, it’s time to test them out. First, find a dark room. Then, light the candle and observe the flame. The flame should be about ½ inch tall. If it’s too high, the candle will burn too quickly. If it’s too low, the candle will burn too slowly. Try to avoid using a windy area, as this can cause the flame to extinguish.
11. Label Your Candle
The next step is to label your candle. This is so you can remember what fragrance you used. Simply write the fragrance’s name and date on a piece of paper and affix it to the bottom of the candle. Using a glass container, you can write directly on the bottom with a permanent marker.
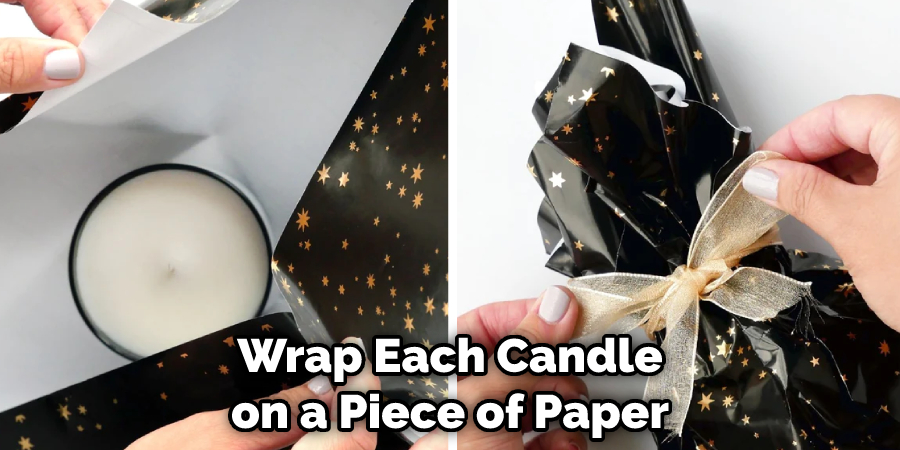
12. Store Your Candles
Once you’re done making your candles, it’s time to store them. First, find a cool, dry place. Then, wrap each candle on a piece of paper and place them in a box. Avoid storing them in an area where they will be exposed to sunlight or heat, as this can cause the wax to melt.
How Much Does It Cost to Make a Candle?
The cost of making a candle depends on the type of wax you use. For example, if you’re using beeswax, it will be more expensive than if you’re using paraffin wax. The price also depends on the type of container you use and the fragrance you add. Generally speaking, it costs about $10 to make a candle.
Conclusion
So there you have it! Now you know how to make dream candles. Just follow the steps above, and you’ll be well on making beautiful candles that smell great. With a little practice, you’ll be able to make perfect candles for any occasion. Thanks for reading!
You Can Check It Out To Boil in Instant Pot Without Lid