

Chime candles are easy to make and provide a soothing ambiance to any setting. This tutorial will teach you how to make chime candles using just a few simple ingredients. These candles are perfect for use in any house and make great gifts for friends and family. So gather your supplies and get ready to create some beautiful chime candles!
What Causes a Chime Candle to Make Its Sound?
The vibration of the metal chimney causes the sound produced by a chime candle. As the flame flickers, the heat from the wax melts the metal. This, in turn, creates a small opening that allows air to enter the chimney. The air then vibrates the metal, producing the characteristic sound of a chime candle.
Another contributing factor to the sound produced by a chime candle is the size of the chimney. A smaller chimney will create a higher pitch, while a larger chimney will create a lower pitch. Additionally, the thickness of the metal will also affect the sound produced.
Thicker metal will create a richer sound, while thinner metal will create a higher-pitched sound. The other element that affects the sound of a chime candle is the type of metal used. Different metals will create different sounds when the flame heats them. Lastly, the environment in which the candle is burned will also affect the sound produced.
For example, burning a chime candle in a room with hardwood floors will create a different sound than if the candle were burned in a room with carpeting.

Why Do People Like to Burn Chime Candles?
There are many reasons why people enjoy burning chime candles. For some, the sound of the chiming candle is soothing and helps to create a relaxing atmosphere. For others, the sound of the candle is a reminder of happier times.
Regardless of the reason, chime candles are enjoyed by many and make a great addition to any home. Additionally, chime candles make great gifts for any occasion. Another great thing about chime candles is that they come in various sizes, shapes, and colors. This allows you to find the perfect candle to match your decor or the personality of the person you are gifting it to.
Finally, chime candles are relatively inexpensive and easy to find. You can purchase them at most home goods stores or online.
Step by Step How to Make Chime Candles
1. Gather Supplies
The first step is to gather all of the supplies you will need. For this project, you will need the following:
- 1 pound of beeswax
- 1 teaspoon of Stearic Acid
- Candle Wicks
- Essential Oils (Optional)
- A Double Boiler
- A Glass Container
- A Metal Chimney
Gather all of your supplies before beginning the project. This will make the process go much smoother. If you have never worked with beeswax before, it is important to note that it can be quite messy. It is a good idea to work in an area that can easily be cleaned, such as a kitchen counter or table. Avoid working in an area with carpeting or on any surface that is difficult to clean.
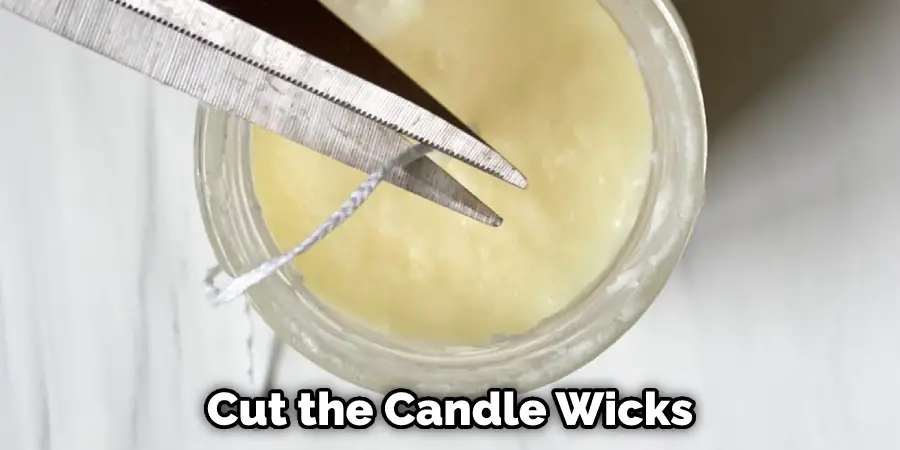
2. Cut Candle Wicks
The next step is to cut the candle wicks. You will need one wick for each candle you plan on making. The wick length will depend on the candle size you are making. For a small candle, a wick that is 6 inches long will suffice. For a larger candle, you will need a wick that is 12 inches long. First, measure and mark the desired length with a pencil to cut the wicks.
Then, use scissors to cut the wicks at the marked line. Once all of the wicks are cut, set them aside. Try to avoid handling the wicks too much, as this can cause them to become frayed.
3. Melt beeswax
The next step is to melt the beeswax. This can be done in a double boiler or in a glass container placed in a pot of boiling water. If you use a double boiler, fill the bottom pot with water and then place the beeswax in the top pot.
If you use a glass container, place the beeswax in the container and then place the container in a pot of boiling water. In either case, be sure to melt the beeswax on low heat to avoid burning it. Once the beeswax is melted, add the stearic acid and stir until it is fully dissolved. Avoid getting any water in the beeswax, as this can cause it to harden.
4. Add Color and Scent (Optional)
If you want to add color or scent to your candles, now is the time to do so. To add color, first, choose the desired shade. Then, add a small amount of beeswax dye and stir until it is fully dissolved. For scent, add a few drops of essential oil and stir until evenly distributed.
Note that you do not have to add color or scent to your candles. If you prefer, you can leave them natural. Avoid adding too much color or scent, as this can cause the candles to smoke when burned.
5. Pour Beeswax into Chimney
Once the beeswax is melted, and the desired color and scent are added, it is time to pour the wax into the chimney. First, place the metal chimney on a flat surface. Then, carefully pour the beeswax into the chimney, being sure to fill it to the top. Avoid pouring the wax too quickly, as this can cause it to splatter. Once the chimney is full, set it aside and allow the wax to cool and harden.

6. Insert Wick into Chimney
Once the wax has cooled and hardened, it is time to insert the wick. First, find the center of the wax and make a small indentation with your finger. Then, take the wick and insert it into the indentation, being sure that the top of the wick is level with the top of the wax.
Once the wick is in place, use your fingers to straighten it out and ensure it is centered. Try to avoid handling the wick too much, as this can cause it to become frayed.
7. Trim Wick
Once the wick is in place, trim it to the desired length. For a small candle, the wick should be trimmed to 1/2 inch. For a larger candle, the wick should be trimmed to 1 inch. First, use scissors to cut the wick at the desired length. Then, use a lighter to singe the end of the wick. This will help to prevent it from fraying. Try to avoid handling the wick too much, as this can cause it to become frayed.
8. Light a Candle and Enjoy
The final step is to light your candle and enjoy the soft, calming light it emits. To light the candle, use a lighter or a match. First, hold the flame to the wick and let it catch fire. Then, gently blow on the flame to help it grow. Once the candle is lit, sit back and enjoy the soothing light and scent. If the candle starts to smoke, blow it out and trim the wick.

Tips and Warnings on How to Make Chime Candles
Tips:
- Be sure to use high-quality beeswax for the best results.
- If you want to add color or scent to your candles, use a beeswax dye or essential oil specifically designed for candles.
- Try to avoid adding too much color or scent, as this can cause the candles to smoke when burned.
- Be sure to trim the wick to the desired length before lighting the candle.
Warnings:
- Be sure to melt the beeswax on low heat to avoid burning it.
- Avoid getting any water in the beeswax, as this can cause it to harden.
- Use caution when handling hot beeswax.
- Do not leave the candles unattended while burning.
How Much Does It Cost to Make a Chime Candle?
The cost of materials for a small chime candle is approximately $6.00. The cost of materials for a large chime candle is approximately $10.00. The cost of labor is approximately $0.50 per hour. Therefore, the total cost of a small chime candle is approximately $6.50. The total cost of a large chime candle is approximately $10.50.
You Can Chack It Out Make Champagne Scented Candle
Conclusion
So there you have it, a complete guide on how to make chime candles. Follow these steps, and you’ll be sure to end up with a beautiful, long-lasting candle. With a little practice, you’ll be able to make perfect candles for any occasion. If you have any questions or tips of your own, be sure to leave a comment below. Happy candle-making!
You Can Chack It Out Make Dream Candles