

It’s no secret that Luminara candles are some of the most popular on the market. They boast a realistic flame that doesn’t require maintenance or care. However, even the best products can have their issues from time to time. If you’re experiencing problems with your Luminara candle, don’t worry – we’re here to help! This post will walk you through how to fix a luminara candle. Keep reading to learn more!

What Causes Luminara Candles to Stop Working?
There are a few different reasons why your Luminara candle might stop working. The most common issue is that the batteries need to be replaced. If your candle is flickering or the flame is weak, this is likely the problem. Another common issue is that the wick has burned down too low.
This is because the wick needs to be a certain length for the candle to work properly. The flame will be weak or nonexistent if the wick is too short.
Additionally, if the wick is crooked, this can also cause problems. The other major reason why Luminara candles stop working is because of a faulty bulb. This is much less common, but it can happen occasionally. Lastly, if there is any debris blocking the sensor, this can also cause problems.

Why It’s Important to Fix Your Luminara Candle
It’s important to fix your Luminara candle for a few different reasons. First and foremost, it’s simply a waste of money to throw away a candle that can be easily fixed. Additionally, if your Luminara candle is not working properly, it’s not safe. A weak or flickering flame can be a fire hazard, so fixing the issue as soon as possible is important. Another reason to fix your candle is that Luminara candles are designed to be used without any maintenance.
If you can’t get yours to work, something is likely wrong. If you ignore the problem, it will likely get worse over time. Finally, it’s frustrating to have a candle that doesn’t work properly. No one wants to deal with a faulty product, so fixing the issue is the best way to go.
Some Simple Ways How to Fix a Luminara Candle
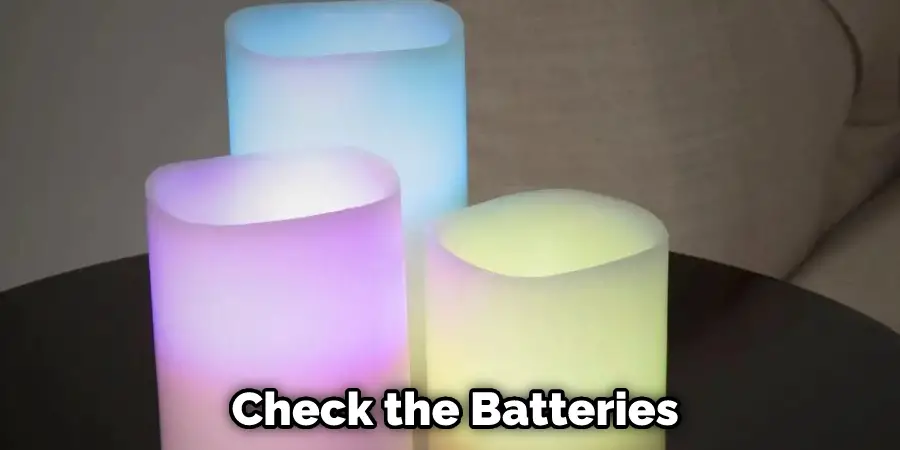
1. Check the Batteries
The first thing you should do when your Luminara candle stops working is to check the batteries. This is because dead or dying batteries cause most issues with Luminara candles. This is by far the most common issue, and it’s also the easiest to fix.
If your candle is flickering or the flame is weak, this is a good indication that the batteries need to be replaced. First, remove the batteries from the candle. Next, check to see if they are dead or dying. If so, replace them with new ones and see if that solves the problem. If not, move on to the next step.
2. Trim the Wick
If the batteries are not the problem, the next thing you should do is trim the wick. This is because a too-short wick is the second most common issue with Luminara candles. If the wick is too short, it will prevent the candle from working properly.
The flame will be weak or nonexistent if the wick is not the correct length. To fix this, first, blow out the candle. Next, use a wick trimmer to trim the wick down to about 1/4 inch. Once you’ve done that, light the candle and see if it works properly. If not, move on to the next step.
3. Check the Wick for Debris
If the wick is the correct length and the batteries are new, you next should check the wick for debris. This is because a clogged wick can prevent the candle from working properly. First, trim the wick to ˝ inch to fix this using sharp scissors. Next, remove any debris from the wick using a paper towel or cotton swab. Finally, ensure the Wick is positioned correctly in the candle’s center. If it is not, carefully reposition it.
4. Clean the Glass
Next, you should clean the glass if the wick is clear and positioned correctly. This is because dirty glass can prevent the light from shining through as brightly. Use a soft cloth and mild soap to clean the inside and outside of the glass.
First, wipe the inside of the glass to remove any residue that may be present. If there is any wax on the glass, you should be able to remove it easily with a paper towel. Next, clean the outside of the glass to give it a streak-free shine. Rinse it well so that no soap residue is left behind.

5. Clean the Sensor
You should clean the sensor if the glass is clean and the wick is trimmed and positioned properly. This is because a dirty sensor can prevent the candle from lighting. To clean the sensor, first, remove the glass and wick.
Then, use a cotton swab or toothpick to clean the debris from the sensor. You can try blowing into the sensor’s hole if the sensor is still not working. This will remove any dust that may be blocking the sensor. Avoid using water to clean the sensor, as this can damage it.
6. Tighten the Base
If the sensor is clean and the glass is streak-free, you should check to see if the base is loose. This is because a loose base can cause the flame to flicker. To fix this, first, remove the glass jar from the base.
Next, use a Phillips screwdriver to tighten the four screws that secure the base. After that, reattach the glass jar and test to see if the candle works properly. Avoid overtightening the screws, as this can strip the threads and damage the base.
7. Replace the Jar
If the base is tight and the sensor is clean, you should check to see if the jar is cracked. A cracked jar can allow air to enter and extinguish the flame. You can try to glue the jar back together. First, clean the surface of the jar with isopropyl alcohol. Next, apply clear epoxy glue to the crack.
Allow it to dry for 24 hours. Finally, screw the base back onto the jar. You will need to buy a new jar if the glue doesn’t hold. Avoid using super glue, as this can damage the jar.

8. Flip the Switch
If the jar is not cracked and the base is tight, you should check to see if the switch is in the “on” position. This is located on the side of the base and is easy to miss. If the switch is in the “off” position, the candle will not light. Try flipping the switch and then replacing the batteries to see if that does the trick.
9. Reset the Candle
Another thing you can try is resetting the candle. This Is done by gently pressing the wick down into the melted wax pool and then pulling it back up. Doing this a few times can help break any crusted wax that may prevent the wick from lighting. Avoid pressing the wick down too hard, as this can damage it.
10. Contact Customer Service
If you have tried all of the above and the candle still doesn’t work, you should contact customer service. They may be able to help you troubleshoot the problem or send you a replacement candle. Try to have your order number and date of purchase handy when you call.
Tips and Warnings on How to Fix a Luminara Candle
Tips:
- Be sure to have a clean, dry surface to work on.
- Use a cotton swab or toothpick to apply the adhesive.
- Be patient and give the adhesive time to dry completely before using the candle.
- Be sure to test the candle in a well-ventilated area.
- If the candle still doesn’t work, try resetting it by gently pressing the wick down into the melted wax pool and then pulling it back up.
Warnings:
- Never use water to clean the sensor, as this can damage it.
- Avoid overtightening the screws that secure the base, as this can strip the threads and damage the base.
- Be careful not to press the wick down too hard when resetting the candle, as this can damage it.
- Never leave a lit candle unattended.
- Keep candles out of reach of children and pets.
Conclusion
So there you have it! Now you know how to fix a Luminara Candle. Following the tips and warnings in this article, you can avoid damaging your candle and keep it working properly for years to come. With a little bit of care and attention, your Luminara Candle will give you years of enjoyment. Thanks for reading!
You Can Chack It Out Make Clay Candle Holders