

If you’ve ever had the unfortunate experience of looking up at your ceiling and seeing a huge gap around your ceiling light box that is full of dust or cobwebs, then you know how stressful it can be to try and figure out how to fix this problem. It’s not only unsightly but also potentially dangerous if left unchecked.
However, there are many different ways in which this issue can be remedied with just a few tools, materials, and some DIY know-how! In today’s blog post, we will walk through step-by-step instructions on how to hide gaps around a ceiling light box so that it looks good as new!
Needed Tools and Materials
Given below are the tools and materials you’ll need to successfully hide gaps around a ceiling light box:
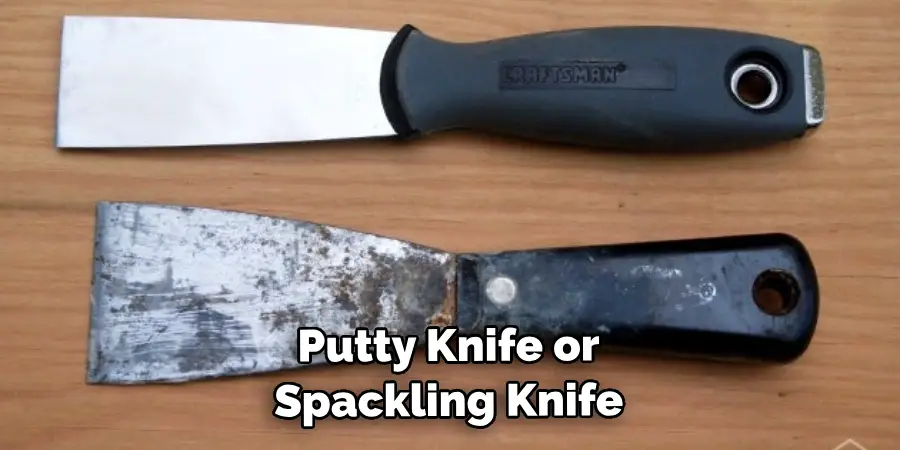
- Putty Knife or Spackling Knife
- Sandpaper
- Drywall Compound/Spackling paste
- Painter’s Tape
- Paint (optional)
11 Step-by-step Instructions on How to Hide Gaps Around a Ceiling Light Box
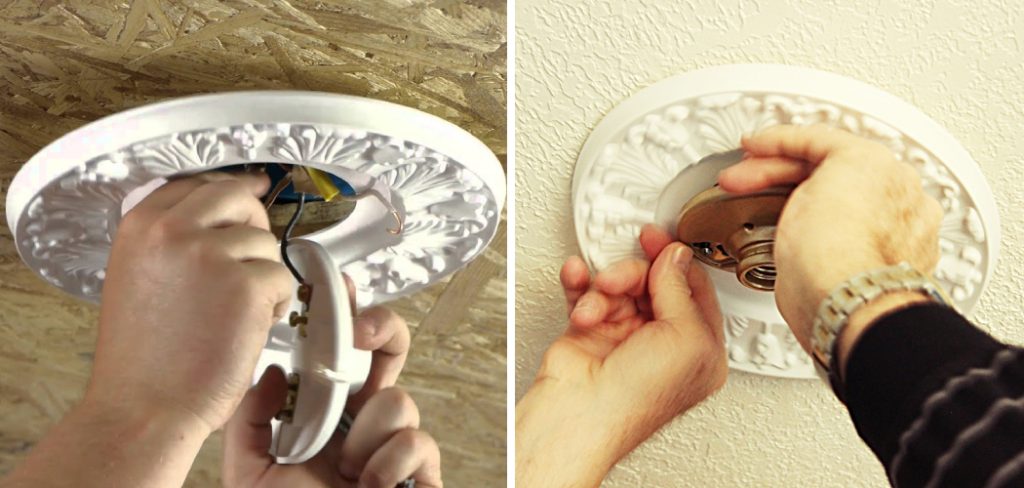
Step 1: Turn Off the Power
Before you begin this project, make sure to turn off the power at the circuit breaker. It’s an important safety precaution that you won’t regret taking. But also, make sure to double-check that the power is off by using a voltage tester on the light switch. Otherwise, you risk electric shock.
Step 2: Clean the Area Around the Light Box
Using a putty knife or spackling knife, carefully remove any cobwebs and dust from around the ceiling light box. Make sure to also clean off any paint chips that may have come loose due to moisture buildup in the area. Finally, use sandpaper to create a smooth surface for the spackling paste.
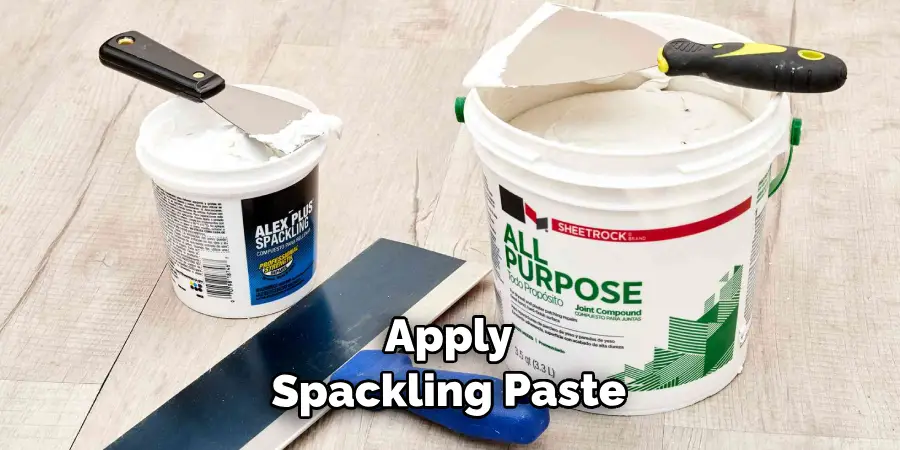
Step 3: Apply Spackling Paste
Once you’ve cleaned and prepped the area, it’s time to apply spackling paste. Using a putty knife or spackling knife, spread an even layer of paste over the gaps around the ceiling light box. Make sure to fill in any crevices and cover the entire area. This will ensure a smooth finish when you paint over it. You may need to apply several layers of spackling paste for a professional finish.
Step 4: Let It Dry
Let the spackling paste dry completely before moving on to the next step. Depending on the type of material you used, this could take anywhere from several hours to overnight. BUt, it is important that the paste be completely dry before you continue. Otherwise, the paint won’t adhere and may flake off. If you’re unsure, use a hair dryer on low to test the area.
Step 5: Sand the Area
Once the spackling paste has dried, use sandpaper to smooth out any irregularities on the surface. This will ensure a perfect finish when painting over it. If you feel that the area needs more spackling paste, you can apply a second layer and repeat steps 3 and 4. You can also opt to use a sanding block instead of sandpaper. It’s just a matter of personal preference. It’s important to make sure the area is completely smooth before painting.
Step 6: Apply Painter’s Tape
Before painting, be sure to apply painter’s tape around the ceiling light box. This will help protect the surrounding wall from any accidental drips or streaks. This step is especially important if you are using a darker color paint as it will be harder to remove any drips without damaging the wall. This also applies if you are going to use multiple colors on the same wall.
Step 7: Paint
Using a brush, roller, or sprayer, apply paint to the area around the lightbox. If you’re using multiple colors (e.g., for trim or accent walls), be sure to paint the darkest colors first and work your way down. You want to make sure all the colors blend together nicely. It’s also a good idea to do a few practice swatches on a piece of scrap wood or cardboard before starting.

Step 8: Let It Dry
Once you’re done painting, let it dry completely before moving on to the next step. This could take anywhere from several hours to overnight. But, it is important that the paint be completely dry before you continue. However, if you’re in a hurry, you can use a fan or hair dryer on low to speed up the drying process. It’s just a matter of personal preference.
Step 9: Remove Painter’s Tape
Carefully remove the painter’s tape from around the ceiling light box. If any paint has come off on the tape, use a damp cloth to clean it up. Anyhow, this step is important to ensure a pristine finish. This is also a good time to check for any drips or runs that may have occurred. If so, simply clean them up with a damp cloth or to ensure a smooth finish. It’s always better to be safe than sorry!
Step 10: Clean Up Any Excess Paint
Using a damp cloth, remove any excess paint that may have accidentally dripped down onto the wall or other surfaces. Be sure to also clean up any paint from the ceiling light box itself. You don’t want any paint residue left behind as it could affect the performance of your lighting. Although, if you’ve followed all the steps so far, this shouldn’t be an issue.
Step 11: Enjoy Your New Look!
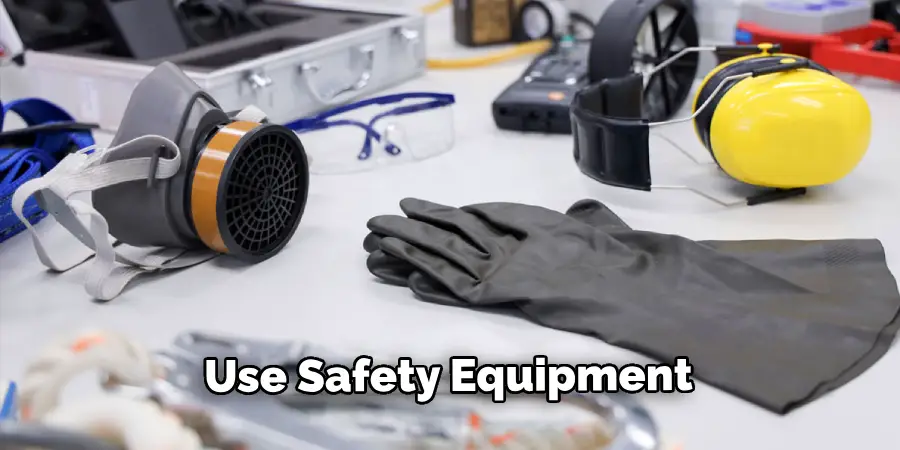
Now that the project is complete, you should have a beautiful and seamless finish around your ceiling light box with no more gaps or cobwebs in sight! Enjoy your new look and feel proud of your hard work. Always remember to use safety equipment and take all necessary precautions when dealing with electricity. It’s always better to be safe than sorry! But, that’s all there is to it.
With these simple steps, you now know how to hide gaps around a ceiling light box quickly and easily. To finish off your project, consider adding some decorative trim or molding around the edges for an extra touch of elegance! Whatever you choose, you’re sure to be pleased with the end result. Good luck!
Do You Need to Hire a Professional?
If you’re not comfortable attempting this project yourself, or if you don’t have the necessary tools and materials, then it may be best to hire a professional. A qualified contractor can ensure that the job is done right the first time and that any potential hazards are taken care of. Plus, they often provide warranties on their work—something that could come in handy if any issues were to arise down the line.
No matter which route you choose, make sure to do your research and find someone who is experienced and trustworthy. With a little bit of effort, you can find a qualified professional who can help you with your project! Good luck!
Frequently Asked Questions
Q: How Long Does It Take to Hide Gaps Around a Ceiling Light Box?
A: It depends on the size of the gap and the complexity of the project. Generally speaking, it should take around a few hours to complete this job. This includes prepping the area, applying the paste, painting, and cleaning up.
Q: What Kind of Paint Should I Use?
A: It depends on your preference and what kind of finish you’re looking for. Most people opt for either flat or semi-gloss paint, as they provide a good balance of durability and aesthetics. However, if you’re looking for something more durable, consider using an eggshell or satin finish.
Q: Is It Necessary to Use Painter’s Tape?
A: Yes, painter’s tape is essential when painting around the ceiling light box. Without it, you run the risk of getting paint on nearby walls or other surfaces. Using painter’s tape will help ensure a clean and even finish.
Q: What Tools Do I Need to Hide Gaps Around a Ceiling Light Box?
A: You will need a putty knife or spackling knife, sandpaper, drywall compound or spackling paste, painter’s tape, and paint (optional). It’s also a good idea to have a voltage tester on hand for safety.
Conclusion
If you’ve ever had the unfortunate experience of looking up at your ceiling and seeing a huge gap around your ceiling light box that is full of dust or cobwebs, then you know how stressful it can be to try and figure out how to fix this problem. It’s not only unsightly but also potentially dangerous if left unchecked.
However, there are many different ways in which this issue can be remedied with just a few tools, materials, and some DIY know-how! In today’s blog post, we will walk through step-by-step instructions on how to hide gaps around a ceiling light box so that it looks good as new!
About
Angela is the chief editor of Indoorense. She began her career as an interior designer before applying her strategic and creative passion to lifestyle and home.
She has close to 15 years of experience in creative writing and online content strategy for housekeeping and cleaning,home decorations as well as other efforts.
She loves her job and has the privilege of working with an extraordinary team. She lives with her husband, two sons, and daughter in Petersburg. When she’s not busy working she spent time with her family.