

When it comes to ensuring safe and clean drinking water, replacing your under-sink water filter cartridge is an important part of the process. Over time, sediment and other contaminants can build up in your filter cartridge, reducing its effectiveness as a purifier. Replacing the cartridge regularly is essential to keep your drinking water free from contaminants.
The advantages of replacing the water filter cartridge in an under-sink filtration system are manifold. Replacing the filter helps ensure that your drinking water is safe and free from contaminants like metals, pesticides, bacteria, and sediment.
It also extends the life of your unit – a well-maintained filter can last up to six months. Additionally, replacing the filter improves the taste and smell of your water – filters often remove chlorine, too. In this blog post, You will learn how to replace under sink water filter cartridge in detail.
How Often Should You Replace Your Under Sink Water Filter Cartridge?
It’s important to be aware of when your under-sink water filter cartridge needs to be replaced, as a dirty filter can lead to contamination and poor water quality. How often you should replace your filter depends on the filter you use, how much water is filtered through it, and the water quality in your area. Generally, it is recommended that you replace your filter every 6 to 12 months.
If you have a higher usage rate, the filter may need to be changed more often. You will also want to check the manufacturer’s guidelines and recommendations on how often the filter should be changed. This information can usually be found in the owner’s manual or the product website.
Tools You Will Need
- Screwdriver
- New filter cartridge (check your owner’s manual for the correct size)
- Pliers or adjustable wrench
- Bucket or container to contain water spillage during installation
- Pipe wrench or slip-joint pliers (if needed)
- Teflon tape (if needed)
- Basin wrench (if needed)
- Plumber’s putty (for re-sealing leaks)
- Replacement O-rings for the filter system head
- Clean cloth or paper towels
Step-by-step Instructions for How to Replace Under Sink Water Filter Cartridge
Step 1: Inspect the Water Filter Assembly
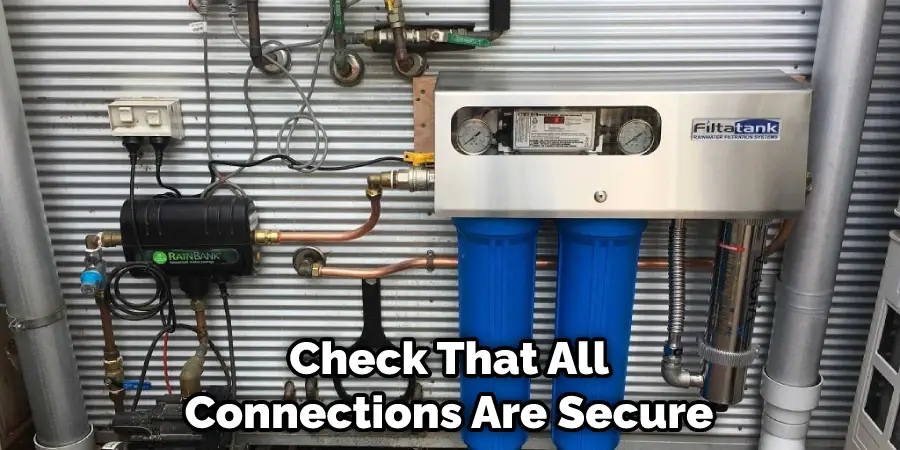
Start by inspecting the water filter assembly to ensure it is in good condition. Check that all connections are secure and there are no obvious signs of leaking or damage. If you have a shut-off valve for the water supply, turn it off before proceeding. You must turn off the main water supply if you do not have a shut-off valve.
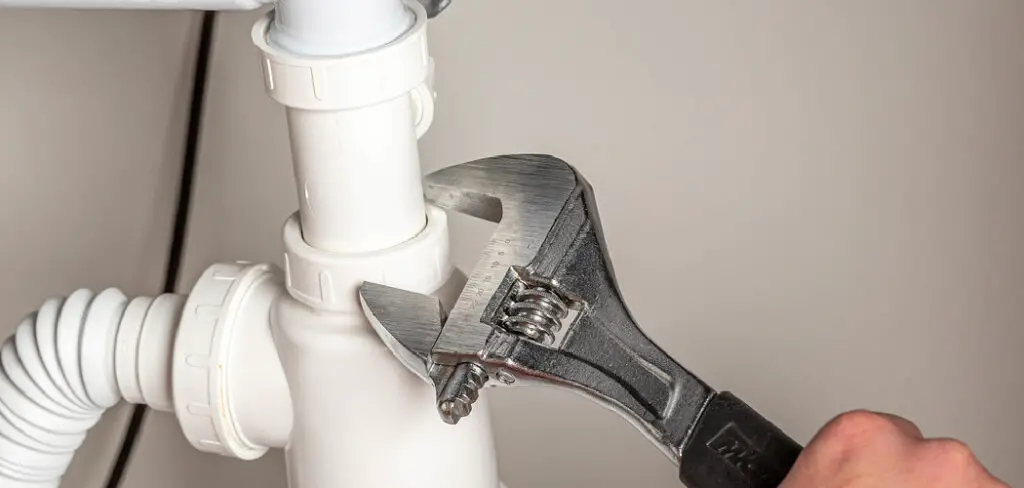
Step 2: Unscrew the Cartridge Housing
Once you have inspected the water filter assembly, you can unscrew the cartridge housing. Use a wrench as necessary to loosen and remove the housing. Be sure to note which way it needs to be re-installed to line up with the existing plumbing connections.
Step 3: Remove the Old Filter Cartridge
Take out the old filter cartridge and discard it. Make sure to wear gloves to protect your hands from any dirt or bacteria. Clean out the housing with a damp cloth or small brush. You can use a mild cleaning solution if needed, such as white vinegar diluted with water.
Step 4: Install the New Cartridge
Install the new cartridge into the housing and make sure it is secure. It should fit snugly without being too tight. If it does not fit, try a different brand or type of filter cartridge. Re-install the housing with the same orientation as before. Again, use a wrench to make sure it is tight and secure.
Step 5: Re-connect the Plumbing
Re-connect all plumbing connections, such as hoses, valves, and fittings. Use thread-sealing tape or pipe joint compound on any threaded connections. Tighten each connection securely. Turn on the water supply by opening the shut-off valve or turning on the main water supply. Check all connections to make sure they are not leaking.
Step 6: Flush Out the System
Run cold water through the filter assembly for a few minutes to flush out the system. This will help remove any debris or dirt that might have been left behind during installation. Test your new filter by running a few glasses of water through it. If the water flow is not as expected, you may need to adjust the filter settings. Once everything is working correctly, enjoy your clean and healthy water.

Following these steps will ensure that you replace your under-sink water filter cartridge correctly and safely. Be sure to check the manufacturer’s instructions for any specific instructions or safety warnings.
Safety Tips for How to Replace Under Sink Water Filter Cartridge
- Before starting the replacement process, turn off the water supply valve to avoid accidents.
- Ensure you have acquired the right filter cartridge and all necessary parts for replacement before beginning.
- Wear protective gloves and eye protection when handling sharp objects or tools, such as wrenches and screwdrivers.
- Unscrew the lid of the housing and discard the old filter cartridge.
- Place a towel over the open space to avoid water leakage while inserting the new filter cartridge.
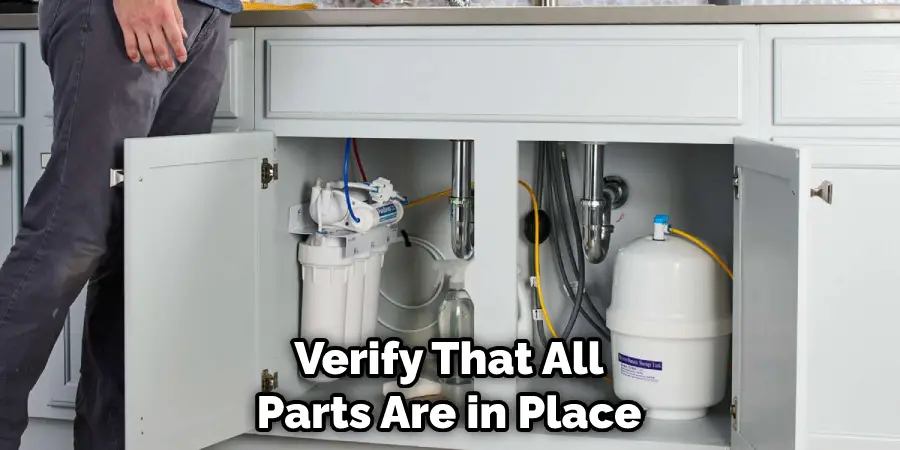
- Verify that all parts are in place, ensuring there is a good seal between the cartridges and housings before turning on the water supply valve again.
- After the filter cartridge is installed, flush out any debris or loose particles.
- Regularly check for leaking or other irregularities during and after installation to avoid further damage.
By following these eight safety tips, you can ensure that How to Replace Under Sink Water Filter Cartridge process goes smoothly and safely.
How Do You Properly Store and Maintain an Extra Under Sink Water Filter Cartridge?
- After replacing the under-sink water filter cartridge, store the extra cartridge in a cool and dry place.
- Make sure to keep the extra cartridge away from direct sunlight, which can cause it to degrade more quickly.
- If you live in a humid climate, consider storing the extra cartridge inside an airtight container or plastic bag to help prevent any moisture from getting inside.
- Check the extra cartridge periodically for signs of wear, including cracks and discoloration due to age or exposure to heat and direct sunlight.
- If you notice any damage, replace the cartridge immediately- even if it has not yet been used in your water filter system. This will ensure that you do not find yourself in a situation where the cartridge has disintegrated or otherwise failed to function correctly.
- Proper maintenance of your extra under-sink water filter cartridge is essential for it to last as long as possible and provide your family with safe, clean drinking water.
Check the manufacturer’s instructions or contact customer service for more information on properly caring for and storing your extra filter cartridge. Doing so will help you get the most out of your purchase and extend its lifespan.
How Often Should You Clean or Service Your Under Sink Water Filter System?
Regular maintenance and cleaning of your under-sink water filter system are essential to keep it running efficiently and effectively. How often you need to service the filter depends on how much water you use, the type of filter, and its capacity. Generally speaking, it’s a good idea for most systems to replace the cartridge every 6 to 12 months.
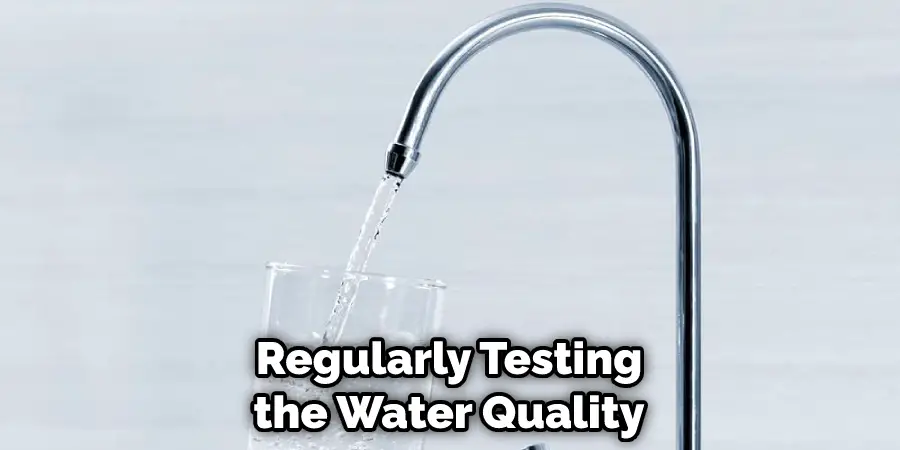
To ensure your filter system is in top condition, monitoring its performance by regularly testing the water quality coming through the filter is important. This may include checking for taste and odor and measuring things like pH, conductivity, and total dissolved solids (TDS). If you find the water quality to be unsatisfactory, it may be time to replace the filter cartridge.
In addition to regular maintenance and cleaning of your system, you should also perform an annual “deep clean” by disassembling the components and thoroughly scrubbing them with detergent or vinegar solution. This will help keep debris and other particles from building up and clogging the filter. And, of course, if it’s been several years since you last replaced your filter cartridge, it may be time to start the Replacement Under the Sink Water Filter Cartridge process.
Conclusion
One disadvantage of replacing a water filter cartridge under the sink is difficulty accessing it. Depending on the construction and layout of the sink, reaching and removing the filter can be difficult or even impossible without moving other fixtures out of the way. If a filter is not replaced often enough, mold or bacteria can accumulate in the system, leading to health risks.
In conclusion, replacing an under-sink water filter cartridge is a relatively simple and straightforward task. Taking a few moments to turn off the main water supply and disconnect the water line before removing the old filter will help ensure a safe and successful replacement process.
With the right tools, such as pliers, adjustable wrench, and channel lock pliers, removing and replacing the old filter with a new one is easy. I hope this article has been beneficial in learning how to replace under sink water filter cartridge. Make Sure the precautionary measures are followed chronologically.
Rick is a handyman who grew up helping his dad with his business. He learned a lot from him about how to fix things, and also about how to work hard and take care of business. These days, Rick is still into fixing things- only now, he’s doing it for a living.
Rick is always looking for new ways to help people grow and develop. That’s why he started contributing to this blog: to share all his experience and knowledge so that he can help people who are interested in DIY repair.