

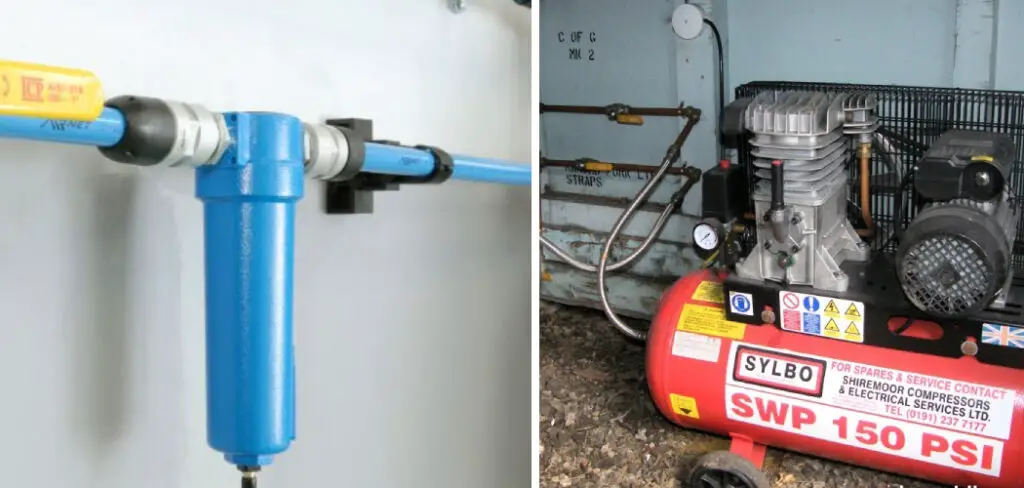
Installing a water separator on your air compressor is an important step in keeping your compressor running smoothly. A water separator removes moisture from the compressed air, preventing corrosion and other damage to the compressor. In this blog post, we’ll show you how to install water separator on air compressor and the benefits it provides. Read on for instructions!
What Causes Water in Air Compressors?
There are a few reasons why water might get into your air compressor. The most likely cause is that the air around your compressor is humid. When compressed, this humid air turns into water vapor, which can condense inside the compressor. This is why keeping your compressor in a dry, well-ventilated area is important.
Another possible cause of water in air compressors is leaking. If there are any leaks in your compressor, air can escape and allow moisture to enter. These leaks can be difficult to spot, so regularly check your compressor for any signs of leaks. Additionally, ensure that all the seals on your compressor are intact and not damaged.
The other potential cause of water in air compressors is condensation. This can happen when the compressed air cools, causing water vapor to condense and collect inside the compressor. Lastly, living in an area with hard water can also lead to water build-up inside your compressor.
Why Is It Important to Install a Water Separator on Air Compressor?
Installing a water separator on your air compressor is important for several reasons. First, installing a water separator will help to prevent corrosion inside your compressor. Additionally, it will help to extend your compressor’s life by preventing moisture damage.
A water separator will also help to keep your air compressor running smoothly by removing water from the compressed air. Another benefit of installing a water separator is that it will help to improve the quality of the air coming out of your compressor. This is because water vapor can cause the air to be less pure. Suppose you’re using your air compressor for painting or other applications where purity is important.
In that case, a water separator will help ensure that the air from your compressor is of the highest quality. Finally, a water separator can also help reduce the noise from your compressor. This is because water vapor can act as a sound absorber, so removing it from the compressed air will help reduce the noise from your compressor.
Step by Step How to Install Water Separator on Air Compressor
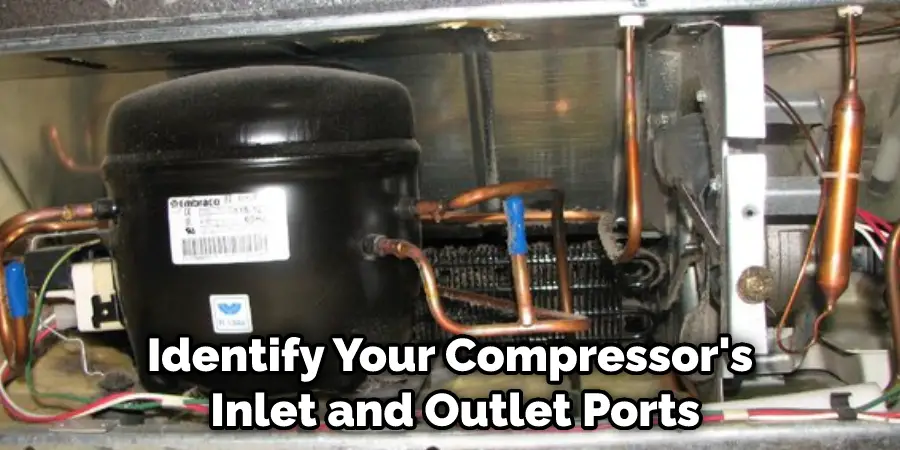
1. Identify the Inlet and Outlet Ports
The first step is to identify your compressor’s inlet and outlet ports. You’ll need to connect the water separator to these ports. The inlet port is where air enters the compressor, while the outlet port is where air exits the compressor. First, locate the air intake on your compressor to find these ports.
The inlet port will be located on the side of the air intake. Then, locate the air outlet on your compressor. The outlet port will be located on the side of the air outlet. Try to find ports that are easily accessible so that you can easily connect and disconnect the water separator. Avoid ports that are difficult to reach or hidden by other compressor parts.
2. Find a Suitable Location
Once you’ve identified the inlet and outlet ports, you’ll need to find a suitable location for the water separator. The separator should be placed as close to the inlet port as possible. This is because the separator will be more effective if it’s closer to the source of the moisture. However, you should also make sure that the separator is easily accessible so that you can easily connect and disconnect it. Avoid placing the separator in a difficult-to-reach location.
3. Prepare the Separator
Once you’ve found a suitable location for the separator, you’ll need to prepare it for installation. First, check the separator to see if it comes with any instructions. These instructions will likely include a list of the tools and parts that you’ll need for installation. Make sure you have all the required tools and parts before beginning the installation process. If the separator doesn’t come with instructions, you can find installation instructions online.
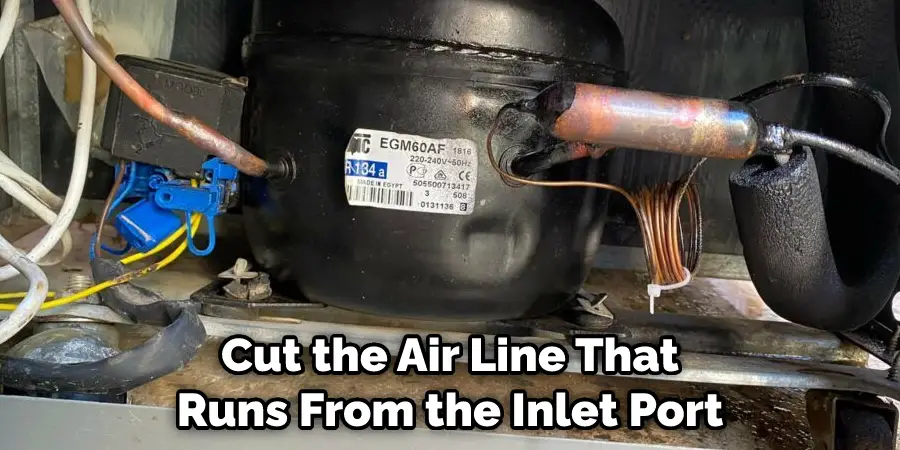
4. Cut the Air Line
After you’ve gathered the required tools and parts, you’ll need to cut the air line that runs from the inlet port to the outlet port. To do this, first locate the air line. Then, use a sharp knife or utility blade to cut the air line carefully. Make sure that you cut the air line straight so that it’s easier to reconnect later. If you’re not comfortable cutting the air line, you can ask a friend or family member to help you.
5. Install the Barb Connectors
The next step is to install the barb connectors. This is a pretty straightforward process, but there are a few things you need to keep in mind. First, make sure that the barbs are facing the right direction. Second, make sure that the O-rings are properly positioned. Third, make sure that the clamps are tight enough so that they don’t leak. First, insert the O-ring into the groove on the barb to install the barbs. Next, insert the barb into the fitting on the compressor. Finally, tighten the clamp around the barb.
6. Install the Water Separator
With the barb connectors installed, you’re now ready to install the water separator. This is crucial in keeping your air compressor free of water and other contaminants. First, find a suitable location for the separator. It should be close to the air compressor but not so close that it will get in the way of other components or tools. Once you have a location in mind, mark the holes for the mounting brackets. Next, drill the holes and secure the brackets in place. The separator should fit snugly into the brackets if everything is properly aligned.
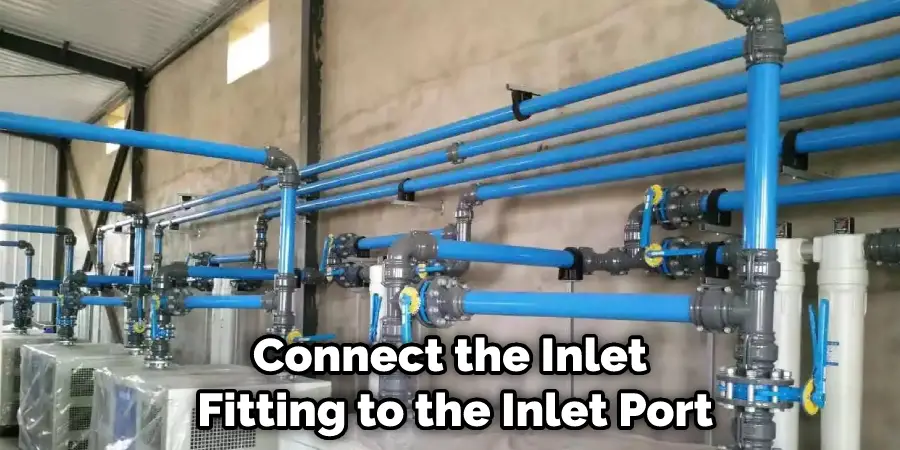
7. Connect the Inlet Fitting
Once you’ve cut the air line, you’ll need to connect the inlet fitting to the inlet port. To do this, first, locate the inlet port on your compressor. Then, locate the inlet fitting on the water separator. The inlet fitting will likely be located near the top of the separator. Next, align the inlet fitting with the inlet port. Then, use a wrench to tighten the inlet fitting. Ensure the fitting is tight so that air can’t leak out.
8. Connect the Outlet Fitting
After you’ve connected the inlet fitting, you’ll need to connect the outlet fitting to the outlet port. To do this, first, locate the outlet port on your compressor. Then, locate the outlet fitting on the water separator. Once you’ve found both, use a wrench to connect the outlet fitting to the outlet port. Try to hand-tighten the connection as much as possible to avoid stripping the threads. If you need to use a wrench, only use a small one.
9. Turn on the Compressor
Once you’ve installed the water separator and connected the fittings, you’re ready to turn on the compressor. First, check all the connections to ensure they’re tight. If any of the connections are loose, air will leak out, and the separator won’t work properly. Once you’ve checked the connections, please turn on the compressor and let it run for a few minutes. If everything is working properly, the separator should start collecting water immediately.
10. Drain the Separator
After the compressor runs for a few minutes, you should see water collecting in the separator. To remove the water, you’ll need to drain it from the separator. To do this, first, locate the drain valve on the separator. The drain valve is usually located near the bottom of the separator. Next, open the valve and let the water drain out. Once the water has stopped draining, close the valve, and you’re done!
You Can Check It Out To Build a 4500 Psi Compressor
How Much Does It Cost to Install a Water Separator?
The cost of installing a water separator will vary depending on the type of separator you choose and the complexity of your air compressor setup. However, in most cases, you can expect to spend between $50 and $100 on the separator itself. Additionally, you may need to purchase some additional fittings and hoses, which can add to the cost. Overall, installing a water separator is a relatively simple and inexpensive way to keep your air compressor running smoothly.
Conclusion
So there you have it! Now you know how to install water separator on air compressor. By following the simple steps in this guide, you can extend the life of your compressor and keep it running smoothly. With a little bit of care and maintenance, your compressor will provide you with years of reliable service. Do you have any tips for installing a water separator? Please share them in the comments below!