

Star lock washers are often used in applications where vibration or looseness could cause a fastener to back out. They are placed between the nut and bolt head and work by wedging against the bolt as it’s tightened, locking the two pieces together. While they can effectively prevent loosening, they can also be challenging to remove if you need to take the assembly apart again. In this article, we’ll show you how to remove star lock washer quickly and easily. Keep reading.

We have all seen those tiny metal discs with teeth (usually 6) around the outside edge. They are called star or serrated lock washers and are used to lock a nut or bolt in place by biting into the surface it is screwed into. The theory behind them is that as the bolt is tightened, the teeth on the washer will bite into the surface, preventing it from turning. This provides extra resistance to vibration and/or tampering.
What Are Star Lock Washers?
Star lock washers, also called split locks, create a tight connection between two surfaces while preventing the bolts or screws from loosening over time. In addition, the star-shaped design helps to evenly distribute the load around the circumference of the washer, making it ideal for use with high-strength fasteners.
Additionally, the split in the washer allows it to expand and contract as needed, making it less likely to loosen or break under heavy loads. While star lock washers are not required for all applications, they can be a helpful addition in situations where bolts or screws are likely to experience high levels of stress.
How Do Star Washers Work?
Star washers, also known as serrated washers, are a fastener commonly used in conjunction with nuts and bolts. Star washers have a series of teeth or barbs around the circumference of the washer.
These teeth or barbs bite into the materials being fastened together, creating a more secure grip than a standard flat washer. In addition to providing a better grip, star washers also help prevent loosening due to vibration.
While star washers are most commonly used with nuts and bolts, they can also be used on their own as stand-alone fasteners. When used in this way, star washers are often referred to as tooth lock washers or helical lock washers.
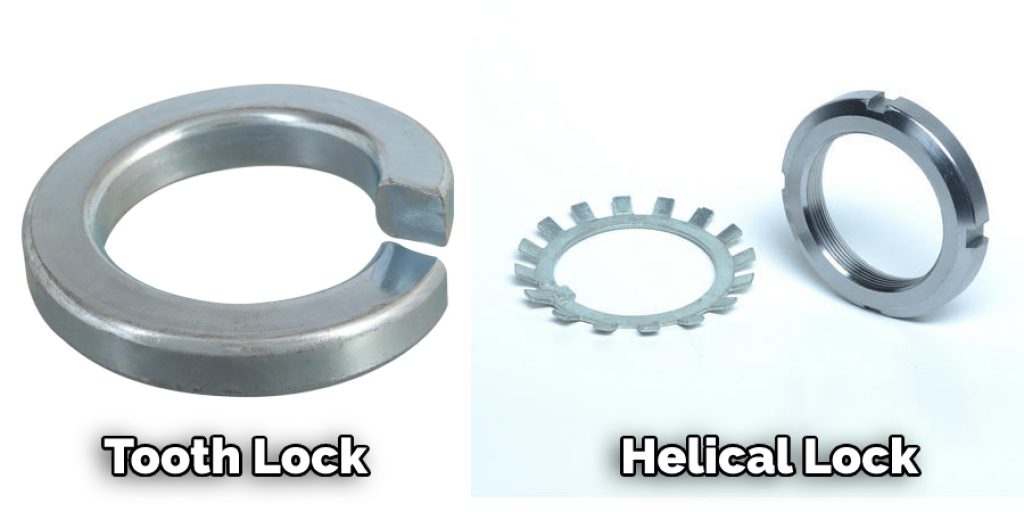
Tooth lock washers and helical lock washers are available in various sizes and materials. The most common material used for these washers is steel, but they can also be made from stainless steel, brass, or nylon. When selecting a star washer, it is essential to choose one that is the appropriate size and thickness for the job at hand.
How to Identify a Star Lock Washer on Your Hardware
A star lock washer is a type of fastener commonly used instead of a standard washer. As its name suggests, this type of washer has star-shaped teeth that dig into the material’s surface it is being tightened against. This creates a more secure grip than a standard washer, making it ideal for use in applications where vibration or movement could cause loosening.
Star lock washers are most often used with bolts and screws but can also be used with other fasteners. To correctly identify a star lock washer, knowing what to look for is essential. Here are some critical identifying features:
- Teeth: The most distinguishing feature of a star lock washer is its teeth. These teeth are typically sharp and point inwards, towards the center of the washer.
- Shape: Most star lock washers are roughly star-shaped, with six or eight points.
- Size: Star lock washers come in various sizes, based on the application they will be used for.
If you suspect that a fastener on your hardware is secured with a star lock washer, you can confirm this by looking for the aforementioned identifying features. Once you have confirmed that a star lock washer is in use, you can proceed with removal if necessary.
What You’ll Need:
- A small punch or nail
- A hammer
- A set of pliers
- A new star lock washer
Step-by-step Instructions on How to Remove Star Lock Washer
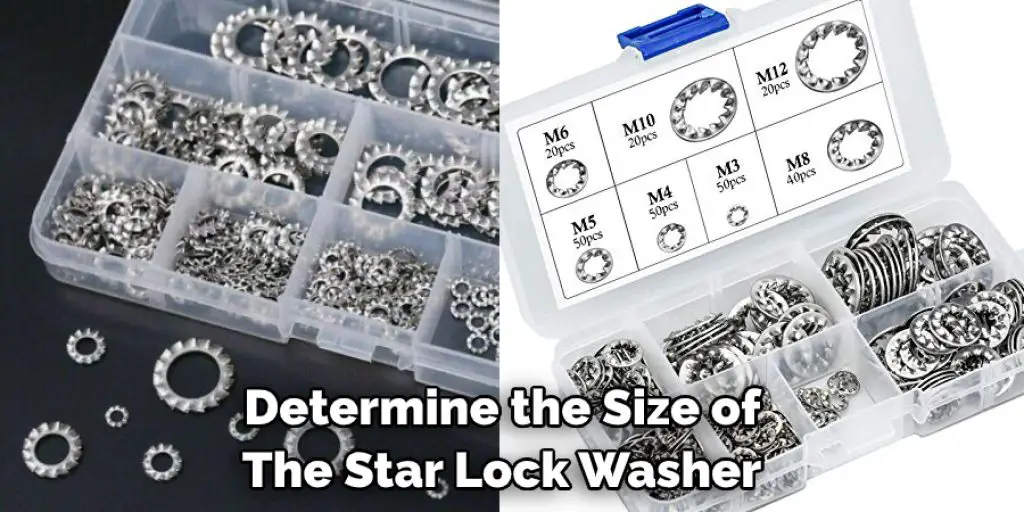
Step 1: Determine the Size of the Star Lock Washer
First, you need to determine the size of the star lock washer. This can be done by measuring the hole diameter in the center of the washer. The most common sizes are 3/8 inch and 1/2 inch.
Step 2: Insert the Punch or Nail Into the Center Hole of the Washer
Next, take your punch or nail and insert it into the center hole of the washer. Again, make sure that the point of the punch is facing up.
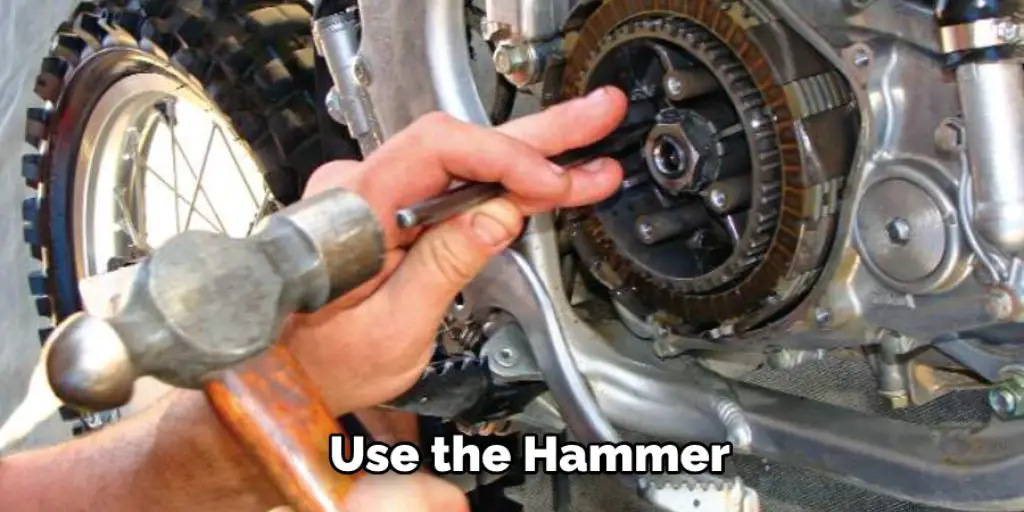
Step 3: Use the Hammer to Drive Out the Pin from the Washer
Once the punch is in place, use your hammer to drive out the pin from the washer. You may need to tap the punch a few times to get the pin started.
Step 4: Remove the Washer from the Pin
Once the pin has been driven out, you can remove the washer from the pin. Use your pliers to remove any remaining washer pieces from the pin.
Step 5: Install the New Star Lock Washer
Now, you will need to install the new star lock washer. To do this, reverse the steps you used to remove the old washer. Make sure that the new washer is correctly seated on the pin before driving in the new pin. Once the new pin is in place, your lock washer should be good as new!
Step 6: Inspect the New Lock Washer
Once you have installed the new lock washer, it is good to inspect it to make sure that it is correctly seated on the pin. You can do this by gently pulling on the washer. If it comes off easily, you will need to start over with a new washer. Otherwise, your lock washer is installed correctly and ready to use!
You Can Check It Out to Remove Lock Nut From Bottom of Toilet Tank
Tips for Preventing Future Problems With the Star Lock Washer:
- Check the manufacturer’s instructions to see if the star lock washer is still under warranty.
- If the star lock washer is not under warranty, consider replacing it with a new one.
- Inspect the star lock washer regularly for signs of wear and tear.
- If the star lock washer is damaged, replace it immediately.
- Do not use a star lock washer that is bent, corroded, or otherwise damaged.
- Use only the recommended tools and techniques for removing and installing the star lock washer.
- If you have any questions or concerns about installing the star lock washer, consult a professional.
- Do not attempt to remove or install the star lock washer without the proper tools and training.
- Use caution when removing the star lock washer, as it is under extreme tension.
- Never use an impact wrench or other power tool to remove the star lock washer. Always wear gloves and eye protection when working with the star lock washer.
Which Way Do Star Lock Washers Face?
The direction that a star lock washer faces is essential because it helps to ensure that the fastener remains tight. Therefore, the teeth of the washer should be pointing in the same direction as the turning force. For example, if you are using a screwdriver to turn a screw, the teeth of the star lock washer should be facing the same way as the screwdriver.
This will help to prevent the washer from slipping and coming loose. In general, it is best to install star lock washers so that the teeth are facing away from the surfaces that will be subject to the most stress. This will help to ensure that the fastener remains tight and does not come loose over time.
How Do You Remove a Push-lock Washer?
When removing a push-lock washer, there are a few steps you can follow to ensure the process goes smoothly. First, you’ll need to locate the push-lock washer that you want to remove. Once you have found it, you can use a pair of pliers to grab onto one side of the washer and gently pull it away from the attached surface.
You may need to wiggle it back and forth a bit to loosen it from the surface. Once you have removed one side of the washer, repeat the process with the other side. It’s important to be gentle and not pull too hard, as you don’t want to damage the surface it is attached to.
Once both sides of the push-lock washer are removed, the washer should come free from the surface it was attached to. It’s worth noting that push-lock washers are designed to be used once, so it’s recommended that you replace them with new ones rather than trying to reuse them.
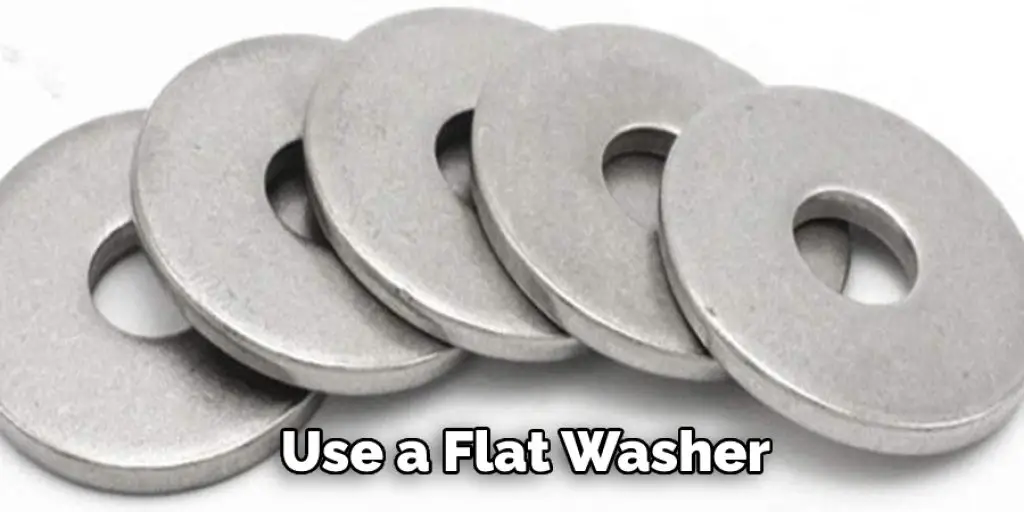
Should You Use a Flat Washer With a Lock Washer?
When it comes to home improvement projects, there are a lot of little details that can make a big difference in the overall quality of the finished product. One such detail is the type of washer that is used to secure bolts and screws. In most cases, a flat washer will suffice.
However, there are certain applications where a lock washer may be a better option. A lock washer has a split ring design that wraps around the bolt or screw, locking it in place. This can help prevent loosening, even under high vibration or extreme temperature conditions. Additionally, a lock washer can provide more excellent resistance to corrosion than a flat washer.
As a result, it is often the preferred choice for outdoor projects or any application where weatherproofing is essential. Ultimately, the best way to determine which type of washer to use is to consult with experienced hardware professional. They will be able to assess your specific needs and make recommendations accordingly.
Conclusion:
Now that you know how to remove star lock washer, it’s time to get started! Be sure to have the necessary tools on hand to complete the job quickly and easily. Be careful when removing the old lock washer – it may be brittle and prone to breaking. But, with patience and care, you’ll have that pesky lock washer removed in no time at all!
Michael has always been interested in security and safety. When he was younger, he loved reading books about espionage and crime. This led him to develop a fascination with surveillance systems and home security systems.
He has 8 years of expertise installing, fixing camera problems and door locks. He also gained knowledge by helping homeowners to stay safe and secure in their homes.
Over the years, Michael has gained a great deal of experience in this field. He is responsible for the content development on this blog.