
If you’re like me, then you probably hate wasting food. So what do you do when you have a little leftover wet food that you don’t want to waste?
If you have ever tried to vacuum seal wet food, you know it is not as easy as it seems. Most of the time, the food gets sucked into the seal, creating a mess. However, there are a few steps that you can take to make vacuum sealing wet food easier. This blog post will share our methods on how to vacuum seal wet food. Stay tuned!

How Vacuum Sealed Wet Food Stay Good?
Wet foods are more challenging to vacuum seal than dry foods because they can emit liquid and cause the bag to become unsealed. The reason why vacuum-sealed wet foods stay good is that the lack of oxygen prevents bacteria from growing.
Bacteria need oxygen to grow, and when you vacuum seal wet food, you take all the oxygen out of the bag. This creates an environment where bacteria cannot thrive, so your food will stay fresher for longer.
Step by Step Guideline on How to Vacuum Seal Wet Food
You can follow these essential steps to vacuum seal wet food:
Step 1: Choose the Right Vacuum Sealer
When it comes to a quality machine that can handle moisture without its model with an automatic moisture detection system, this feature will ensure that your fo is sealed adequately without being overcooked. Of course, you can also use a manual model, but get one with suction power.
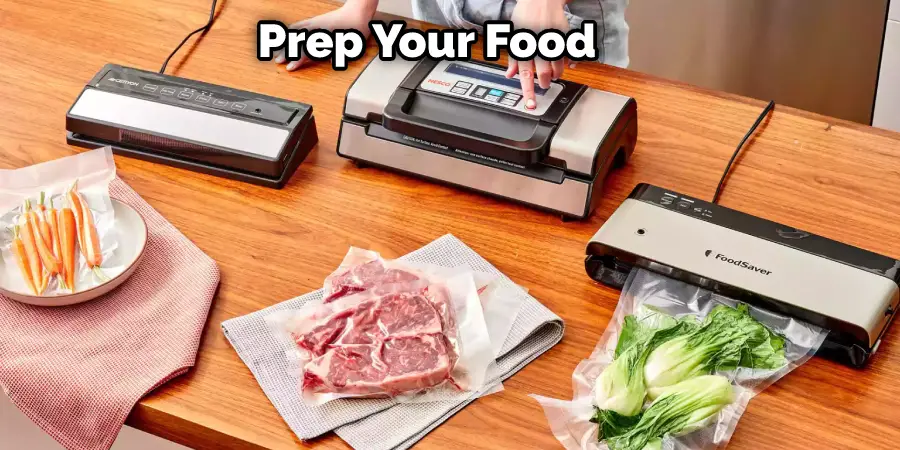
Step 2: Prepare Your Food
Once you have the right vacuum sealer, it’s time to prep your food. If you’re sealing raw meat, make sure to cook it. This will make it easier to seal and prevent your food from being overcooked.
If you’re sealing cooked food, let it cool down first. You don’t want to seal hot food as this can lead to moisture buildup and spoilage.
Step 3: Start Sealing
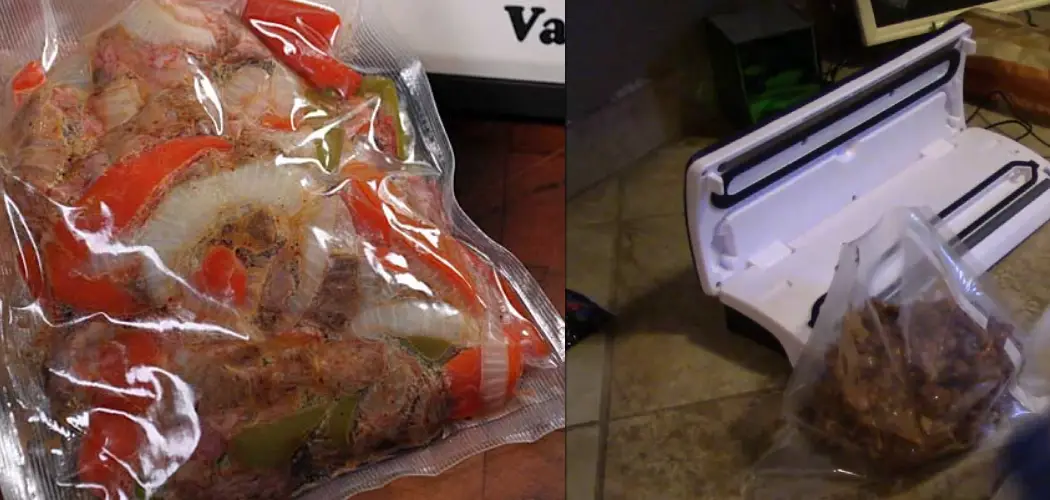
Now it’s time to start sealing. Put your food into the vacuum sealer bag and ensure no air is left in the bag. If there’s any air left, your food will not be adequately sealed.
Once the bag is airtight, put it into the vacuum sealer and start sealing. Depending on your machine, this can take a few minutes.
Step 4: Check the Seal
Once the sealing process is complete, check the seal to ensure it’s airtight. You can do this by pressing down on the seal. If there’s any give, it’s not properly sealed, and you’ll need to start over. If the seal is good, your food is ready to be stored.
Step 5: Store Your Food Properly
Once your food is sealed, it’s essential to store it properly to prevent spoilage. Vacuum-sealed wet food can last for up to 3 months in the freezer. If you’re planning on storing it for longer, use a freezer-safe bag.
You can also store vacuum-sealed wet food in the fridge, which will only last a few days. So if you’re not planning on eating it right away, it’s best to freeze it.
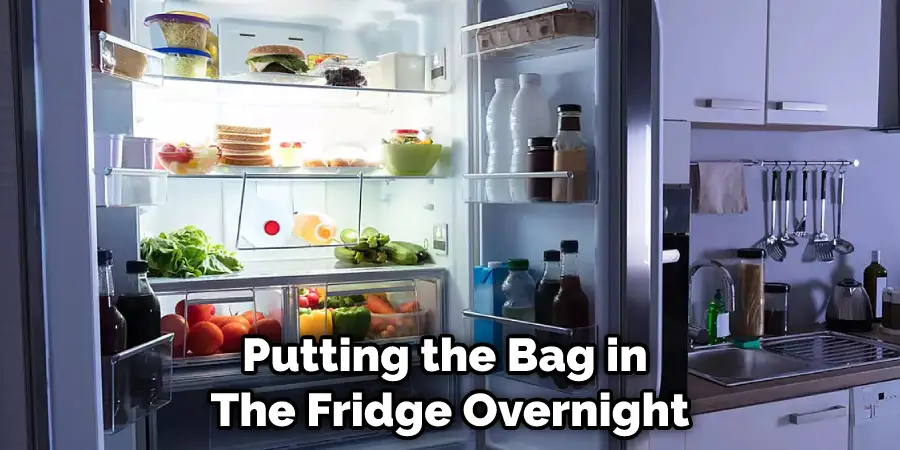
Step 6: Thawing and Reheating
When you’re ready to eat your vacuum-sealed wet food, you first need to thaw it. You can do this by putting the bag in the fridge overnight.
Once the food is thawed, you can then reheat it. The best way to do this is in the microwave. Just cut a small hole in the bag to vent the steam.
And that’s it! Now you know how to vacuum seal wet food and store it properly. Just follow these steps, and you can enjoy your food for weeks.
5 Methods to Vacuum Seal Wet Food
Method 1: Use a Salad Spinner
You can use a salad spinner to remove excess water from your food before vacuum-sealing it. This is a good option for leafy greens or other vegetables that have been washed. This is very much like how you would prepare salad greens for storage.
Method 2: Use a Colander
If you don’t have a salad spinner, you can use a colander to drain water from your food. Just make sure that the colander is clean and dry before you start. You don’t want to introduce any bacteria into your food.
Method 3: Use Paper Towels
If you don’t have a salad spinner or a colander, you can use paper towels to absorb excess water from your food. This method is highly effective for removing water from both fruits and vegetables.
This method is ideal for removing water from delicate fruits and vegetables, such as berries, cherries, and grapes.
Method 4: Use a Clean Dish Towel
If you don’t have paper towels, you can use a dishtowel to absorb excess water from your food. This is commonly used for delicate fruits like grapes and berries. A vacuum sealer can damage that.
Method 5: Use a Food Dehydrator
To use this method, you will need to have a food dehydrator. This method is perfect for those who want to store their foods for longer, as the moisture will be removed from the food.
First, cut your food into small pieces that will fit onto the trays of your dehydrator. If you are dehydrating fruit, slice it thinly. Herbs can be left whole or cut into smaller pieces. Then, spread the food out on the dehydrator trays, ensuring that none of the pieces touch each other. Next, turn on your dehydrator and set it to the correct temperature. The temperature should be between 125 and 135 degrees Fahrenheit for most fruits and vegetables.
Let the food dehydrate for the recommended amount of time. This will vary depending on the type of food and the thickness of the slices, but it can range from four hours to overnight.
Once the food is fully dehydrated, remove it from the dehydrator and let it cool completely.
These simple methods can be used to vacuum seal wet food. However, if you are storing the food for a long time, it is best to use a food dehydrator. This will remove all the moisture from the food, preventing bacteria from growing.

Which Wet Food Can’t Be Sealed With a Vacuum?
Some wet foods are just not meant to be sealed with a vacuum. These include:
- Foods that are high in fat content. Fat can go rancid quickly, and the seal on a vacuum-sealed food may not be airtight enough to keep out oxygen.
- Wet foods with a strong odor. The vacuum sealing process can intensify the odor of these foods.
- Wet, mushy foods. These foods can get caught in the seal of the vacuum bag and cause it to break.
So, what wet foods can be sealed with a vacuum? Here are some examples:
- Cooked meats will be reheated and eaten within a few days. This is very common with leftovers.
- Soups and stews that have been cooked and cooled. You can portion them out into individual serving sizes before sealing.
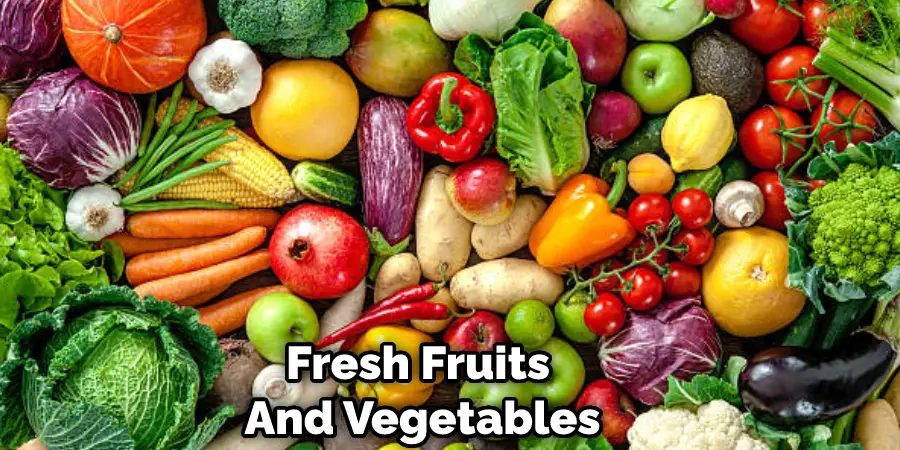
- Fresh fruits and vegetables that have been washed and cut up. These can be stored in the fridge for a few days or frozen for extended storage.
- Cooked pasta dishes that have been cooled. Again, you can portion these out into individual servings before sealing.
- Wet, dry dog or cat food. This is a great way to keep your pet’s food fresh and free of pests.
When sealing wet foods with a vacuum, it’s essential to use a food-grade vacuum sealer. These sealers are designed to create an airtight seal that won’t allow bacteria or other contaminants to enter the food.
It’s also important to use vacuum sealer bags for wet foods. These bags have a special coating that prevents them from being punctured by sharp edges.
To vacuum seal wet foods, simply place the food in the bag and seal it according to the manufacturer’s instructions. Be sure to leave enough space in the bag so the food can expand when heated.
Conclusion
Vacuum sealing wet food is a great way to store it for long periods. You can use a vacuum sealer, a Ziploc bag, and the water displacement method.
By following these simple steps and methods on how to vacuum seal wet food, you can extend the shelf life of your wet foods by months or even years! Have you ever tried vacuum sealing wet food? What are your thoughts? Let us know below!
You Can Chack It Out Vacuum Seal Soup