
It’s that time of year again when the leaves change and the air is cooler. Of course, that means it’s also time for soup! But what do you do with all of the leftovers? Vacuum sealing soup can help you extend the shelf life so you can enjoy your delicious soup all winter long.
Vacuum sealing your soup is the perfect way to ensure it stays fresh. In this blog post, we will show you how to vacuum seal soup so you can enjoy it for days or weeks!

Why is Vacuum Sealing Better for Soup?
The main reason why vacuum sealing is better for soup is that it prevents freezer burn. Freezer burn is caused by exposure to air, which dries out the food and causes it to become tough and flavorless. When food is vacuum sealed, it is completely isolated from the air, which means it will stay fresh and delicious for much longer.
Another advantage of vacuum sealing soup is that it makes it easier to portion out. If you make a big batch of soup and then freeze it in individual servings, you can thaw and reheat just the amount you need. This is very convenient if you cook for one or two people, saving time and energy.
Finally, vacuum-sealed soup will last for months in the freezer, whereas unsealed soup will only last for a few weeks. This is because the lack of air prevents bacteria from growing, so the soup will not spoil as quickly.
If you plan to make soup in advance, vacuum sealing is the best way to ensure that it stays fresh and delicious.
7 Steps on How to Vacuum Seal Soup
Soup season is upon us, and there’s nothing more comforting than a big bowl of warm soup on a cold winter day. But if you’re not careful, your soup can go bad quickly. That’s where vacuum sealing comes in. Vacuum sealing your soup will extend its shelf life and keep it tasting fresh for weeks. Here’s how to do it:
Step 1: Choose the Right Container
The first step is to choose the right container for your soup. You’ll want to use a food-grade plastic or glass container large enough to hold all of your soup. Avoid using containers made of metal, as they can rust and leach toxins into your food. Because they’re not airtight, cardboard boxes are also not ideal for vacuum-sealing soup.

Step 2: Prepare Your Soup
Once you’ve chosen a container, it’s time to prepare your soup. If you’re using fresh ingredients, cook the soup until all vegetables are tender. If you’re using canned soup, simply heat it until it’s warm. Once the soup is cooked, let it cool slightly, so it’s not too hot to handle.
Step 3: Fill the Container
Carefully pour the soup into the container, leaving enough headspace at the top. The headspace is important because it allows the air to be sucked out of the container when you seal it. Otherwise, your soup could be improperly sealed and spoil quickly.
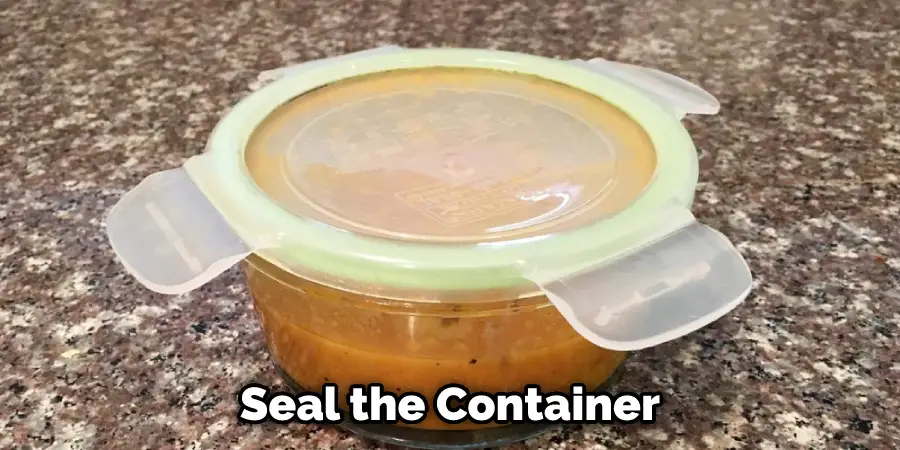
Step 4: Seal the Container
Now it’s time to seal the container. Using a plastic container, put the lid on tight and wrap the entire container in cling film. If you’re using a glass jar, screw on the lid tightly and then cover the jar with a piece of cling film. Ensure the cling film is snug against the top so no air can get in.
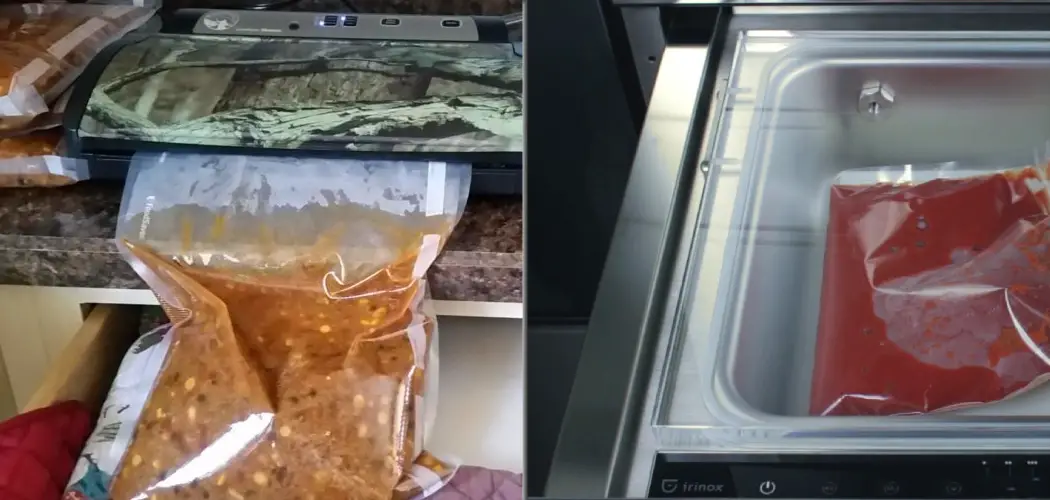
Step 5: Attach the Vacuum Sealer
Attach your vacuum sealer to the container, making sure that the sealer is airtight. If you’re using a handheld sealer, follow the instructions that came with your sealer. If you’re using a countertop sealer, the process is usually automatic.
Step 6: Seal the Container
Once the vacuum sealer is attached, turn it on and let it do its job. The vacuum sealer will remove all the air from the container and create a tight seal. Be careful with the glass jars, as they can break if the vacuum sealer is too strong. Hold the glass jar with a towel while the sealer runs to maintain extra caution.
Step 7: Store the Soup
Your soup is now ready to be stored! Label the container with the date and contents, then store it in the fridge or freezer. Vacuum-sealed soup will last for 3-4 weeks in the refrigerator and 6 months in the freezer.
And that’s it! Now you know how to vacuum seal soup and extend its shelf life. From now on, you’ll be able to enjoy your favorite soups all winter long.

How to Defrost and Reheat Vacuum-sealed Soup?
You can defrost and reheat your vacuum-sealed soup in a few different ways.
The first way is to place the sealed soup bag into a warm water bowl. Let it sit in the water for about 15 minutes or until the soup is thawed. Once thawed, you can then reheat the soup on the stove.
Another way to defrost and reheat your soup is to place the sealed bag in the refrigerator overnight. In the morning, the soup will be thawed, and you can heat it on the stove.
If you are in a hurry, you can also use the microwave to defrost and reheat your soup. Simply place the sealed soup bag into a bowl of warm water and microwave it for about 2 minutes. Once thawed, you can then heat the soup on the stove.
8 Tips to Vacuum Seal Soup
Here are some tips to make sure your soup stays fresh and delicious:
- Choosing the right container is essential. Make sure you have a container that is specifically designed for vacuum sealing. This will ensure a tight seal and prevent any leaks.
- Try to pre-freeze your soup. If you’re planning on freezing your soup, pre-freeze it before vacuum sealing. This will help to prevent any freezer burn.
- You can use a food saver bag. When vacuum-sealing soup, be sure to use a food saver bag. These bags are designed to lock in moisture and keep your soup fresh.
- Carefully remove all the air. Ensure you remove as much air as possible from the bag before sealing. This will help to prevent your soup from spoiling.
- Ensure to seal it tightly. Once you’ve removed all the air, seal the bag tightly. This will ensure that no new air can get in and spoil your soup.
- Use a chopstick or sharp object to remove air bubbles before sealing.
- Freeze the soup in a single layer on a baking sheet before vacuum sealing.
- Label the bags with the name of the soup and the date it was sealed.
These are some tips to help you vacuum seal your soup. By following these tips, you can ensure your soup stays fresh and delicious.
Safety Precautions You Need to Know Before Vacuuming Real Soup
Here are some essential safety precautions you need to know before vacuum sealing real soup:
- Use caution when handling hot soup. When dealing with hot soup, be sure to use caution. Make sure the container is secure before beginning the vacuum sealing process.
- Be careful of sharp objects. When working with sharp objects, such as a knife, be sure to use caution. Be careful not to cut yourself when sealing the soup.
- Never touch the opening of the vacuum sealer to anything wet.
- Only fill the bags half full so that the air can circulate and heat evenly.
- Use a dedicated vacuum sealer for food; do not use it for other things like clothes.
- Do not reuse vacuum seal bags – they can harbor bacteria.
- If using a freezer, ensure it is set to 0 degrees Fahrenheit or below.
- For long-term storage, consider using a food-grade vacuum sealer designed for freezing.
- 9. If you are using a non-vacuum-sealed freezer bag, make sure to remove as much air from the bag as possible before sealing.
- 10. Thaw frozen soup in the refrigerator overnight before reheating.
How Long Does Vacuum Sealed Soup Last?
Vacuum-sealed soup can last anywhere from 2-3 weeks in the fridge to 6-8 months in the freezer. How long your soup lasts will depend on several factors, including the type of soup, how it was prepared, and how well it was sealed.
To extend your vacuum-sealed soup’s shelf life, start storing it in the fridge. If you plan on keeping it for more than a few days, consider freezing it. When stored correctly, the vacuum-sealed soup will retain its freshness and flavor for weeks or even months.

Conclusion
Soup is a great way to pack the nutrients and keep them fresh. Vacuum-sealed soup is an easy and convenient way to store and transport your favorite soups!
Following these simple steps on how to vacuum seal soup, you can vacuum seal soup and have tasty meals ready to eat any time you want them – no cooking required! Have you tried this method for preserving soups? What are some of your favorite recipes?
You Can Chack It Out Vacuum Seal Meat With Liquid