

If you’re anything like me, making a fresh pot of coffee in the morning is an essential part of your routine. But if you’re pressed for time, you may not have time to wait for your coffee to brew. Setting a timer on your Black and Decker coffee maker can come in handy! In this article, I’ll show you how to set timer on black and decker coffee maker so you can enjoy a hot cup of joe without waiting.
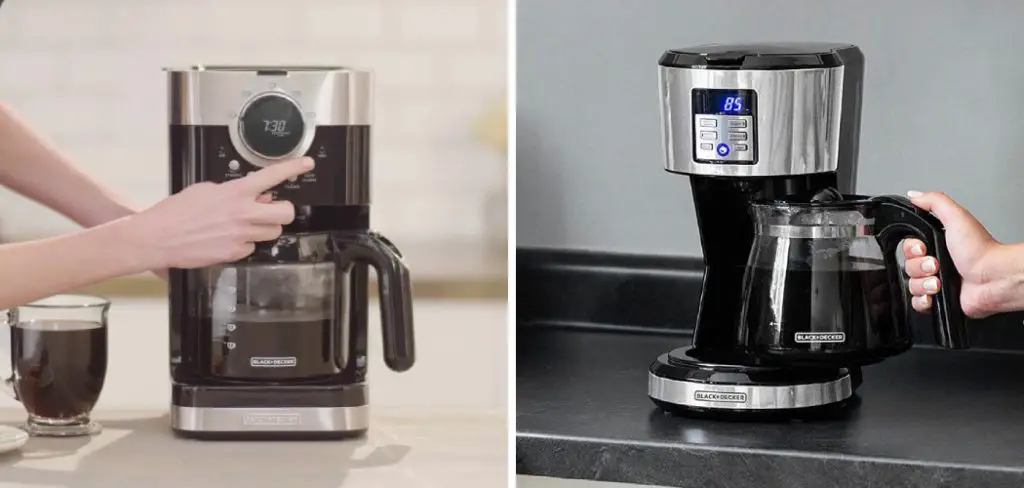
Coffee is one of the most popular beverages globally, and for a good reason! It tastes great, but it can also give you a much-needed energy boost to help you start your day. Many people enjoy drinking coffee first thing in the morning, but it can be tough to wait for your coffee to brew if you’re short on time. Setting a timer on your Black and Decker coffee maker can come in handy!
Types of Black and Decker Coffee Maker
There are three different types of Black and Decker coffee makers available in the market, each with its features.
Single Cup
If you’re like me, you can’t start your day without a cup of coffee. But sometimes, making coffee can be a hassle. That’s why I love my Black and Decker single-cup coffee maker. It’s easy to use and has a built-in timer so I can have fresh, hot coffee waiting for me when I wake up in the morning.
A single cup Black and Decker coffee maker can brew up to 12 ounces of coffee. That’s enough for one large cup or two smaller cups.
5-cup
Brew delicious coffee at home with this Black & Decker 5-cup coffeemaker. The easy-view water window lets you keep an eye on the water level as you fill, while the pause ‘n serve function enables you to grab a cup before brewing is finished. Plus, cleanup is a breeze thanks to the removable dishwasher-safe filter basket.

5-cup coffee makers are perfect for small households or anyone who doesn’t drink a lot of coffee. They typically brew around 25 ounces of coffee, about five cups. Many 5-cup coffee makers have an automatic shutoff, pause-and-serve, and timers.
12-cup
This 12-cup coffeemaker from Black & Decker is perfect for busy families or anyone who loves to entertain. The quick brew function brews coffee 25% faster, while the Sneak-A-Cup feature lets you grab a cup before brewing is finished. In addition, the dishwasher-safe filter basket and brew basket make cleanup a breeze.
12-cup coffee makers are the most popular type of coffee maker. They typically brew around 60 ounces of coffee, about twelve cups. Many 12-cup coffee makers have an automatic shutoff, pause-and-serve, and timers.
A Stepwise Guide on How to Set Timer on Black and Decker Coffee Maker
Step 1. Prepare Before Touching Any Buttons
Before you start playing around with the buttons, it’s essential to have everything set up and ready to go. That means having your coffee machine plugged in and near an outlet and making sure there is water in the reservoir. It’s also good to have your coffee grounds measured out and ready to use.
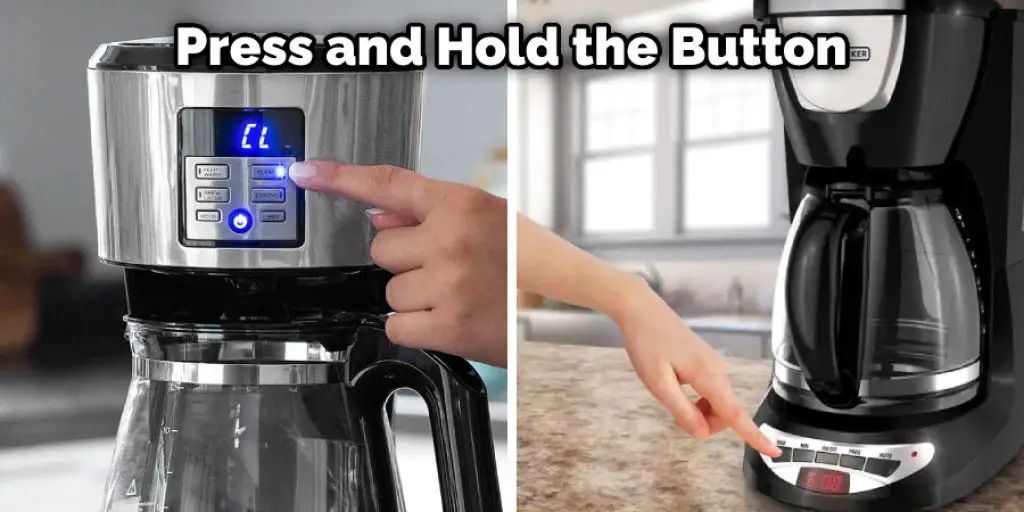
Step 2. Set the Clock for Programming
Once everything is in place, you can begin programming the coffee maker. To do this, press and hold the “Clock” button until the time on the display starts to blink. Then, use the “+” and “-” buttons to set the current time. Once the correct time is displayed, press the “Clock” button again to confirm.
Step 3. Program When You Want Coffee
Now it’s time to program when you want your coffee maker to start brewing. First, press and hold the “Program” button until the word “Auto” starts blinking on display. Next, press the “+” and “-” buttons to set the time you want the brewing to start. Once the correct time is displayed, press the “Program” button.
First, make sure that the coffee maker is turned off to set the clock. Then, press and hold the “Clock” button for about three seconds. The display will show “12:00.” Next, use the “+” and “-” buttons to set the time. Once you’ve reached the correct time, press the “Clock” button again to confirm. The display should now show the time that you programmed.
Now that the clock is set, you can program the coffee maker to start brewing at a specific time. Press and hold the “Program” button for about three seconds to do this. The display will show “P0.” Next, use the “+” and “-” buttons to select a brewing time. Once you’ve reached the desired time, press the “Program” button again to confirm. The display should now show the time that you programmed and the word “PROG.”
Press and hold the “Program” button for about three seconds to cancel the brewing timer. The display will show “P0.” Next, use the “+” and “-” buttons to select a brewing time of “00:00.” Once you’ve reached the desired time, press the “Program” button again to confirm. The display should now show the word “CANCEL.”
If you want to brew coffee right away and don’t want to use the timer, press the “Brew” button. The coffee maker will begin brewing immediately.
Step 4: Set the Auto-brew Time
Now that the clock is set and you’ve programmed when you want the coffee maker to start brewing, it’s time to set the auto-brew feature. This feature will automatically turn off the coffee maker after two hours. Press and hold the “Clock” button for about three seconds to set this. The display will show “12:00.” Next, use the “+” and “-” buttons to set the time. Once you’ve reached the correct time, press the “Clock” button again to confirm. The display should now show the word “AUTO.”
If you want to cancel the auto-brew feature, press and hold the “Clock” button for about three seconds. The display will show “12:00.” Use the “+” and “-” buttons to set the time. Once you’ve reached the correct time, press the “Clock” button again to confirm. The display should now show the word “OFF.”
Step 5: Start Brewing
Now that everything is programmed, it’s time to start brewing your coffee. To do this, press the “Brew” button. The coffee maker will begin brewing immediately.
If you need to pause the brewing process, press the “Pause/Cancel” button. The coffee maker will stop brewing, and the display will show “PAUSE.” To resume brewing, press the “Brew” button again.
The coffee maker will automatically turn off when the brewing cycle is finished. The display will show “END” and the word “Auto” will stop blinking.
Step 6. Keep the Carafe Plate Warm
The Black and Decker coffee maker has a built-in warming plate if you want to keep your coffee warm. To turn this on, press the “Warm” button. The light next to the button will turn on, and the display will show “WARM.” The coffee maker will stay on until you press the “Warm” button again or unplug the coffee maker.

Step 7: Clean the Coffee Maker
It’s essential to clean your coffee maker regularly. To clean the coffee maker, first, remove the carafe and filter. Then, wipe down the inside of the coffee maker with a damp cloth. Be sure to clean the carafe plate and brewing basket as well.
To descale the coffee maker, fill the carafe with equal parts water and white vinegar. Then, pour the mixture into the water reservoir. Next, press the “Brew” button and let the mixture brew for about 30 minutes. After 30 minutes, press the “Pause/Cancel” button and let the coffee maker cool for about 15 minutes. Then, run two cycles of fresh water through the coffee maker to remove any residual vinegar taste.
It’s also a good idea to clean the coffee maker after each use. To do this, rinse out the carafe and filter with warm, soapy water. Then, wipe down the inside of the coffee maker with a damp cloth. Be sure to clean the carafe plate and brewing basket as well. These steps will help in how to set timer on black and decker coffee maker.
You Can Check It Out To Unlock Hopper on Breville Coffee Maker
Tips
- For first-time use, it is recommended to rinse the coffee pot with hot water from the tap. Discard this water before brewing.
- If using ground coffee, make sure it is of a medium grind.
- Do not overfill the coffee filter basket. It should be no more than half full.
- It is not necessary to wait for the water in the reservoir to come to a boil before starting the brew cycle. However, if you live in an area with tough water, you may want to let the water come to a boil first and then start the brew cycle. This will help prevent mineral buildup in your coffee maker.
Why Does My Black and Decker Coffee Maker Not Work?
There could be several reasons why your Black and Decker coffee maker is not working. Perhaps the most common reason is that the coffee maker is not plugged in. Another possibility is that the coffee filter is clogged. If neither of these is the problem, the heating element may have burned out.

If your Black and Decker coffee maker is not working, you should first check to make sure that it is plugged in. If it is plugged in, check if the coffee filter is clogged. If the coffee filter is clogged, replace it with a new one. If neither of these is the problem, the heating element may have burned out. To test this, plug the coffee maker in and turn it on. The coffee maker will not heat up if the heating element has burned out.
Conclusion
So there you have it, how to set timer on black and decker coffee maker. Setting the timer is relatively easy because you have a Black and Decker coffee maker with a timer function. Press the “Timer” button on the control panel and use the + and – buttons to set the desired time. Once the time is set, press the “Start” button to begin brewing. Your coffee will be ready at the specified time. Enjoy!
Rick is a handyman who grew up helping his dad with his business. He learned a lot from him about how to fix things, and also about how to work hard and take care of business. These days, Rick is still into fixing things- only now, he’s doing it for a living.
Rick is always looking for new ways to help people grow and develop. That’s why he started contributing to this blog: to share all his experience and knowledge so that he can help people who are interested in DIY repair.