

Bella coffee makers are one of the most popular brands on the market, and with good reason! These machines make a great cup of coffee time after time. However, they need to be cleaned regularly to maintain optimal performance. In this article, we will walk you through how to clean bella coffee maker. Keep reading for more information!

Coffee makers are one of the most common appliances in homes across the globe. They make a great cup of coffee, but they can also save you time and money. However, to ensure that your coffee maker continues to run smoothly, it’s important to clean it regularly.
What is a Bella Coffee Maker?
A Bella coffee maker is a small kitchen appliance used to make coffee. It is a single-serve coffee maker, which means that it can only make one cup of coffee at a time. Krups make the Bella coffee maker, and it comes in two different sizes: standard size and mini size.
The Bella coffee maker has a simple design. It consists of three main parts: the water tank, the coffee filter, and the carafe. The water tank sits on the bottom of the machine, and you fill it with water up to the max line. The coffee filter is attached to the top of the machine, and the carafe sits on top of the filter. The carafe holds the coffee that is brewed, and it has a spout that allows you to pour the coffee into a cup.
Features of Bella Coffee Maker
If you love coffee, you need to have a Bella coffee maker. These coffee makers are some of the best on the market, and they make great coffee. The coffee is good, but these machines are also easy to clean. Here are some of the features of Bella coffee makers that make them so great:
- They are easy to use. You have to add water and coffee grounds and then press a button.
- The filters are dishwasher safe, which makes cleaning them a breeze.
- The carafe is made from thermal material, which keeps your coffee hot for hours.
- There is a pause function, so you can pour yourself a cup of coffee while the machine is still brewing.
- The coffee makers come in a variety of colors, so you can choose the one that best suits your style.
Why Do We Need to Clean the Bella Coffee Maker?
The Bella coffee maker is a popular appliance for making coffee at home. It’s easy to use and makes a great cup of coffee. However, the Bella coffee maker needs to be cleaned occasionally to keep it in good working order like all appliances.
There are several reasons why it’s essential to clean the Bella coffee maker. First, coffee residue can build up on the machine over time and cause problems. Second, mold and bacteria can grow in the coffee maker if it’s not cleaned regularly. This can cause health problems for people who drink the coffee made by the machine. Finally, stale or bad-tasting coffee can result if the machine isn’t cleaned correctly.
Prevent Allergy Infections caused by Mold
Molds are fungi that can be found both indoors and outdoors. Molds reproduce by releasing tiny spores into the air. When these spores land on a wet surface, they begin to grow and form new mold colonies.
Molds produce allergens, which are substances that can cause allergic reactions in people. Inhaling or touching molds or spores may cause sneezing, runny nose, red eyes, skin rash, wheezing, and other respiratory problems.
People with asthma are particularly susceptible to mold allergies. Therefore, it is essential to prevent exposure to molds if you have asthma. One way to do this is to clean your coffee maker regularly to remove any mold growths.
Things You’ll Need
- Vinegar
- Water
- Paper Towels
- Cleaning brush or a toothbrush
- Q-tips
A Step by Step Guide on How to Clean Bella Coffee Maker
Step 1: Determine if your coffee maker needs cleaning.
The water reservoir and carafe should be cleaned every time you use them. The warming plate should be cleaned every other week. The exterior of the coffee maker can be wiped down with a damp cloth every few days. If you’re not sure if your coffee maker needs to be cleaned, refer to the owner’s manual.

Step 2: Prepare the Coffee Maker for Cleaning
Now that you have all of the supplies you need, it is time to prepare your coffee maker for cleaning. This process is simple and only requires a few minutes.
First, unplug your coffee maker from the wall. If your coffee maker has a water tank, remove the tank and set it aside. Next, locate the filters in your coffee maker. There should be one or two depending on the make and model of your coffee maker. Remove the filters and set them aside.
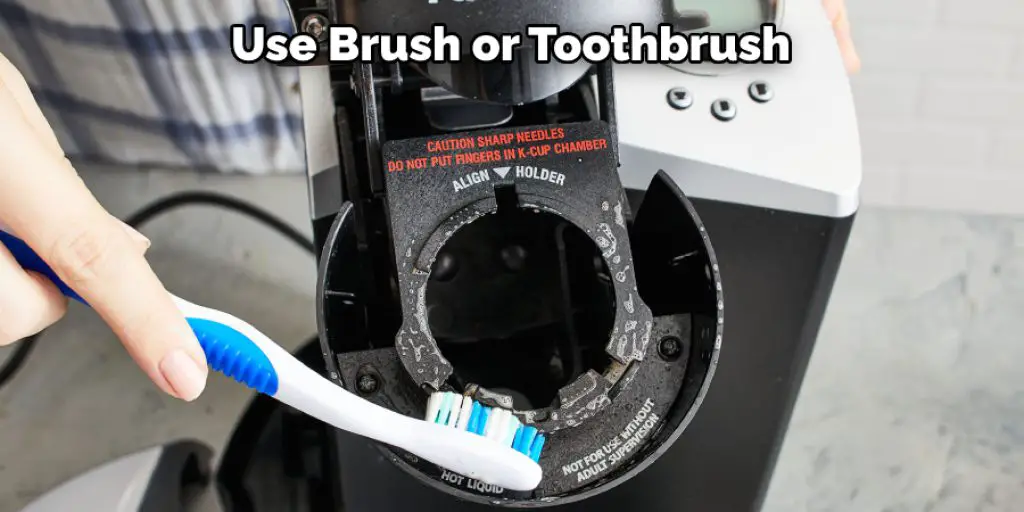
Finally, locate the cleaning brush that came with your supplies. This brush is specifically designed for cleaning coffee makers. With the brush, scrub all of the surfaces of your coffee maker that come into contact with water or coffee. Be sure to pay special attention to the areas around the filters and the water reservoir.
Step 3: Clean the Coffee Maker’s Water Reservoir
The water reservoir is where the coffee maker gets its water from. Therefore, it is essential to clean this part of the machine regularly, or it can lead to poor tasting coffee and even mold growth.
To clean the water reservoir, remove it from the coffee maker. There may be a small screw on the bottom that needs to be removed to take it off. If there is, use a screwdriver to do so.
Once the reservoir is off, fill it with white vinegar and let it sit for an hour. After an hour, rinse it with warm water and put it back on the coffee maker. Brew a pot of coffee using clean water to clear out any vinegar taste.
You can also clean the water reservoir by using a dishwasher-safe cycle. Just make sure to place it in the top rack.

Step 4: Take Care of Coffee Maker’s Housing
The coffee maker’s housing is where the coffee is brewed. Therefore, it is important to clean this part of the machine regularly, or it can lead to poor tasting coffee and even mold growth.
Pour white vinegar into a small bowl. Dip the Q-tip into the vinegar and wipe down the coffee maker’s housing inside. Be sure to get into all of the nooks and crannies. Rinse with water and dry with a soft cloth. Re-assemble the coffee maker. It would help if you also cleaned the outside of the coffee maker’s housing every once in a while.
Use a damp cloth once the housing is off to wipe it down. Be sure to avoid getting water inside any of the electrical components. If there is any stubborn dirt or grime, you can use a mild detergent in diluted water. Just be sure to rinse it off well before putting it back on the coffee maker.
Step 5: Cleaning the Drip Tray and Filter Basket
Now that you have removed the coffee pot and water tank, it is time to clean the drip tray and filter basket. The drip tray can be easily cleaned by removing it and rinsing it underwater. The filter basket can also be cleaned by running water through it or using a brush to clean out any coffee grounds. Let both the drip tray and filter basket dry completely before putting them back in place.
Step 6: Descaling the Coffee Maker
Coffee makers need to be descaled every few months to remove built-up mineral deposits. These deposits can affect the taste of your coffee and shorten your machine’s life.
There are several ways to descale a coffee maker. One way is to use a commercial descaling product available at most stores. Another way is to make a solution of vinegar and water. Then, pour the solution into the water tank and run it through the coffee maker like regular water. Be sure to repeat this process until the water runs clear.
Once you have descaled your coffee maker, it is important to rinse all of the parts with clean water. Then, reassemble the machine and run one cycle with water only to ensure all the descaling solutions are gone. These steps will help in how to clean bella coffee maker.

Precautions
The Bella coffee machine is a popular kitchen appliance, and it is essential to clean it regularly to ensure that it continues to function correctly. However, a few precautions should be taken before cleaning the machine.
First, unplug the coffee maker and allow it to cool down completely before beginning the cleaning process. Hot water and soap can cause burns, so it is best to wait until the machine is cool to the touch before starting.
Next, make sure that all of the parts of the coffee maker are dry before putting them back together. Water left in any crevices or openings can cause corrosion and damage the machine over time.
Finally, always use caution when cleaning around electrical cords and plugs. Never submerge the cords in water or use metal brushes or sharp objects to clean them, as this can cause short-circuiting and shock hazards.
You can check it out to Use Toastmaster Coffee Maker
Conclusion
Now that you know how to clean bella coffee maker, there’s no need to worry about buildup or bacteria. Instead, follow the steps outlined in this article, and your coffee maker will be running like new in no time! Thanks for reading.
Rick is a handyman who grew up helping his dad with his business. He learned a lot from him about how to fix things, and also about how to work hard and take care of business. These days, Rick is still into fixing things- only now, he’s doing it for a living.
Rick is always looking for new ways to help people grow and develop. That’s why he started contributing to this blog: to share all his experience and knowledge so that he can help people who are interested in DIY repair.