
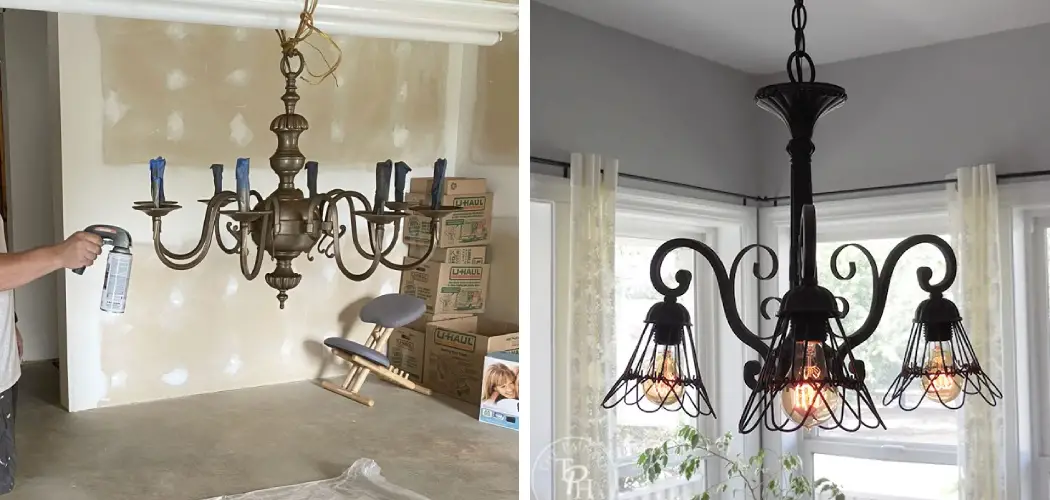
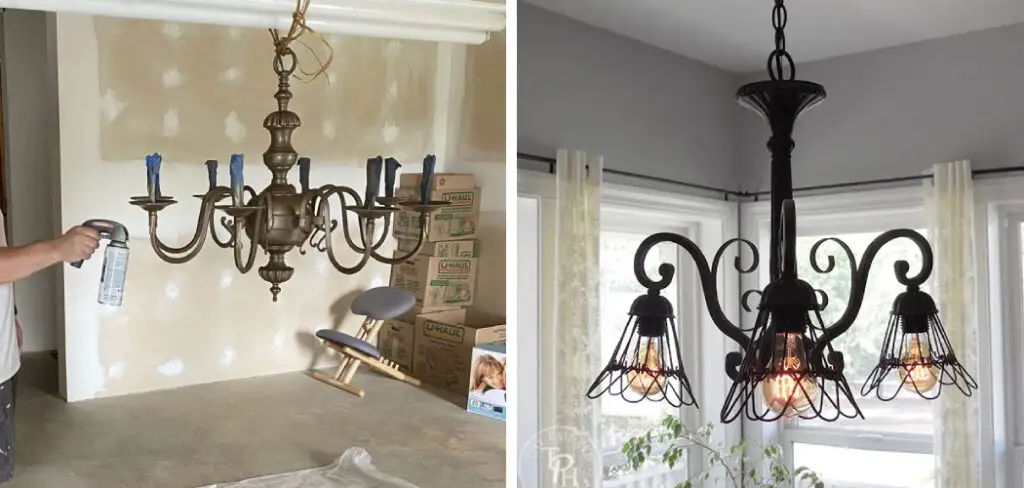
Have you ever wanted to give your home a touch of brilliance and luxury? A great way to do this is by painting an old chandelier. Not only will this add brightness to any room, but it’s also an inexpensive solution for giving your space a fresh look. Painting a chandelier can require some preparation and caution, but with the right supplies and steps, you can turn something ordinary into stunning in no time!
In this blog post, we’ll provide all the tips and tricks necessary for tackling a successful painting project so that you can enjoy your beautiful new focal point in no time.
Painting a chandelier can be intimidating, but it doesn’t have to be complicated. With the right supplies and instructions, anyone can transform their old or outdated chandelier into something modern and new. Here we will discuss the steps on how to paint a chandelier so that you can give your home a beautiful upgrade without breaking the bank.
Why May You Want to Paint a Chandelier?
There are many reasons you may want to paint a chandelier. Such as:
1. To Refresh Its Look
One of the main reasons to paint a chandelier is to give it a whole new look. You can either choose to keep the same color or select something entirely different. This will help you create a completely different atmosphere in your home and add an interesting visual element to your space.
2. To Match Your Decor
Another reason why you may want to paint your chandelier is to match a certain color scheme you have in your home. If the walls are painted yellow, for example, painting the chandelier could be an affordable way of making it fit into the decor.
3. To Save Money
Painting a chandelier can often be more budget-friendly than replacing it altogether. If the chandelier is still in good condition, painting it can be a quicker and more affordable option to get the desired look you’re hoping for.
Once you have decided to paint your chandelier, the next step would be to gather all the necessary supplies and prepare your area. Read on to find out what you need to know in order to paint a chandelier properly.
How to Paint a Chandelier in 6 Easy Steps
Step 1: Prepare the Chandelier
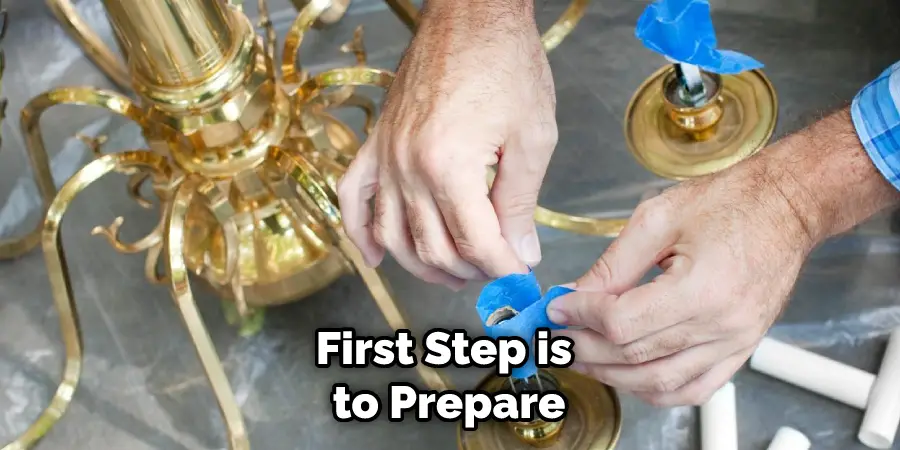
The very first step is to prepare your chandelier for painting. Start by wiping the fixture clean with a damp cloth. This will remove any dust or residue that could impact the finish of the paint job later on. Also, wear gloves to protect your hands from any harsh chemicals.
Step 2: Apply Primer
Once the chandelier is clean, apply a thin coat of primer, letting it sit for about 15 minutes before starting to paint. The primer will help the paint stick better and last longer. You will have to ensure it covers all the surfaces evenly, avoiding drips or runs.
Step 3: Choose Your Color
Once you’ve chosen a color, mix it with the proper ratio of thinner and let it sit for 15 minutes before beginning to paint. Depending on the type of chandelier you are painting, you may have to use several different color coats to get the desired effect.
Step 4: Start Painting
Once you’ve finished mixing the paint, begin painting the chandelier in small sections and let each coat of paint dry completely before moving on to a new section. A roller or sprayer can help speed up this process. Also, make sure to use even strokes to ensure a consistent finish.
Step 5: Touch Up Any Mistakes
If you notice any mistakes or imperfections, touch them up with a brush and some of your leftover paint. Make sure to let the touched-up sections dry before continuing on. Make sure to check the entire chandelier thoroughly to ensure that everything is covered and looks nice.
Step 6: Finishing Touches
Once you’ve completed all the steps above, your chandelier should be ready for a finishing touch. This can include lacquering or varnishing to help protect it from any damage or fading. After that, your chandelier should be ready to hang up and enjoy!

Following these steps will help you create a beautiful and eye-catching painted chandelier in no time. With just a little preparation and patience, you can turn any chandelier into a work of art. So go ahead and start painting! Good luck!
Some Additional Tips to Paint a Chandelier
1. Do Not Strip the Existing Finish
This is especially important if the chandelier is antique. Removing an existing paint or finish can damage it and make it harder to clean, so use a cleaner that removes dirt and dust without removing the finish.
2. Avoid Prolonged Exposure to Moisture
Before painting, make sure the chandelier is completely dry. Prolonged exposure to moisture can cause paint to peel and chip off, so be sure to let it dry out after cleaning. Also, if you’re painting the chandelier outside, be sure to paint it on a dry day with minimal wind.
3. Prime and Paint with Quality Products
Using quality products is essential when painting a chandelier. Primers will help the new color adhere better and last longer, so use a good primer that’s designed for metal to prepare the surface. Additionally, use quality paints with high opacity and coverage, such as oil-based or spray paints, to get the best results.
4. Allow Adequate Drying Time
Before applying a second coat of paint or varnish, give your chandelier time to dry completely. How long it takes will depend on the type of paint used, but it’s generally best to let the chandelier dry overnight before adding any additional layers.
5. Add a Protective Coating

When finished painting, add a sealant or protective coating to help preserve the color and finish of your chandelier. This will also help keep dirt and dust from settling into the paint, which can cause it to fade or peel over time.
By following these tips, you’ll be able to successfully paint a chandelier and create a beautiful new look for your home! You can easily give any old chandelier an updated look with just a few simple steps. Good luck and happy painting!
Frequently Asked Questions
What Precautions Should I Take?
When painting your chandelier, it is important to take certain safety precautions. Make sure that the area is well-ventilated and free of debris. Wear a face mask for added protection against dust particles or fumes from any paint you may be using. Cover the surrounding areas with drop cloths or plastic sheets to avoid mess. Finally, turn off the power to the light fixture before beginning your project.
What Paint Should I Use?
The paint type you use depends on the material from which your chandelier is made. For example, if you are working with a metallic chandelier, it’s best to use high-quality metal paint. For non-metallic surfaces, an oil- or water-based acrylic paint will work best. Make sure to choose a color that compliments the surrounding decor and furniture. Also, use a paintbrush with soft bristles to get an even finish.
Are There Any Special Cleaning Techniques I Should Use?
Yes, make sure you properly clean your chandelier before painting it! Start using a vacuum cleaner to remove dust and dirt from the light fixture’s surface. Once that is done, use a damp cloth to wipe away any residue. Finally, use a soft brush with soapy water to carefully clean the chandelier’s crevices and corners.

How Many Coats of Paint Should I Apply?
In general, it is best to apply two coats of paint on your chandelier. Use a thin layer of paint for the first coat and allow it to dry completely before applying the second one. Make sure to be gentle with your strokes, as too much pressure can lead to an uneven finish. Additionally, before beginning your project, sand down the light fixture’s surface to ensure a smooth finish. Also, remember to use a quality primer to prepare the surface before painting.
Do I Need Protection Against Moisture?
Yes, you should take precautions against moisture when painting a chandelier. Prolonged exposure can cause paint to peel and chip off, so be sure to let it dry out after cleaning. Also, choose paints designed for outdoor use or with a protective coating to help keep moisture out.
Conclusion
Learning how to paint a chandelier can be an invigorating experience. Not only can you breathe new life into your existing décor, but you will save money by not needing to buy a replacement. Plus, the feeling of accomplishment you get from DIYing any project is absolutely priceless.
Armed with these simple steps, you now have all the information required to transform your chandelier into something stunning and sophisticated. Once it’s complete, make sure to take a minute or two to stand back and admire your hard work. With just a few supplies and a bit of effort, you can create something truly spectacular!
About
Angela is the chief editor of Indoorense. She began her career as an interior designer before applying her strategic and creative passion to lifestyle and home.
She has close to 15 years of experience in creative writing and online content strategy for housekeeping and cleaning,home decorations as well as other efforts.
She loves her job and has the privilege of working with an extraordinary team. She lives with her husband, two sons, and daughter in Petersburg. When she’s not busy working she spent time with her family.