

Do you ever feel like the light from your ceiling fan just isn’t bright enough to light your room? Is it difficult for you to see while you are trying to read in a dimly lit area? If so, you should consider exploring how to make your ceiling fan lights brighter. By increasing and adjusting the wattage of your bulbs or browsing some other options like installing new fixtures around the room’s edges, we’ll show you how to make ceiling fan light brighter!
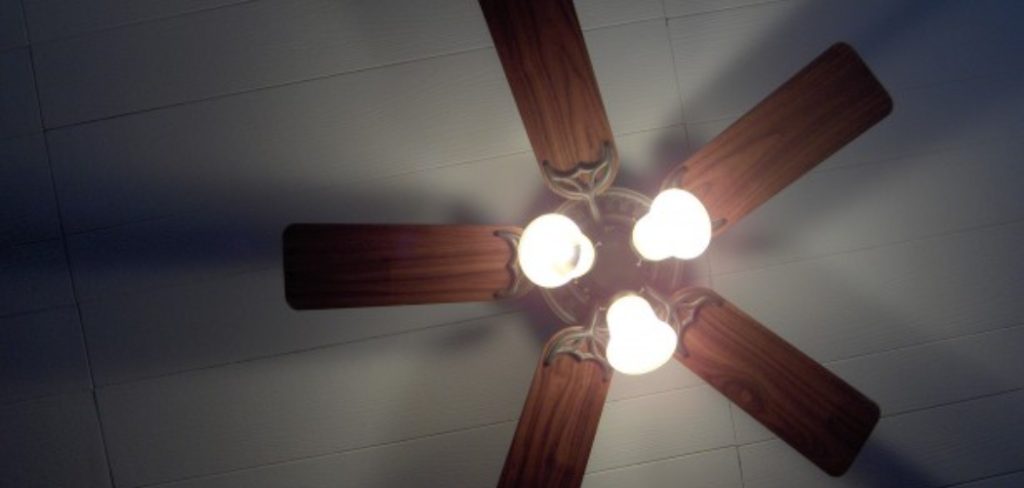
Whether your ceiling fan’s bulbs have already burned out or you’re just looking for an upgrade, we will go over the steps you need to take to make your ceiling fan light brighter.
Always ensure the power is turned off at your breaker box before attempting to work with any electrical wiring.
What Will You Need?
Before you start, make sure that you have the following materials:
- Bulbs
- Screwdriver
- Socket wrench (optional)
- New fixture (optional)
Once you have gathered the materials, you are ready to begin!
10 Easy Steps on How to Make Ceiling Fan Light Brighter
Step 1: Check Your Existing Ceiling Fan Light Fixture
Before attempting anything else, check your existing ceiling fan light fixture. Make sure that it can handle higher wattage bulbs. If not, do not replace your ceiling fan light fixture before continuing.
Step 2: Change the Bulbs
Changing the bulbs is the easiest and most cost-effective way to brighten your ceiling fan. Make sure that you purchase bulbs of higher wattage than previously used—for example, if the previous bulb was a 40-watt one, then opt for a 60- or 75-watt one. Stay within the limits of your ceiling fan light fixture to avoid potential dangers.
Step 3: Replace the Bulbs
Once you have obtained the new bulbs, it is time to replace them. To remove the existing bulb from its socket, unscrew it using your screwdriver or a socket wrench if necessary. Once it is loose, gently remove the bulb from the socket and replace it with your new one. Make sure to screw it in securely.

Step 4: Turn On The Power
Once you have finished replacing the bulbs, turn on the power at your breaker box. Return to your ceiling fan light fixture and turn it on using a wall switch or remote control. Be careful when doing this—if the wattage of your new bulbs is too high, it could cause a power surge or an electrical fire.
Step 5: Test The Brightness
Now that the light has been turned on test out to see how bright it is. Depending on the wattage of your bulbs, you should be able to notice a difference in brightness. If not, you may need to replace your bulbs with even higher wattage or consider other options.
Step 6: Adjust The Bulb Wattages As Needed
If you need more than the increased wattage of your current bulbs, then continue replacing them with higher-wattage ones until you get the desired brightness. Keep track of the wattage for each bulb so that you can adjust them as needed. Remember to turn off the power at your breaker box before replacing any bulbs.
Step 7: Install Additional Light Fixtures (Optional)
If you find that more than the brightness from your ceiling fan light is needed, consider installing additional light fixtures around the room’s edges. This will help to evenly distribute more light throughout the area and make the room brighter. Additionally, this is a great way to add more style and décor to your home.
Step 8: Clean The Fixture
Dirt, dust, and debris can accumulate around the ceiling fan light fixture over time. To ensure that the light can shine its brightest, clean it occasionally. Simply use a damp cloth and vacuum to remove any debris and dirt that have built up.
Step 9: Replace The Fixture (Optional)
If, after adjusting the wattage of your bulbs, cleaning the fixture, and installing additional light fixtures still don’t give you a bright enough ceiling fan light, you may need to replace it entirely. Make sure to purchase a light fixture compatible with your ceiling fan and can handle higher wattage bulbs. Remember that you may need to hire an electrician for this, depending on the job’s complexity.

Step 10: Enjoy The Brightness!
Now that you have followed our steps, you should be able to enjoy a brighter ceiling fan light in your room. Whether you adjusted the wattage of the bulbs or installed additional fixtures around the room’s edges, you can now bask in the bright glow that your new and improved ceiling fan light provides. Adjust the wattages and clean the fixture regularly to maintain brightness.
Following these steps, you should know how to make ceiling fan lights brighter. With just a few simple adjustments or upgrades, you can now enjoy better visibility in your room and improved lighting!
5 Additional Tips and Tricks
Use LED Bulbs:
Switching to LED bulbs can be a game-changer in terms of brightness. These bulbs are not only brighter than traditional incandescent ones, but they are also more energy-efficient and last longer. Plus, they come in various color temperatures, from warm yellow to cool white so that you can customize the mood of your room.
Add a Dimmer Switch:
Adding a dimmer switch lets you easily control the brightness level of your ceiling fan light. This can be especially useful for different occasions and times of the day.
Opt for Layered Lighting:
If a single ceiling fan light is not bright enough, consider layering your lighting with table lamps, floor lamps, or wall sconces in addition to your fan light. This creates a well-balanced and evenly lit room.
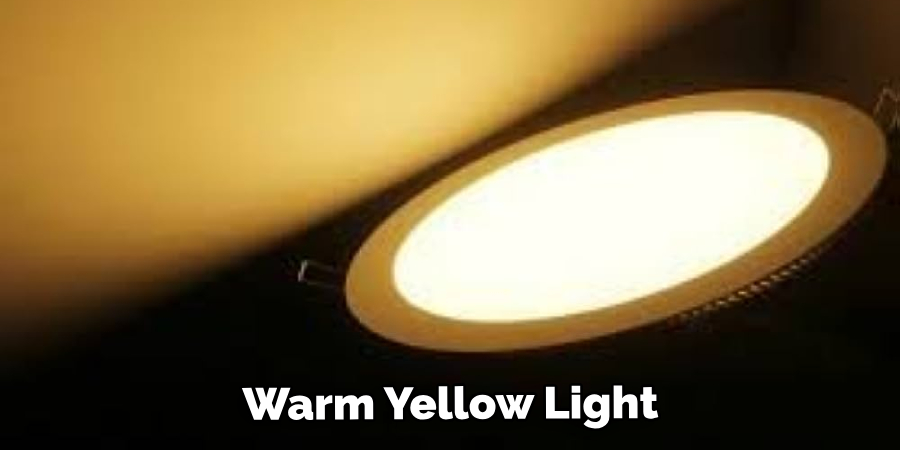
Consider Light Color:
The color of the light can also affect the perceived brightness. Cool white or daylight bulbs often appear brighter than soft white or warm white ones. Experiment with different color temperatures to find what works best for your space.
Mirrors and Light Colors:
Incorporating mirrors and light-colored paint or furnishings can help reflect light around the room, enhancing the overall brightness. This is a great non-electrical solution to make your room appear brighter.
With these tips and tricks, you should now better understand how to make ceiling fan lights brighter. Whether it’s adjusting the wattage of the bulb, changing out fixtures, or adding layered lighting—you can find the perfect solution for your space. Enjoy your newly brightened room!

5 Things You Should Avoid
Overloading the Fixture:
One crucial thing you should avoid is overloading your ceiling fan light fixture. If you install a bulb of higher wattage than is recommended for the fixture, it can cause overheating and, in extreme cases, a fire. Always adhere to the wattage guidelines provided by the manufacturer.
Ignoring the Quality of the Bulbs:
All bulbs are not created equal. Some cheaper bulbs may promise high brightness levels but deliver a poor quality of light and burn out quickly. Always invest in quality bulbs from reputable manufacturers.
Neglecting Regular Cleaning:
Allowing dust and grime to accumulate on your light fixture can significantly dim its brightness. Pay attention to the regular cleaning of your fixture. A simple wipe-down can go a long way in maintaining the brightness of your lights.
Using the Wrong Light Color:
While it might seem trivial, using the wrong color light can make a room feel dimmer than it is. Avoid using bulbs with a color temperature that doesn’t suit your room. For example, a bulb that emits a warm yellow light might make a room feel cozy, but it won’t be as bright as a cool white bulb.
Overlooking Natural Light:
Relying solely on artificial lighting can make a room feel dimmer than it could be. Avoid overlooking the importance of natural light. Where possible, try to incorporate natural light into your space. It can enhance the room’s brightness and create a more inviting ambiance.
Avoiding these five mistakes will help you make your ceiling fan light brighter and create a better lighting experience. With a few easy adjustments, you can turn your room into one that is both bright and inviting. Enjoy the new level of brightness in your home!
Conclusion
Making ceiling fan lights brighter is a relatively easy task requiring no special equipment or extensive expertise. You can make your ceiling fan light look its best with just a few steps and basic tools. It’s always important to be safe when working on an electrical circuit and turn off the power at the source before making any changes.
Now that you know how to make ceiling fan light brighter and more eye-catching, it’s time to give your lighting a facelift. Step by step, you’ll have a brighter room in no time! You might even consider changing your light fixtures for stylish new options for greater visual appeal and modern upgrades.
Spend some time browsing online for attractive new lights that could match the existing fixtures in your home, or get creative with designing something unique! Either way, it’s up to you to brighten your living space – good luck!
About
Angela is the chief editor of Indoorense. She began her career as an interior designer before applying her strategic and creative passion to lifestyle and home.
She has close to 15 years of experience in creative writing and online content strategy for housekeeping and cleaning,home decorations as well as other efforts.
She loves her job and has the privilege of working with an extraordinary team. She lives with her husband, two sons, and daughter in Petersburg. When she’s not busy working she spent time with her family.