

Are you someone who loves having freshly-made sandwiches for breakfast or dinner? Well, then, you must know that a sandwich maker can be one of the most versatile tools in your kitchen! Not only will it help you make scrumptious sandwiches quickly and easily, but it will also save on your electricity bills.
However, like all other kitchen appliances, it does require proper cleaning and maintenance to stay in top condition; so if you’re wondering how to clean a sandwich maker like a pro, then this guide on how to clean sandwich maker is perfect for you! Keep reading as we discuss the best ways to get rid of crusty bits from your sandwich maker effortlessly – no scrubbing needed!
Why Cleaning Sandwich Maker is Difficult
Sandwich makers get covered in cheese, oil, and other crumbs while cooking which can make them difficult to clean. If left uncleaned, these crusty bits of food will not only make your sandwich maker look unsightly but can also cause bacteria growth that could be harmful to your health.
The best way to prevent this from happening is to make sure you clean your sandwich maker regularly. Regular cleaning helps remove the build-up of food particles, oils, and debris that can be hard to remove.
Needed Materials and Supplies
To begin the process of cleaning your sandwich maker, you will need to gather a few supplies:
- Sponge or soft cloth
- Dish soap
- Baking soda
- White vinegar
- Mild scrub brush or toothbrush (optional)
10 Tips on How to Clean Sandwich Maker
With all the supplies and materials at hand, it’s time to get started on cleaning your sandwich maker.
1. Unplug the Sandwich Maker
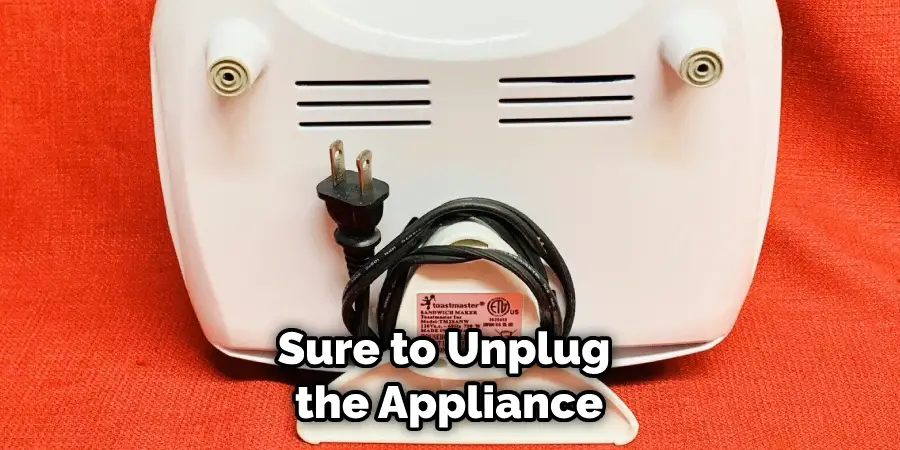
Before doing anything else, make sure to unplug the appliance from the electric sockets and wait until it has cooled down completely. If you have a removable plate, take it off and set it aside. Otherwise, move on to the next step.
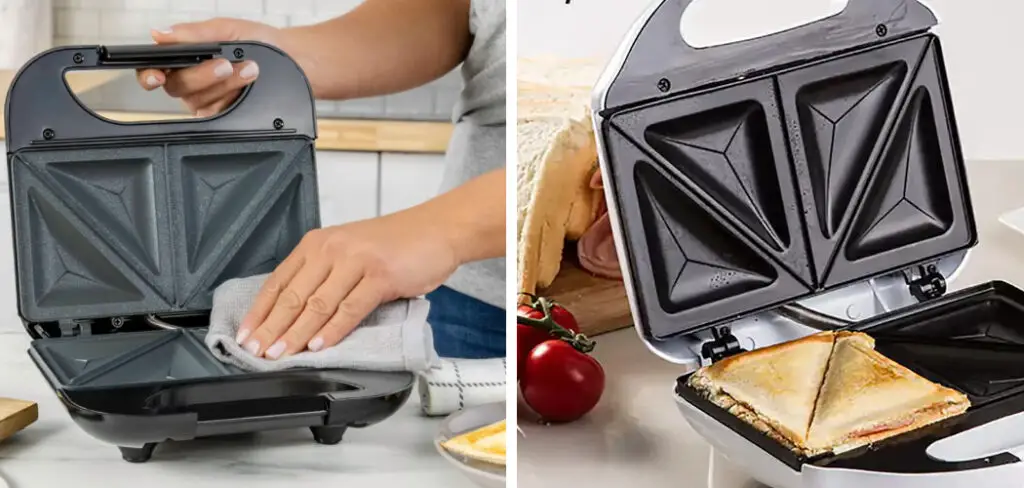
2. Remove all Loose Crumbs and Debris
Using a paper towel or a soft cloth, remove any loose crumbs, food residue, and debris from both sides of the sandwich maker’s plates. Discard them in the trash can. Crumbs and debris can get lodged in between the plates, so be sure to pay extra attention when cleaning.
3. Clean with Soap and Water
Once you’ve removed all the loose crumbs, it’s time to use some soap and water for a deeper clean. Dip your sponge or soft cloth into the soapy water and gently scrub the plates of the sandwich maker. Make sure to clean all the nooks and crannies, as well as any stubborn bits of food residue.
4. Rinse with Clean Water
Rinse off the soap from the sandwich maker with a cloth soaked in clean water. This will ensure that there’s no residue left on the plates. Try to avoid submerging the appliance in water, as this can cause the electrical components to malfunction.
5. Let It Dry Naturally
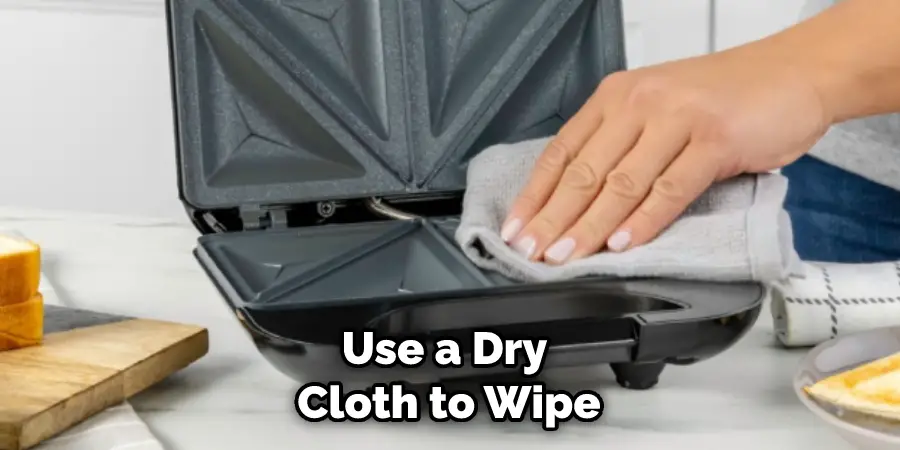
Once all the cleaning is done, use a dry cloth to wipe off any excess moisture from the plates of your sandwich maker. Make sure that it’s completely dry before you plug it back in and turn it on.
6. Use Baking Soda and Vinegar
For tougher stains, you can use baking soda and white vinegar to get rid of them. Mix the two ingredients in a bowl and apply the paste onto the plates of your sandwich maker. Leave it for 10 minutes, then scrub it off with a mild scrub brush or toothbrush.
7. Wipe with a Damp Cloth
After scrubbing, use a damp cloth to wipe off the baking soda and vinegar paste from the plates of your sandwich maker. Rinse with clean water once you’re done, and let it dry naturally before turning it on again.
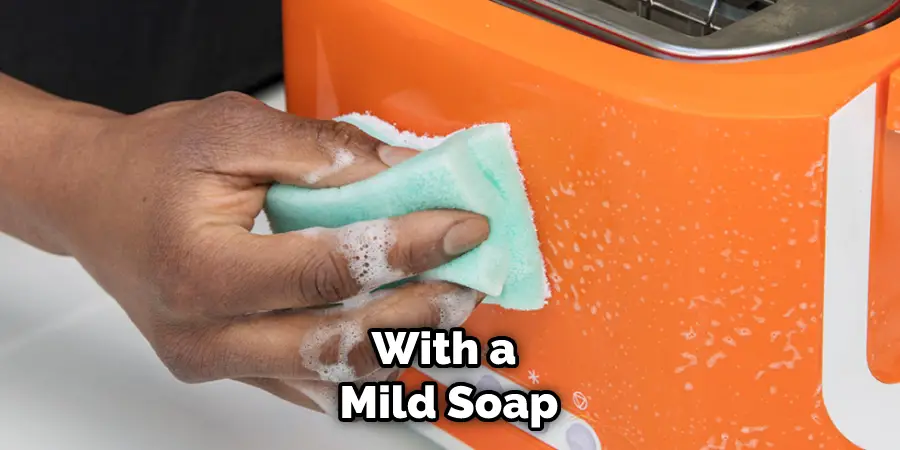
8. Clean the Exterior
Don’t forget to clean the exterior of your sandwich maker as well. Wipe it down with a damp cloth and dry off any remaining moisture with a soft cloth before plugging it back in.
9. Store Properly

Once you’re done cleaning, make sure that you store your sandwich maker properly. Keep it in a cool, dry place, and make sure that the cord is not wrapped around too tightly, as this can cause damage to the electrical components.
10. Clean Regularly
Finally, make sure you clean your sandwich maker regularly to prevent the build-up of food particles, oils, and debris which can be hard to remove. Doing so will also extend the life of your appliance and help you keep it in good condition for a longer period of time.
Following these 10 tips on how to clean your sandwich maker should help you keep it in great condition for as long as possible. Make sure that you unplug it every time before cleaning and store it properly after you’re done. This will make sure that your sandwich maker remains in great condition and lasts for a long time.
8 Maintenance Tips
- Unplug the sandwich maker before cleaning. Always make sure to unplug the appliance from any power source before attempting to clean it. Otherwise, you risk the chance of electric shock.
- Wipe down the exterior with a damp cloth and mild soap or liquid detergent. Use a soft, non-abrasive cloth to avoid scratching the surface of the sandwich maker. Be sure to dry the appliance off completely when finished.
- Remove any crumbs and debris from the cooking area with a damp cloth. Try to stick to warm water as it can help loosen tough food particles more easily. Make sure the surface is dry before closing the sandwich maker.
- Clean the non-stick plates with a wet cloth or kitchen towel, but avoid using any harsh scrubbing materials such as steel wool.
- Apply vegetable oil to the plates using a soft cloth or paper towel after they have cooled down. This will help keep the non-stick coating from deteriorating and prevent food from sticking in the future.
- Clean the handle, hinge, and other moving parts with a cotton swab dipped in soap and water. This will help to get rid of any food residue and keep the appliance looking like new.
- Inspect the power cord for any signs of damage, such as fraying or broken wires. If you notice any issues, it is important to replace the cord right away, as using a damaged cord can be hazardous.
- Store the appliance in a dry, dust-free area. This will help to keep it in good condition and prevent dirt from getting into the sandwich maker.
Following these maintenance tips can help keep your sandwich maker running and looking like new for years to come! So take the time to give it some TLC and enjoy delicious meals every day.
Frequently Asked Questions
How Long Will It Take to Finish It?
Cleaning your sandwich maker should only take a few minutes. It depends on how much grease and food particles need to be removed. Cleaning with a damp cloth and cleaning solution should only take a few minutes, while more thorough scrubbing may take longer. Be sure to read the instruction manual for your specific sandwich maker model for details.
Can I Put My Sandwich Maker in the Dishwasher?
It is generally not recommended to put your sandwich maker in the dishwasher as it can cause damage. To clean a sandwich maker, use a damp cloth and cleaning solution or scrub brush to remove any stuck-on grease and food particles. Be sure to read the instruction manual for your specific model for more details.
Do I Need Special Cleaning Products?
No, you do not need any special cleaning products in order to clean your sandwich maker. A damp cloth and mild dish soap should be sufficient for most models. Be sure to read the instruction manual for your specific model for more information on the best way to clean it. You can clean it with a damp cloth and some white vinegar if needed.
Is it Safe to Scrub my Sandwich Maker?
Yes, it is safe to scrub most sandwich makers as long as you use a soft-bristled brush or sponge. Be sure to read the instruction manual for your specific model for more details on how to clean it properly. Always use mild soap and avoid using any abrasive cleaning products, as they can cause damage to the appliance.
Conclusion
All in all, cleaning sandwich makers regularly will ensure that you get the most out of them for a long time. Plus, it’ll help you save more money since it will be easier to maintain and already be protected from grease and grime build-up that could eventually lead to breakdowns and malfunctions.
Additionally, cleaning your sandwich maker ensures safer food contact, as grime build-up can also lead to bacteria on the cooking surfaces. Moreover, a clean sandwich maker retains its original design plus it doesn’t cause any smoke or tasty smells emanating in your kitchen. Ultimately, keeping a clean and well-maintained sandwich maker is the best way to keep up with the efficient functioning of these useful tips on how to clean sandwich maker.
About
Angela is the chief editor of Indoorense. She began her career as an interior designer before applying her strategic and creative passion to lifestyle and home.
She has close to 15 years of experience in creative writing and online content strategy for housekeeping and cleaning,home decorations as well as other efforts.
She loves her job and has the privilege of working with an extraordinary team. She lives with her husband, two sons, and daughter in Petersburg. When she’s not busy working she spent time with her family.