

Cuisinart blender is a kitchen appliance used to blend or chop food. It is a versatile tool that can be used to create smoothies, soups, sauces, and more. Cuisinart blenders come in both countertop and handheld models. Some models even have built-in features like ice cream makers and juicers. So if you’re not sure how to assemble your Cuisinart blender, don’t worry! We’ve got you covered.
It can be so frustrating when you go to make a smoothie or protein shake and realize that you are missing one of the most important pieces of equipment – the blender. Luckily, assembling a Cuisinart blender is a quick and easy process, so you can be on your way to enjoying your drink in no time! Here is a step-by-step guide on how to assemble a cuisinart blender.
Step by Step How to Assemble a Cuisinart Blender:
1. Finding a Flat Surface.
Start by finding a flat surface on which to assemble your blender. You will also need to gather all of the parts and accessories that came with your blender and a Phillips head screwdriver.
2. Assembling the Base.
Once you have gathered all of your materials, begin by attaching the blender’s base to the motor. Next, screw on the two rubber feet. Make sure that the feet are pointing in the right direction so that the blender can stand on its own. If they are not, the blender will be very unstable.
3. Wash All Parts in Warm, Soapy Water.
Carefully wash all parts of the blender in warm, soapy water. Rinse well and dry thoroughly with a clean towel. Be sure to pay special attention to the blade assembly, as this is where most food particles and bacteria will accumulate.
You can also run the parts through a cycle on the top rack if you have a dishwasher. Just be sure to use a mild detergent and remove the parts immediately after the cycle is complete to prevent them from rusting.

4. Dry All Parts Thoroughly.
It’s important to make sure all Cuisinart blender parts are completely dry before assembly. Any water left on the parts can cause rust or corrosion, damaging the blender and making it unsafe to use. Instead, use a clean, dry cloth to wipe down all blender parts, including the base, jar, lid, and blades.
5. Attaching the Blades.
The next step is to attach the blades to the bottom of the pitcher. There are three ways to do this, depending on the model of blender you have. The first is to insert the blades into the pitcher, then screw on the bottom. The second is to screw the bottom onto the pitcher, then insert the blades. The third is to insert the blades into the bottom, then screw on the pitcher. For the first two methods, make sure the blades are pointing in the right direction. The blades should be pointing away from the handle and towards the spout. If they’re not, they won’t blend the ingredients properly.
For the third method, make sure the blades are pointing in the right direction. The blades should be pointing away from the spout and towards the handle. If they’re not, they won’t blend the ingredients properly. Once the blades are in place, screw on the bottom (or the pitcher, if you’re using the third method), be sure to screw it on tight, so the blades don’t come loose while you’re blending.
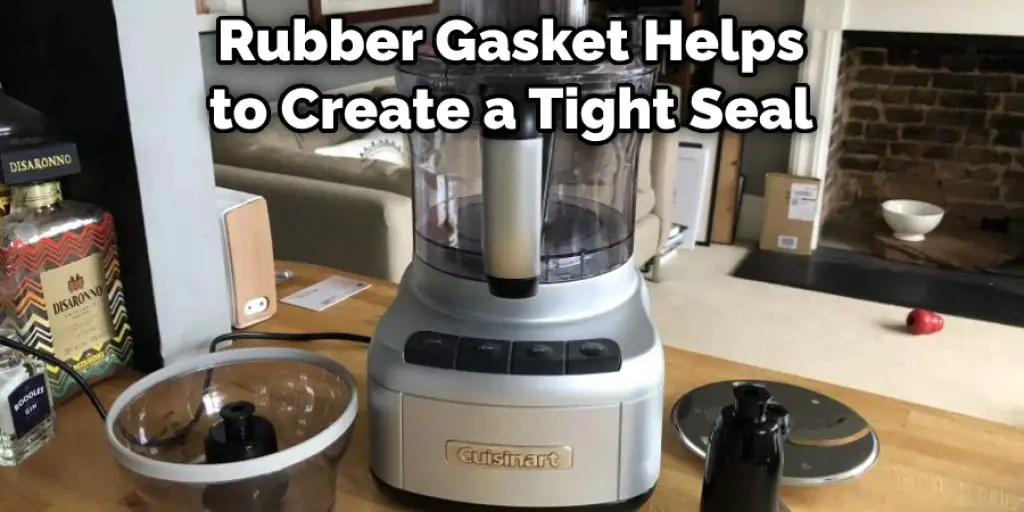
6. Place Rubber Gasket on Blade Assembly.
The rubber gasket helps to create a tight seal between the pitcher and the blade assembly. Make sure that the gasket is properly in place before attaching the blade assembly to the pitcher.
7. Plug in the Blender and Press the “on” Button.
Plug the power cord into an outlet and press the “on” button. The blender will start at a low speed and then increase to a high one. If you want to use a lower speed, press the “low” button. To pulse, press the “pulse” button.
8. Inserting the Pitcher.
Next, take the pitcher and gently insert it into the machine. Make sure that you do not force it, as this can damage the inner workings of your coffee maker. Once the pitcher is in place, tighten the lid securely. If it is not attached properly, it could come loose and cause hot coffee to spill everywhere.
9. Adding Water.
Once the pitcher is in place, it’s time to fill it with water. The best way to do this is to use a funnel, which will help prevent spills. If you don’t have a funnel, you can make one out of a piece of paper. Pour the water slowly at first until the funnel is full. Then, increase the flow until the water is coming out of the spout as fast as you can pour it. Once the pitcher is full, remove the funnel and put the lid on.
10. Adding Ingredients.
Now it’s time to add your ingredients! For a basic smoothie, you’ll need 1-2 cups of liquid (milk, water, or juice), 1-2 cups of frozen fruit, and 1 cup of fresh fruit or veggies. If you want a more decadent smoothie, you can add in 1-2 tablespoons of nut butter, honey, or a protein powder. Once you’ve added all your ingredients, blend until smooth, and enjoy.

11. Adding Liquid
Now that we have our list of ingredients let’s add some liquid to the mix. Water is the most common liquid used in brewing, but other options include fruit juices, honey, and even wine. The type of liquid you use will depend on the style of beer you’re making. For example, a wheat beer will often use fruit juice or wine, while a honey beer will, well, use honey. The amount of liquid you use is also important. Too much liquid will make your beer too thin, while too little will make it too strong. A good rule of thumb is to use about 1 gallon (3.8 L) of liquid for every 5 pounds (2.3 kg) of grain. So, if we’re using 10 pounds (4.6 kg) of grain, we’ll want to use 2 gallons (7.6 L) of liquid.
12. Adding the Grain
Once we have our liquid, it’s time to add the grain. The grain should be crushed before being added to the brew kettle. This will help to ensure that we get a good extraction during the brewing process. There are a few different ways to crush grain. The most common is probably to use a grain mill. This will give you a nice, uniform crush that is perfect for brewing.
13. Boiling the Wort
Once the grain is added, it’s time to begin boiling the wort. The wort is the liquid that will become beer. The boiling process is important because it sterilizes the wort and extracts the sugars from the grains. Turn up the heat on your brew kettle until the wort starts boiling. It’s important to maintain a vigorous boil throughout the entire process. If the wort doesn’t boil, the beer will be susceptible to infection.
14. Cooling the Wort
Once the wort has been boiling for 60 minutes, it’s time to start cooling it down. The faster you can cool the wort, the better, as this will help to prevent bacteria from contaminating it. There are a few different ways to cool the wort, but the most common is to use a wort chiller.
You Can Check It Out to Clean Nutribullet Blender Pitcher

Tips and Warnings on How to Assemble a Cuisinart Blender:
Tips:
- If you’re having difficulty attaching the blender’s base to the jar, try turning the jar upside down. The jar’s opening should be facing downwards, and then you can screw on the base with ease.
- Make sure that the rubber gasket is in place before screwing on the blade assembly. Otherwise, your blender will not work properly.
- Be careful when handling the blade assembly, as it is very sharp.
Warnings:
- Do not operate your blender without all of its parts attached and screwed on correctly. Doing so could result in serious injury.
- Never place your hand inside the blender jar while the blades are spinning. Always use the plunger to push down ingredients, and never try to reach in with your hand.
- Be sure to unplug your blender and allow it to cool down before disassembling it for cleaning. Otherwise, you could get burned by the hot motor.
Conclusion
So there you have it! Your very own guide on how to assemble a Cuisinart blender. This is just one of the many helpful guides we have here on our website, so be sure to check out the rest of our content for more tips and tricks that will make your life easier in the kitchen. And as always, if you have any questions or need help with anything, feel free to reach out to us. We’re always happy to help. Thanks for reading.