
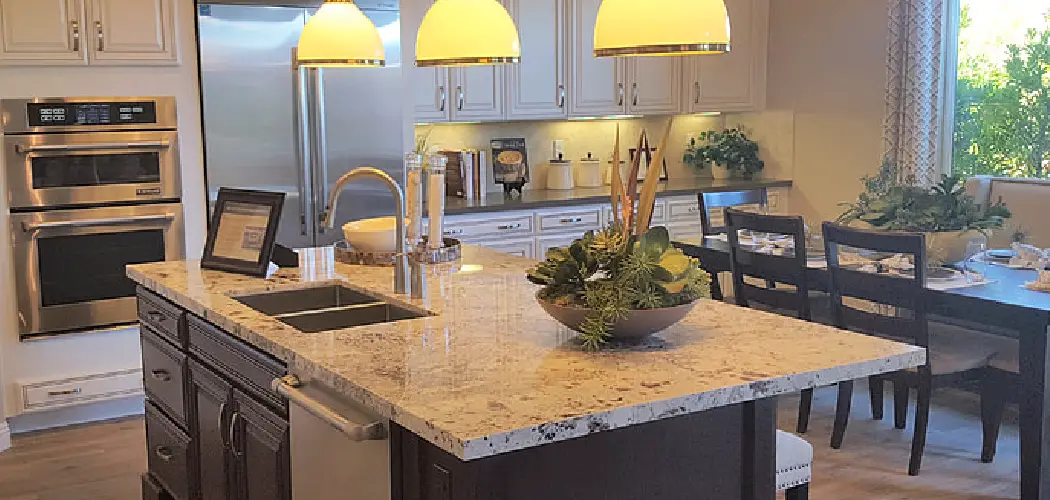
A fresh coat of paint can dramatically transform a kitchen island into a striking centerpiece or seamlessly blend it with the kitchen’s overall decor. Repainting a kitchen island is an increasingly popular DIY project because it is budget-friendly, customizable, and offers a quick way to refresh the kitchen’s ambiance without the need for a complete renovation.

By simply altering the color or finish, homeowners can inject new life into their kitchen spaces, reflecting personal style and evolving trends. This article is designed to guide you through painting a kitchen island, offering detailed steps on preparation, painting techniques, and finishing touches. With our comprehensive guide on how to paint a kitchen island, you can confidently tackle this project and achieve professional-looking results, elevating the aesthetic appeal of your culinary haven.
Choosing the Right Paint and Materials
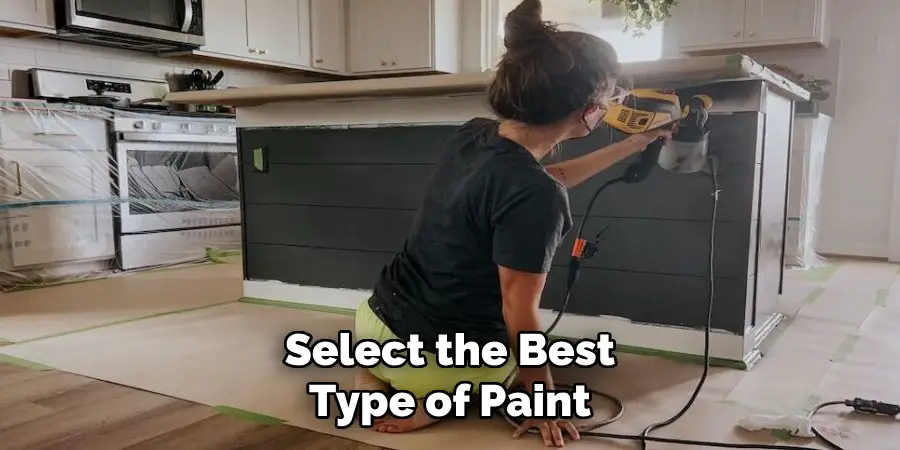
1. Select the Best Type of Paint
When painting a kitchen island, choosing durable, high-quality paint is essential due to the kitchen’s high-traffic nature and its exposure to moisture and heat. Quality paints ensure longevity and a vibrant finish that can withstand daily wear. Choosing the right type of paint involves evaluating options like latex, acrylic, and oil-based paints. Latex paint is popular for its quick drying time and ease of use, but it might not be as durable as oil-based options.
Acrylic paint is a versatile choice, offering strong adhesion and durability while being water-based for easier clean-up. Oil-based paints, while offering excellent durability and a smooth finish, require longer drying times and more arduous clean-up procedures. When considering finishes, semi-gloss, satin, or gloss are recommended for kitchen islands because they enhance durability and are easy to clean.
2. Pick the Right Tools
Equipping yourself with the right tools is just as crucial as selecting the proper paint. Essentials include brushes, rollers, painter’s tape, a sanding block, and drop cloths. Using angled brushes for edges allows for precise application, while foam rollers effectively achieve smooth, even surfaces. This combination ensures that both detailed and broad areas are evenly coated, preventing common issues like brush marks or paint drips. Painter’s tape helps protect adjacent surfaces and create clean lines, while drop cloths protect the floor from accidental spills.
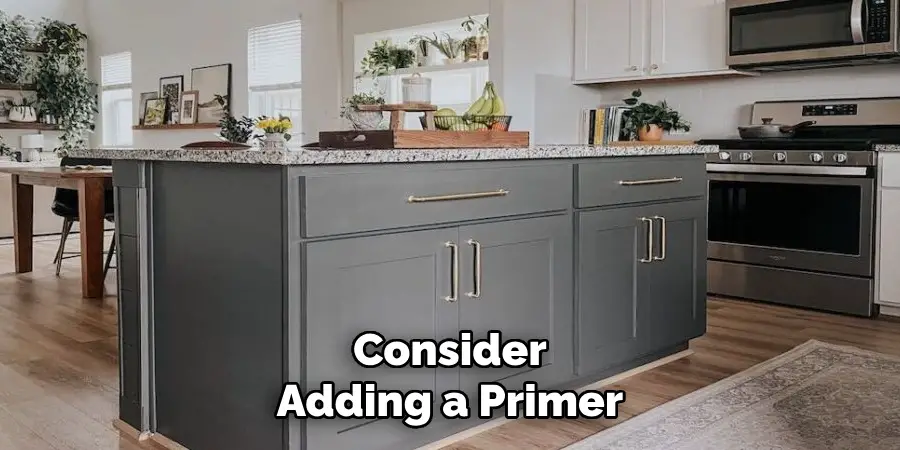
3. Consider Adding a Primer
A primer ensures a smooth finish and strong paint adhesion, especially when dealing with dark or glossy surfaces. Priming helps to seal the surface, block stains, and promote even paint application. Selecting a stain-blocking or bonding primer can significantly enhance the final appearance, reducing the number of paint coats needed and ensuring a longer-lasting finish. Taking the time to prime properly sets the foundation for a professional look, making it a worthwhile step even for the most novice painters.
Prepping the Kitchen Island for Painting
1. Clear and Clean the Island
Before painting begins, it’s essential to prepare the kitchen island by removing all items, hardware, and accessories. Take off handles, knobs, and any other detachable components to ensure a smooth painting process. Once these are removed, thoroughly clean the island using a degreaser to eliminate grease, grime, and food residues that accumulate through daily use. A clean surface helps the paint adhere better and ensures a more polished final appearance.
2. Sand the Surface
Sanding the surface of the kitchen island is vital for removing the old finish and creating a texture that promotes better paint adhesion. Use a fine-grit sandpaper to lightly sand the entire surface, focusing on any areas with existing gloss or imperfections. For particularly rough or uneven surfaces, start with a coarser grit and gradually move to a finer grit to achieve a smooth, ready-to-paint surface. This step is crucial for creating a professional finish, so take your time to ensure it’s done thoroughly.

3. Repair Any Imperfections
Inspect the island for any dents, holes, or scratches that might impact the final look. Use wood filler or putty to fill any imperfections, applying it carefully to avoid overfilling. Once the filler dries, sand it down to ensure it blends seamlessly with the surrounding surface. This creates an even foundation for painting, eliminating any distractions or blemishes that might detract from the finished piece.
4. Tape and Protect Surrounding Areas
To safeguard the kitchen from unwanted paint splatters, apply painter’s tape along the edges of the island, countertops, and any adjoining cabinetry. This step ensures clean lines and protects those areas from accidental paint application. Additionally, cover the floor with drop cloths to prevent any spills or stains. Protecting the surrounding areas not only maintains the kitchen’s cleanliness but also reduces the need for extensive clean-up once the painting is complete.
How to Paint a Kitchen Island: Priming the Kitchen Island
1. Apply a Coat of Primer
Begin by evenly applying a coat of primer to the kitchen island surface. Use a high-quality brush for detailed areas and a roller for larger surfaces. Start at the island’s top and work your way down, ensuring the primer is applied in long, smooth strokes to avoid streaks or drips. This method will help achieve a clean and even application. Be attentive to corners and edges, as these areas are often missed and require careful attention. Using proper techniques enhances the look and ensures the paint adheres well during subsequent steps.

2. Allow Primer to Dry Completely
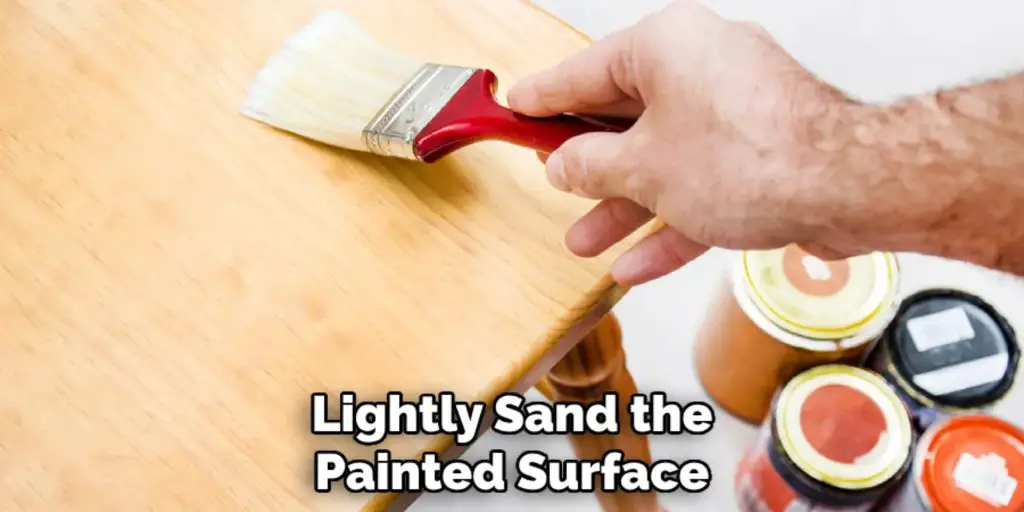
After applying the primer, it’s crucial to allow it to dry completely, which typically takes a few hours or overnight, depending on the specific product you are using. Check the product instructions for precise drying times. Once dry, inspect the surface for any raised grain or unevenness. If necessary, lightly sand the entire surface using fine-grit sandpaper to create a smooth finish, careful not to sand through the primer layer. This step helps to remove any imperfections and prepares the surface for an even topcoat application.
3. Inspect and Touch Up Areas
Once the primer has dried and sanded, closely inspect the island for areas lacking coverage or showing imperfections. Pay special attention to darker surfaces, as these might require extra primer for complete coverage. If any spots are missed or appear thinly coated, apply a second coat of primer, ensuring each layer is evenly distributed. Proper application and inspection at this stage are key to ensuring a flawless finish, setting the foundation for a stunning painted kitchen island.
How to Paint a Kitchen Island: Painting the Kitchen Island
1. Start with the First Coat of Paint
To begin painting the kitchen island, apply the first coat of paint using a combination of brushes and rollers. Use angled brushes to effectively cover the edges and corners, ensuring precision in the application. Opt for a foam roller for flat surfaces to achieve a smooth and even finish. It is advisable to paint in sections, starting from the top of the island and moving downward, following the grain of the wood for a uniform look. This method minimizes streaks and provides a professional finish. Be patient and attentive, avoiding drips and ensuring even coverage throughout the surface.
2. Allow the Paint to Dry Between Coats
After applying the first coat, allow the paint to dry completely before proceeding to the next. Drying times can vary depending on the type of paint used. Latex paint generally takes 2-4 hours to dry, while oil-based paints may require a longer drying period. Maintaining a dust-free environment during this time is essential to prevent debris or particles from sticking to the fresh paint. Closing windows, using air purifiers, and avoiding heavy traffic near the drying area can help ensure the paint dries smoothly and evenly.
3. Apply a Second (and Third, if Needed) Coat
Once the first coat is dry, assess the coverage to determine if a second or even a third coat is necessary for a solid, even color. If additional coats are needed, lightly sand the painted surface with fine-grit sandpaper between applications. This step helps eliminate any brush strokes or roller marks, enhancing the overall finish. Repeat the painting process in sections, following the grain and allowing each coat to dry thoroughly before adding the next. Multiple coats help achieve depth and richness in color, contributing to a professional-looking painted island.
4. Use a Fine Brush for Detailing
Pay special attention to small details or corners by using a fine brush for touch-ups. Ensure clean and sharp lines at junctions, particularly if you are working with two-tone or accent color designs. Carefully applying paint with a fine brush allows for precise control when colors meet, creating a polished and cohesive appearance. Patience and precision in detailing can significantly enhance the overall aesthetic, making your kitchen island a standout feature in the room.
Sealing and Finishing the Kitchen Island
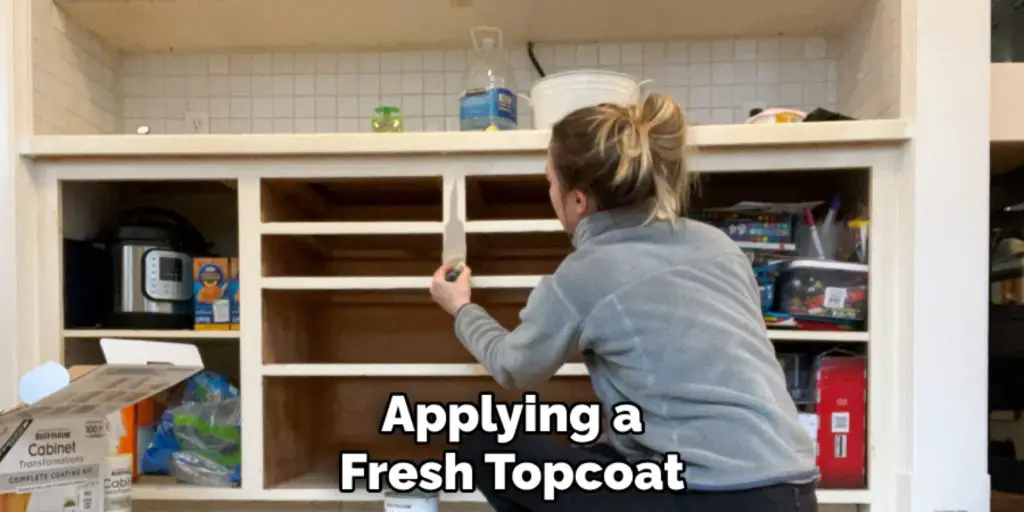
1. Apply a Protective Topcoat
Applying a protective topcoat is vital in ensuring the longevity and durability of your freshly painted kitchen island. In a busy kitchen environment, the island is subjected to regular wear and tear and exposure to moisture and heat. A high-quality topcoat acts as a barrier, protecting the underlying paint layer from chipping, staining, and fading over time. Depending on your paint finish, consider using clear sealants like polyurethane for a durable, glossy finish or polycrylic for surfaces where a lower sheen or water-based product is preferred. Both options offer excellent protection, enhancing the overall resilience of the paintwork.
2. Allow the Topcoat to Cure Properly
After applying the topcoat, it’s essential to allow it to dry and cure fully to achieve maximum effectiveness. The curing process typically requires 24-48 hours, during which the coating hardens and forms a resilient shield. To ensure optimal results, avoid heavy use of the kitchen island and refrain from placing items on its surface during this period. Keeping the room well-ventilated can expedite the drying process and minimize any lingering odors while ensuring a dust-free environment prevents imperfections in the finish.
3. Reattach Hardware and Make Final Touches
Once the topcoat has cured, proceed to reattach any hardware that was removed, such as handles, knobs, or decorative accents, to finalize the island’s appearance. If you’re aiming for a complete refresh, consider replacing existing hardware with new styles that complement the updated color scheme and enhance the overall aesthetic. This is an opportunity to incorporate modern trends or personal touches into your kitchen design. Ensure all hardware is securely fastened, and inspect the finished island for any final touch-ups needed to maintain the polished look you’ve worked hard to achieve.
Tips for Maintaining a Painted Kitchen Island
1. Clean with Gentle Products
To keep your painted kitchen island looking pristine, always use non-abrasive cleaners. Harsh chemicals or scrubbing pads can damage the paint, leaving unsightly scratches or marks. Instead, opt for mild soap solutions or specialized surface cleaners that are safe for painted finishes. Use a soft cloth or sponge for cleaning, gently wiping spills as soon as they occur to avoid staining. Regular cleaning helps maintain the island’s vibrant appearance and prolongs the life of the paint.
2. Touch Up as Needed
Over time, even with the best maintenance practices, your kitchen island may develop minor chips or wear. It is advisable to keep some leftover paint on hand for touch-ups. When imperfections arise, use small brushes to carefully fill in the affected areas, maintaining the color consistency and seamless finish. Addressing these issues promptly can prevent further paint deterioration and ensure your island remains a beautiful kitchen feature.
3. Protect High-Wear Areas
In areas subject to frequent use, such as the countertop or edges, consider using coasters, placemats, or cutting boards to shield the paint from everyday wear and tear. These protective measures help prevent scratches and maintain the island’s appeal. Additionally, applying a fresh topcoat every few years can reinforce the durability of the paint and enhance its longevity, keeping your kitchen island looking new and inviting.
Conclusion
In summary, transforming your kitchen space begins with learning how to paint a kitchen island. Start by meticulously prepping the surface, followed by applying paint coats with care and precision. Seal the paint with a durable topcoat, allowing it to cure fully before reattaching any hardware. Maintenance is key to preserving your hard work, with gentle cleaning practices and timely touch-ups. Let your creativity shine through bold color choices, making your kitchen island a true highlight within your culinary haven. A thoughtfully painted island elevates the kitchen’s aesthetics and adds a personal touch to your home.
About
Angela is the chief editor of Indoorense. She began her career as an interior designer before applying her strategic and creative passion to lifestyle and home.
She has close to 15 years of experience in creative writing and online content strategy for housekeeping and cleaning,home decorations as well as other efforts.
She loves her job and has the privilege of working with an extraordinary team. She lives with her husband, two sons, and daughter in Petersburg. When she’s not busy working she spent time with her family.