

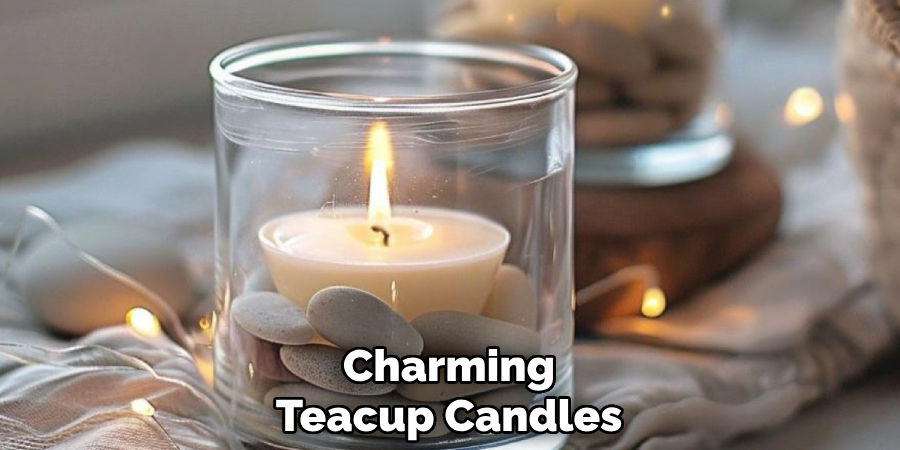
Teacup candles are a charming and unique way to repurpose old or vintage teacups while adding a personal, handcrafted touch to your home decor or as a thoughtful gift. Their vintage charm and delicate appearance are perfect for any occasion, whether you’re looking for a centerpiece, a gift, or simply a cozy accent for your home.
This guide teaches you how to create beautiful teacup candles using simple, affordable materials. Whether you’re a beginner or an experienced DIY enthusiast, this project is an easy and fun way to bring a warm glow to any space. We will walk you through the process from gathering materials to finishing your candle and even share tips on adding a personal touch with fragrances and colors. Dive into the delightful world of crafting and learn how to make teacup candles that will illuminate your space and bring a unique charm.

Gather Materials and Tools
To create your charming teacup candles, you’ll need a selection of materials and tools that can be easily sourced and are often budget-friendly. The materials you’ll need include teacups, which can be vintage, mismatched, or new, depending on your personal taste. You’ll also require candle wax, with options such as soy, paraffin, or beeswax available based on your preference.
Pre-tabbed cotton wicks are recommended for convenience, along with wick stickers or hot glue, which are essential for securing the wick at the bottom of the teacup. For those who wish to add a personal touch, consider incorporating fragrance oils for a delightful scent or candle dye for vibrant colors. Alternatively, essential oils can be used if you prefer a natural scent.
In terms of tools, you’ll need a double boiler or a heatproof bowl and saucepan to melt the wax. Keeping the wick centered is crucial, so use a wooden skewer, chopstick, or pencil for this purpose.
A thermometer is essential for monitoring the wax temperature, especially if you’re using soy wax. You’ll also need scissors to trim the wick and a pouring jug or heat-safe container to transfer the melted wax into the teacup. Optional tools include a heat gun to smooth the candle’s surface after pouring and measuring cups to accurately measure the wax and fragrance ratios. With these materials and tools, you’ll be well-prepared to embark on your teacup candle-making adventure.
Choosing Your Wax and Scent
Step 1: Choosing the Right Wax:
There are different types of candle wax, each with its own characteristics. Soy wax is a natural, eco-friendly option that burns clean and lasts longer, making it a popular choice for those who prioritize sustainability. Paraffin wax, while more affordable and widely available, produces more soot and isn’t as environmentally friendly. Beeswax provides a naturally sweet scent, burns slower, and is entirely natural, though it can be more expensive. Choose the wax that suits your needs based on the type of candle you want to create.
Step 2: Selecting Your Fragrance:
To create a scented candle, select fragrance or essential oils to achieve your desired aroma. For fragrance oils, use approximately 1 ounce for every pound of wax. Mix a few drops to reach your preferred scent strength if you prefer essential oils. Popular choices for natural candles include lavender, eucalyptus, and vanilla, offering calming and refreshing aromas.
Step 3: Deciding on Dye:
Adding color to your teacup candle is optional. Candle dyes specifically made for candle-making are available in liquid, block, or chip form to ensure even coloring and safe burning. Whether you choose to keep your candle natural or add a burst of color is up to you, but make sure the dye complements the overall aesthetic you desire.
Prepping the Teacups and Wicks
Step 1: Clean the Teacups:
Start by ensuring that your teacups are completely clean and dry. Washing them with warm, soapy water and thoroughly drying them will remove any dust, grime, or leftover residue that could interfere with the wax’s ability to stick properly. This step is crucial because any residual particles might impact the smoothness and appearance of the finished candle surface.
Step 2: Attach the Wick:
Next, take a wick sticker or a small dab of hot glue and secure the wick tab firmly in the center of the bottom of the teacup. Press it down to ensure it sticks properly, as this will help the wick remain in place throughout the pouring process and burn evenly. If you’re working with larger teacups, it may be necessary to use a larger wick to ensure an even and robust burn that adequately melts the wax across the surface.
Step 3: Keep the Wick Centered:
To keep the wick centered while pouring the wax, place a wooden skewer, chopstick, or pencil across the top of the teacup. Carefully wrap the excess wick around the skewer, keeping it taut and vertical, which helps maintain the wick’s position. A centered wick is essential for a balanced burn, preventing tunneling and ensuring the candle maintains an even appearance once it sets.
By following these preparation steps, your teacups and wicks will be flawlessly ready for the wax pouring process, setting the foundation for beautiful and functional teacup candles.
How to Make Teacup Candles: Melting and Pouring the Wax
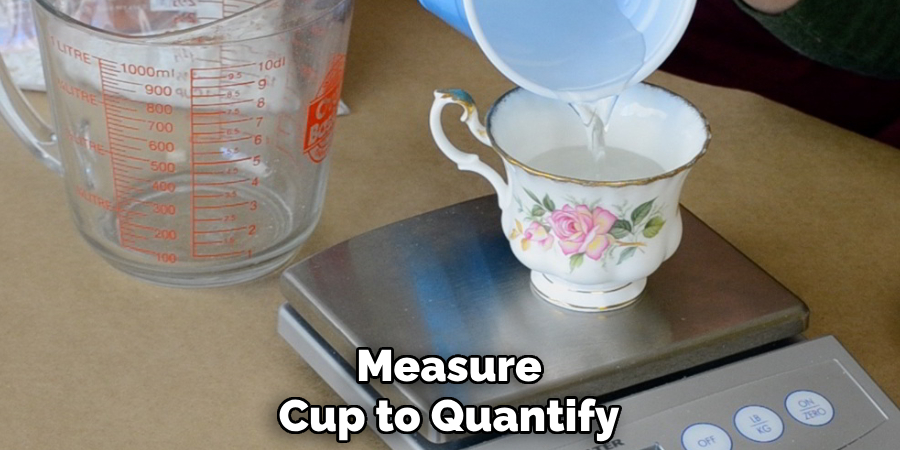
Step 1: Measure the Wax:
To determine the appropriate amount of wax for your teacup candle, begin by filling the teacup with water. Carefully pour this water into a measuring cup to quantify its volume. Multiply this amount by 1.5 to estimate how much wax is needed for each teacup. This calculation ensures you have adequate wax for a complete fill, accommodating any settling that may occur as the wax cools.
Step 2: Melt the Wax:
Utilize a double boiler or a heatproof bowl set over a saucepan with simmering water to gently melt your chosen candle wax. As wax flakes are added to the bowl, stir intermittently to promote even melting. This method prevents the wax from reaching excessively high temperatures, avoiding fire hazards associated with direct flame exposure.
Step 3: Monitor the Temperature:
Temperature control is crucial, particularly when using soy or beeswax. Soy wax should be heated to approximately 170°F (77°C). Paraffin and beeswax require slightly higher melting points. Use a reliable thermometer to ensure precision, as overheating the wax can compromise candle quality and lead to uneven burns. Maintaining the correct temperature is vital for achieving a smooth and long-lasting candle.
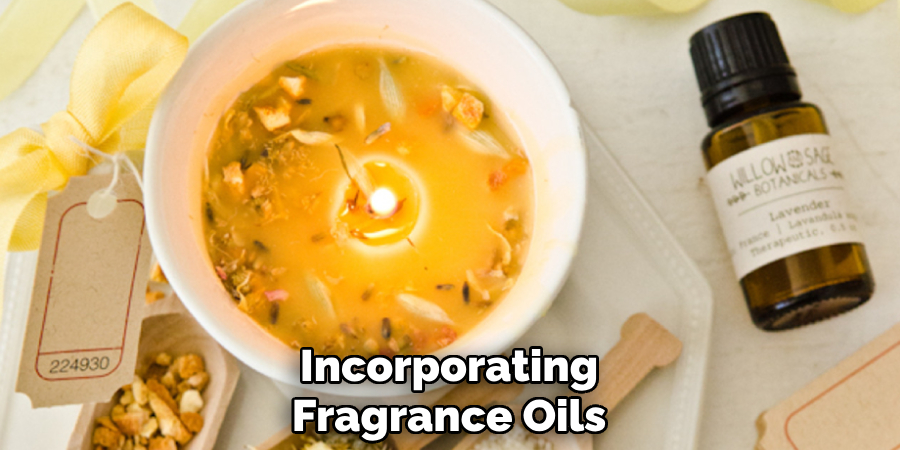
Step 4: Add Fragrance and Dye:
After the wax fully melts, carefully remove the bowl from the heat source, allowing it to cool slightly. If incorporating fragrance oils, blend them into the wax when it reaches around 160°F (70°C), preserving the essential properties of the scent. To add color, introduce candle dye during this stage, stirring thoroughly for uniform distribution, ensuring your candle has the vibrant or subtle hue desired.
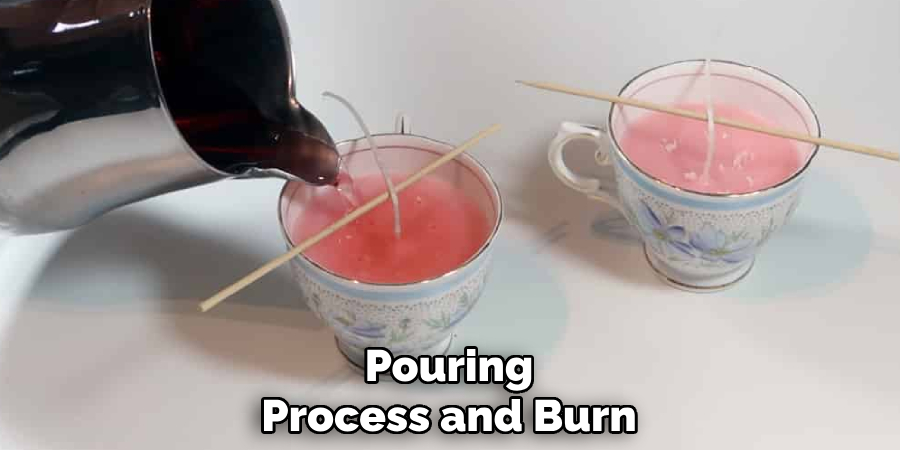
Step 5: Pour the Wax into the Teacup:
With meticulous attention, pour the melted wax into the prepared teacup, creating a space of about ¼ inch at the top to prevent overflow and allow for the wax to settle. Maintain the wick’s centered position throughout the pouring process to ensure even burning. Once poured, let the wax settle slightly before making any necessary wick adjustments to center its position firmly. Following these steps, you’ll create a beautifully poured candle, ready to set and enjoy.
Cooling and Finishing the Candle
Step 1: Let the Wax Set:
After pouring the wax into the teacup, it is crucial to allow it to cool and harden completely, which may take several hours. During this period, refrain from moving or touching the teacup, as any disruption can cause the wax to crack or develop air pockets. Patience during this stage is essential to ensure the candle maintains a smooth and even surface upon setting.
Step 2: Check for Sinkholes:
As the wax begins to cool, you might notice a slight dip or sinkhole forming around the wick. This is a common occurrence in candle-making and can be corrected easily. Reheat a small amount of leftover wax you saved after the initial pour. Carefully pour this reheated wax over the surface of your candle, filling in any depressions or sinkholes. This step helps maintain the candle’s structural integrity and aesthetics.
Step 3: Trim the Wick:
Once the wax is set thoroughly, trimming the wick is time. Cut the wick down to about ¼ inch above the candle’s surface using scissors. Keeping the wick at this ideal length is crucial to prevent excessive smoking and ensure a clean, even burn when the candle is lit. Proper wick maintenance enhances both the safety and longevity of your candle.
Step 4: Optional Surface Smoothing:
If the surface of your candle appears uneven or bumpy, achieving a polished finish can be easily accomplished. Use a heat gun or hairdryer to gently warm the top layer of the candle, allowing it to melt slightly and redistribute into a smooth surface.
This step is optional but recommended for those seeking a more refined and professional appearance to their handcrafted teacup candle. By following these cooling and finishing steps, your candles will be ready to light, showcasing your skill and attention to detail in candle-making.
Decorating and Personalizing Your Teacup Candles
Step 1: Add Decorative Elements:
To personalize your teacup candles, consider adding decorative elements like ribbon, labels, or small charms to the handle. These embellishments can reflect the style or occasion, making each candle unique and tailored to the recipient’s taste.
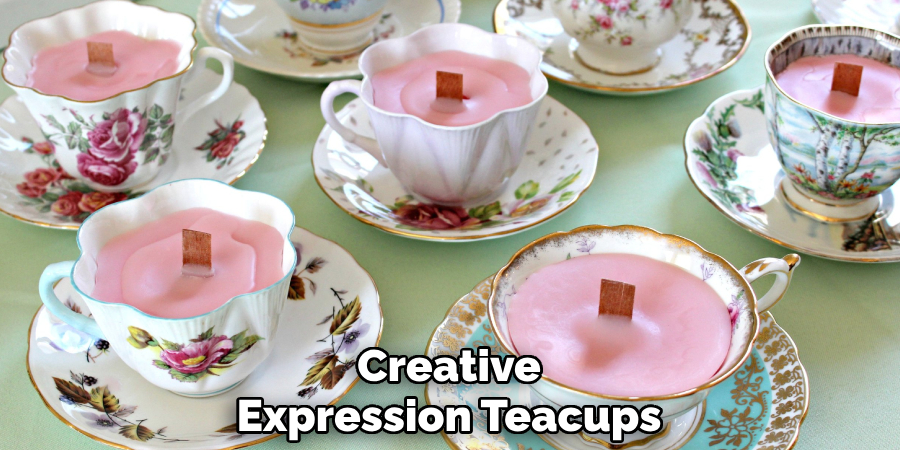
Step 2: Create Sets or Themes:
Teacup candles make excellent gifts, allowing for creative expression through themed sets. By selecting complementary teacups and colors, you can design collections such as vintage floral, rustic, or holiday. Package them in gift boxes with tissue paper or cellophane for an added touch of elegance, enhancing their appeal as thoughtful presents.
Step 3: Store or Display:
Display your finished teacup candles on shelves, coffee tables, or mantels to showcase their charm and craftsmanship. They can also be stored in a cool, dry place to preserve their quality until you’re ready to use them or give them as gifts, maintaining their pristine condition.
Conclusion
Making teacup candles is a fun and creative DIY project that allows you to repurpose beautiful teacups and create unique, handcrafted items for yourself or loved ones. By following these steps—gathering materials, prepping the wicks, melting the wax, and adding personal touches—you can produce stunning candles that add warmth and charm to any space.
Teacup candles can also be customized to your preferences by choosing different types of wax, fragrances, and colors, making them perfect for gifts or home décor. Enjoy the candle-making process, and don’t hesitate to experiment with different scents and styles to create a candle that reflects your personal taste. Learning how to make teacup candles enriches your crafting skills and provides an opportunity to express creativity and bring joy to others through homemade, heartfelt gifts.
About
Angela is the chief editor of Indoorense. She began her career as an interior designer before applying her strategic and creative passion to lifestyle and home.
She has close to 15 years of experience in creative writing and online content strategy for housekeeping and cleaning,home decorations as well as other efforts.
She loves her job and has the privilege of working with an extraordinary team. She lives with her husband, two sons, and daughter in Petersburg. When she’s not busy working she spent time with her family.