
Creating your own roller shades is an excellent way to add a personalized touch to your home décor while also saving money. Whether you’re looking to refresh your interior with a new style or need a custom solution for unusually sized windows, crafting roller shades allows you to choose fabrics, colors, and finishes that match your aesthetic perfectly.
This guide will walk you through the process of how to make roller shades, providing step-by-step instructions and tips to ensure that even beginners can achieve a professional-looking result. With just a few materials and tools, you can transform your space with beautiful and functional window treatments that reflect your unique style.
Benefits of Making Your Own Roller Shades
Creating your own roller shades offers numerous advantages that go beyond just aesthetics. Firstly, it allows you complete control over the material and color selection, ensuring that the shades perfectly complement your room’s décor. By customizing their design, you can enjoy unique window treatments that can’t be found in stores.
Moreover, making your own roller shades can be a cost-effective solution, helping you save money compared to purchasing high-end custom shades. Another benefit is the flexibility to size the shades to perfectly fit unusual or non-standard window dimensions, enhancing their functionality and appearance. Lastly, the rewarding sense of accomplishment that comes from crafting your own home furnishings adds a personal touch to your living space, making it truly feel like your own.
Gather Materials and Tools
Before you begin creating your roller shades, it’s important to gather all the necessary materials and tools to streamline the crafting process. You’ll need the following materials: fabric of your choice, a roller shade kit (which usually includes the roller mechanism, brackets, and mounting hardware), a fabric stiffener or lining (optional for lightweight fabrics), a measuring tape, and fabric scissors.
Additionally, consider acquiring a fabric adhesive or a hot glue gun for securing the fabric to the roller. For tools, have a drill with a bit suitable for your wall type, a level to ensure even installation, and a pencil for marking mounting points. With these materials and tools at your disposal, you’ll be well-prepared to craft custom roller shades tailored perfectly to your space.
10 Methods How to Make Roller Shades
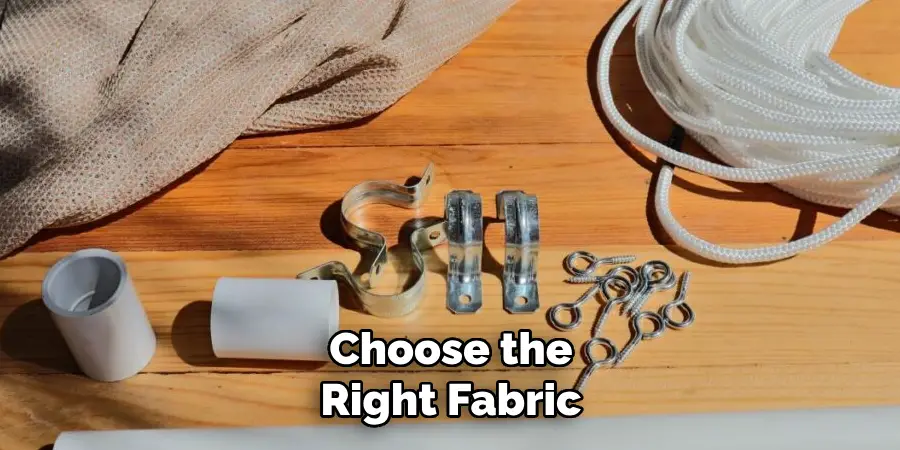
1. Choose the Right Fabric
The first step in making roller shades is selecting the right fabric. The material you choose will greatly affect both the look and functionality of your shades. For a more transparent, light-filtering shade, opt for sheer or lightweight fabrics like linen or cotton. If you’re looking for a blackout option, heavier fabrics such as canvas, denim, or blackout lining are ideal. Keep in mind that thicker fabrics provide better insulation and privacy, while lighter ones allow more natural light to enter the room. Consider the overall decor of your space and the function of the shades when making your selection.
2. Measure Your Windows Accurately
Before starting the project, it’s important to measure your windows accurately to ensure a perfect fit for your roller shades. Use a measuring tape to measure both the width and height of the window, deciding whether the shade will be mounted inside the window frame or outside it. For inside mounts, measure the width of the inside of the window frame at the top, middle, and bottom, and use the narrowest measurement. For outside mounts, measure the width and height of the window, adding a few extra inches to ensure full coverage and light control. Double-check your measurements to avoid any errors later on.
3. Select the Roller Mechanism
The roller mechanism is a key component of roller shades, as it allows you to raise and lower the shade smoothly. You can purchase pre-made roller mechanisms from home improvement stores, or repurpose an old roller shade. Make sure the mechanism you choose is compatible with the width of your window and can support the weight of the fabric you plan to use. Most roller mechanisms come with a tube for the fabric to attach to, along with a spring or chain-driven system for operation. A chain mechanism is often more convenient and allows for precise control, while a spring-loaded system offers a cleaner, minimalist look.

4. Cut the Fabric to Size
Once you have your fabric and roller mechanism ready, it’s time to cut the fabric to size. Lay the fabric flat on a clean, smooth surface, and use the measurements you took earlier to mark the dimensions on the fabric. Be sure to add a few extra inches to the height and width to allow for hemming and attaching the fabric to the roller tube. Use a straight edge or ruler to ensure that the lines are straight and cut the fabric carefully with sharp fabric scissors. If you’re using a patterned fabric, make sure the design is aligned properly before cutting.
5. Hem the Edges for a Finished Look
Hemming the edges of your fabric ensures that the roller shade has a neat, finished look and prevents fraying over time. To hem the fabric, fold the edges over by about half an inch and press them down with an iron. You can either sew the hems using a sewing machine or apply iron-on hem tape for a no-sew option. Be sure to hem all four sides of the fabric, including the top edge that will attach to the roller tube and the bottom where the weight bar will be inserted. This step not only adds durability but also gives the shade a polished, professional appearance.
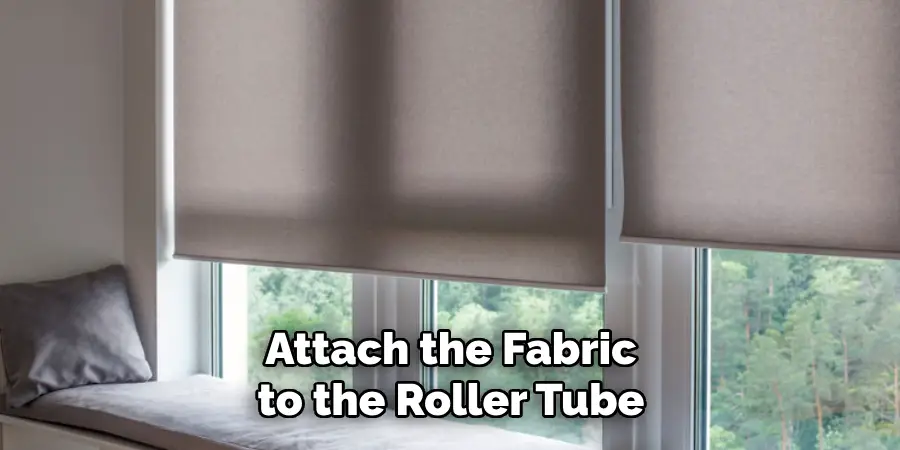
6. Attach the Fabric to the Roller Tube
Attaching the fabric to the roller tube is a crucial step in creating your roller shade. Most roller mechanisms come with an adhesive strip on the tube where the fabric can be attached. If your mechanism does not have this feature, you can use a strong fabric adhesive or double-sided tape. Start by aligning the top edge of the fabric with the adhesive strip on the tube, ensuring that the fabric is straight. Press down firmly to secure the fabric, and then begin to roll the fabric onto the tube, ensuring it wraps evenly. This will help the shade operate smoothly without bunching or wrinkling.

7. Add a Bottom Weight Bar
To ensure that the roller shade hangs straight and operates smoothly, it’s important to add a weight bar at the bottom of the fabric. Most roller shades use a metal or wooden dowel as a weight bar, which is inserted into a pocket at the bottom of the fabric. You can create this pocket by folding the fabric over the dowel and sewing or gluing it in place. The weight bar keeps the shade from curling and helps it to roll up and down more easily. Make sure the bar is evenly distributed across the width of the shade to maintain balance.
8. Customize with Decorative Trim or Tassels
One of the benefits of making your own roller shades is the ability to add decorative touches that reflect your personal style. Consider adding trim, tassels, or fringe along the bottom edge of the shade for a unique, custom look. Decorative trims come in various styles and materials, from elegant lace to playful pom-poms. To attach the trim, simply sew it onto the bottom hem of the fabric or use fabric glue for a no-sew option. This small detail can add a lot of character to the shades and make them a standout feature in your room.
9. Install the Roller Shade Mechanism
Once the shade is assembled, it’s time to install the roller mechanism. Follow the manufacturer’s instructions for mounting the brackets, which typically involve screwing them into the wall or window frame. If you’re using an inside mount, make sure the brackets are positioned evenly within the window frame. For an outside mount, ensure that the brackets are level and placed at the correct height. After securing the brackets, snap the roller shade into place and test its operation by pulling the chain or using the spring mechanism to raise and lower the shade.
10. Maintain and Clean Your Roller Shades
Proper maintenance will ensure that your roller shades remain functional and attractive for years to come. Depending on the fabric you chose, your shades may need occasional cleaning to remove dust or stains. For most fabrics, a gentle vacuuming with a brush attachment will suffice to remove dust. If the shades are stained, spot cleaning with a mild soap and water solution is usually safe. Avoid using harsh chemicals that could damage the fabric. Periodically check the roller mechanism to ensure it operates smoothly, tightening any loose brackets or components as needed.
Conclusion
Making your own roller shades allows you to customize your window treatments to perfectly suit your space, style, and needs. By selecting the right fabric, roller mechanism, and adding personal touches like decorative trim, you can create functional and stylish shades that enhance your home’s decor. Follow these simple instructions outlined in this blog post about how to make roller shades, and you’ll be able to get the job done with ease.
About
Angela is the chief editor of Indoorense. She began her career as an interior designer before applying her strategic and creative passion to lifestyle and home.
She has close to 15 years of experience in creative writing and online content strategy for housekeeping and cleaning,home decorations as well as other efforts.
She loves her job and has the privilege of working with an extraordinary team. She lives with her husband, two sons, and daughter in Petersburg. When she’s not busy working she spent time with her family.