
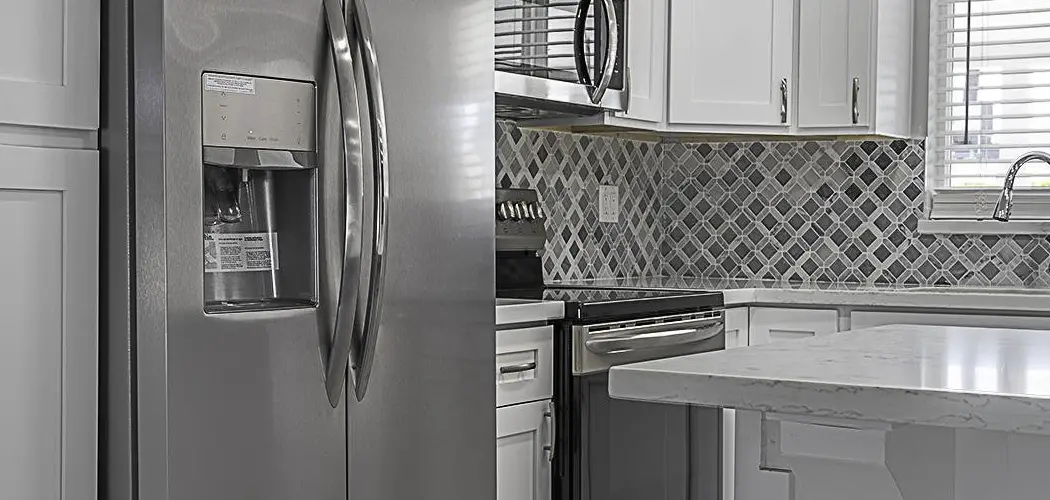
Are you tired of the clunky look of your freestanding fridge? Do you want to give your kitchen a more seamless, built-in appearance?
How to make freestanding fridge look built-in can significantly enhance the aesthetics of your kitchen, offering the sleek and seamless appearance often seen in high-end designs. While freestanding fridges are typically more affordable and versatile in placement, they can sometimes stand out against the cabinetry. With some strategic planning and a few clever design tricks, you can integrate a freestanding fridge into your kitchen layout to mimic the flush alignment of built-in models.
Whether you aim to achieve a contemporary or classic look, this guide will provide step-by-step instructions and creative ideas to transform your freestanding fridge into a stylish and cohesive component of your kitchen’s design.
What Will You Need?
Before diving into the steps, gathering the necessary tools and materials for this project is essential. Here are some items you will need:
- Measuring tape
- Level
- Drill and drill bits
- Screwdriver
- Wood filler or putty
- Sandpaper
- Paint or stain (optional)
- Cabinet-grade plywood or MDF board (depending on your preferred finish)
Once you have all the necessary tools and materials, let’s transform your freestanding fridge into a built-in masterpiece!
10 Easy Steps on How to Make Freestanding Fridge Look Built-in
Step 1: Measure and Plan
The first step in this project is to measure your fridge’s dimensions carefully. You’ll need to measure your refrigerator’s width, depth, and height, including any handles or protrusions. Accurate measurements are crucial, as they will be used to create a custom enclosure for your fridge.
Next, note where you want to place your fridge and other cabinetry or appliances. Consider your available space and if any obstacles may affect installation.

Step 2: Choose the Material
Choosing the suitable material is essential for crafting an enclosure that matches your kitchen aesthetic and provides durability and functionality. For this project, cabinet-grade plywood or MDF boards are popular choices due to their strength and ability to mimic the appearance of solid wood when finished properly. Plywood is revered for its stability and resistance to warping, making it ideal for environments with fluctuating temperatures, such as the kitchen. On the other hand, MDF offers a smooth surface that is easy to cut and paint, allowing you to achieve a high-quality finish with less effort.
When selecting the material, consider the existing cabinetry in your kitchen; the texture and color must harmonize well with your current design scheme. You may use a veneer to match the natural grain of existing wood or go with a painted finish for a unified look. Additionally, consider whether you need the material to be moisture-resistant, especially if your fridge is near a sink or water source.
Step 3: Build the Framing
Once you’ve chosen your material, it’s time to construct the framing for your fridge’s enclosure. Start by cutting the plywood or MDF board to the dimensions you measured earlier, ensuring you account for any additional space needed for ventilation. Using a drill and screws, assemble the panels to form a sturdy enclosure structure. Using a level during this process is essential to ensure that all pieces align perfectly, creating an even and stable frame. Reinforce any joints with wood glue or brackets for added strength. After the frame is constructed, do a dry fit around the fridge to ensure everything aligns appropriately and make any adjustments before finalizing.

Step 4: Install the Framing
With the framing built, the next step is to secure it around the fridge. Carefully position the structure around your refrigerator, ensuring that there is adequate space for ventilation. Maintaining at least a one-inch gap behind the fridge and half an inch on each side is crucial to allow air to circulate correctly. Once aligned, attach the framing to adjacent wall studs using screws for maximum stability. Recheck the level to ensure the enclosure is straight and balanced. Use shims to correct any offsets and secure them in place if necessary.
Step 5: Fill Gaps and Seams
Filling gaps and seams is crucial to achieving a seamless, built-in look for your fridge enclosure. Begin using wood filler or putty to fill any visible gaps where the panels meet or around corners. A putty knife can help you apply the filler smoothly and evenly. Since wood filler can shrink as it dries, it’s wise to overfill each seam slightly and allow it to dry thoroughly before proceeding. Once the filler is completely dry, sand the filled areas with fine-grit sandpaper until flush with the surrounding surface.

Pay special attention to the corners and edges, ensuring they are smooth to the touch and visually cohesive. The goal is to blend the seams into a continuous surface that appears to be part of the original design. This process improves the aesthetics and adds structural integrity to the enclosure.
Step 6: Apply Paint or Stain
Now that your framing is built and gaps are filled, it’s time to finish the surface with paint or stain based on your chosen design. If you’re going for a painted look, select a high-quality paint that matches or complements your existing kitchen cabinetry. Use a roller or brush to apply the paint in even coats, allowing each layer to dry thoroughly before adding the next.
First, a coat of wood conditioner is applied to a stained finish to ensure even absorption. Choose a stain that matches the tone of your existing wood elements, and apply it using a clean cloth or brush, wiping off any excess to reveal the natural grain. Finish with a protective clear coat to seal the surface, protecting it from moisture and wear.

Step 7: Attach Door Panels
For a genuinely built-in appearance, consider adding matching cabinet door panels to the front of the fridge. Measure the doors to align with surrounding cabinetry, and attach using a specialized adhesive or mounting brackets designed for appliance panels. Make sure to allow for handle accessibility and check for any functional impediments. Alternatively, painting or adding magnetic veneer sheets directly to the fridge doors can provide a similar effect.
Step 8: Create Trim and Molding
To achieve a high-end, cohesive look, install trim or molding around the edges of the fridge enclosure. This helps cover any visible gaps between the fridge and adjacent cabinetry. Select a style that complements your kitchen decor, whether sleek and modern or ornate and traditional. Carefully measure and cut the trim pieces, then secure them using finishing nails or adhesive. Be sure to fill any nail holes with wood filler and touch up with paint or stain to blend seamlessly with the surrounding materials.
Step 9: Check Ventilation
Proper ventilation is a critical component of a built-in fridge enclosure to ensure the refrigerator operates efficiently and has a prolonged lifespan. To promote air circulation, start by verifying sufficient space around the fridge, particularly behind it and on either side. The one-inch gap at the back and half-inch on the sides should be reassessed, ensuring that these clearances are maintained even after all trim and molding have been installed.
Consider whether your enclosure design requires additional venting solutions. To facilitate heat dissipation, discreet vents could be integrated at strategic points, such as the top or sides of the enclosure. These vents can be designed to blend with the overall décor, ensuring functionality without compromising aesthetics.
In some setups, installing a small fan or using vents that encourage passive airflow might be beneficial, particularly if the kitchen experiences significant temperature fluctuations.
Step 10: Final Inspection and Adjustments
Conduct a final walkthrough of your built-in fridge project, checking for any areas requiring adjustments or touch-ups. Look for alignment issues, uneven surfaces, loose panels, or any aesthetic inconsistencies that could detract from the overall appearance. Use a level to ensure everything is upright and balanced, making any necessary corrections involving shims or minor repositioning. Additionally, test the functionality of all aspects of the enclosure, including door accessibility and handle clearance, to ensure practical usability.
Verify that all finishing touches, such as paint or stain, are uniform and free of imperfections. If needed, apply additional coats or repair any areas that show signs of wear. This is also the perfect opportunity to ensure that ventilation modifications, like gaps or vent inserts, function effectively without being obstructed.
Following these steps, you can successfully build a custom enclosure for your fridge and achieve a polished built-in look that adds value and style to your kitchen.
Conclusion
Transforming a freestanding fridge into a seamlessly integrated part of your kitchen design is both a rewarding and achievable DIY project.
You can create a polished, built-in appearance without requiring extensive renovations by carefully planning each step, from initial measurements to the final decorative touches. Ensuring proper alignment and ventilation is crucial for maintaining the refrigerator’s efficiency and longevity. The use of matching materials and thoughtful design choices, such as coordinated door panels and molding, ensures that your fridge functions well and complements your kitchen’s aesthetics.
Hopefully, the article on how to make freestanding fridge look built-in has provided you with the necessary guidance and inspiration to transform your kitchen into a harmonious and stylish space.
About
Angela is the chief editor of Indoorense. She began her career as an interior designer before applying her strategic and creative passion to lifestyle and home.
She has close to 15 years of experience in creative writing and online content strategy for housekeeping and cleaning,home decorations as well as other efforts.
She loves her job and has the privilege of working with an extraordinary team. She lives with her husband, two sons, and daughter in Petersburg. When she’s not busy working she spent time with her family.