

Fabric envelopes are versatile and stylish alternatives to traditional paper envelopes. These fabric-crafted pouches serve numerous purposes, such as holding gift cards, acting as decorative stationery, or providing reusable packaging for small items like jewelry or keepsakes. The appeal of fabric envelopes lies in their eco-friendliness and reusability, offering a sustainable option for environmentally conscious individuals. They can be easily personalized by choosing different types of fabric, adjusting the size, and incorporating various decorations.
This guide on how to make fabric envelopes will provide comprehensive instructions on selecting the appropriate materials and will walk you through the step-by-step process of cutting, sewing, and finishing your envelope. Furthermore, we will offer valuable tips on how to add embellishments such as buttons, ribbons, or embroidery to further enhance the appeal and uniqueness of your fabric envelope.
Materials and Tools Needed
To successfully create your own fabric envelopes, having the right materials and tools is crucial.
Fabric
Cotton, felt, and linen are excellent options when choosing fabric for your envelope due to their versatility and ease of handling. Consider the weight of the fabric: lightweight choices provide a flexible feel, while heavier fabrics offer more structure and sturdiness to the envelope. It’s also a good opportunity to explore various fabric patterns and themes based on the occasion—floral designs are perfect for weddings, while bold prints add fun to birthday celebrations. Solid colors work beautifully for a classic and timeless look.
Interfacing or Batting
Adding interfacing can significantly improve the envelope’s durability and appearance by providing additional structure. Though optional, it’s suggested that your envelope maintain its shape over time if you wish. Lightweight or medium-weight interfacing is best, chosen based on the thickness of your fabric, to ensure the right balance between flexibility and support.
Sewing Supplies
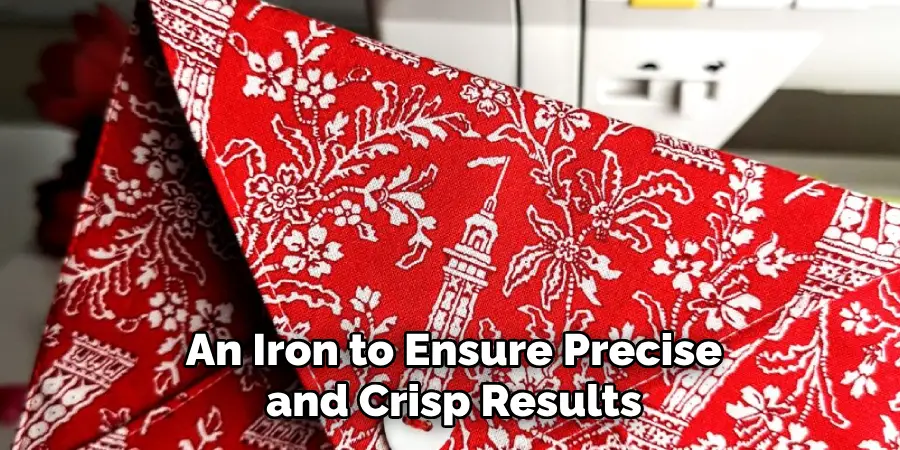
Essential sewing supplies include a sewing machine or a needle for those who prefer hand stitching, along with coordinating or contrasting thread to complement your chosen fabric. You’ll also need fabric scissors, a ruler, pins, and an iron to ensure precise and crisp results.
Closures and Embellishments
Consider using buttons, Velcro, or snap fasteners to secure the envelope flap. Each adds a unique touch to your creation. Optional embellishments like ribbons, lace, or embroidery can be incorporated to further personalize your envelope, making each piece uniquely yours.
Preparing and Cutting the Fabric
Measuring and Marking the Fabric
Before you begin cutting, the first crucial step is measuring and marking your fabric accurately. For a standard gift card holder, aim for a fabric rectangle approximately 5” x 8”, which provides adequate space for folding into an envelope, considering the seam allowances. However, feel free to adjust these dimensions according to your specific needs. To mark your fabric, lay it flat on a work surface and use a ruler to measure and draw lines using fabric chalk or a disappearing fabric pen. It is essential to ensure that your markings are straight for precise cutting and help guide your stitching later.
Cutting the Fabric
Once marked, it’s time to cut your fabric. You’ll need two rectangles of fabric: one for the outer surface and another for the lining. Additionally, if you’re using interfacing, cut a rectangle slightly smaller than your fabric pieces to fit inside without extending into the seams. Begin cutting with sharp fabric scissors to achieve smooth edges, which are crucial for maintaining an even seam during sewing. Take your time with this step, as precise cutting leads to a more polished final product.
Optional: Cutting Out a Template
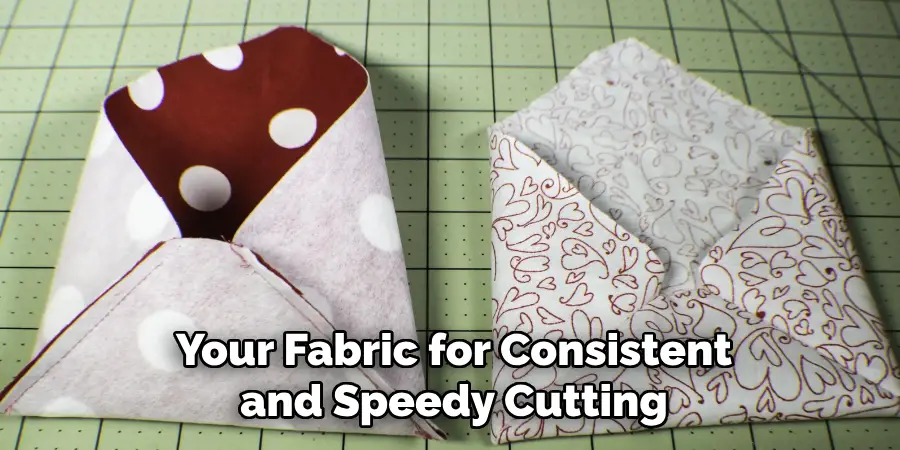
If you plan to produce several fabric envelopes, you might find it beneficial to create a template. Use cardboard or heavy paper to cut out a rectangle of your desired envelope size, then simply trace around it on your fabric for consistent and speedy cutting.
Ironing the Fabric
Ironing is crucial to ensure your fabric and interfacing are smooth and wrinkle-free before sewing. Lay out your fabric pieces and gently iron them flat. If using interfacing, follow the package instructions to properly adhere it to the wrong side of your fabric, usually by placing its adhesive side down and pressing with a warm iron. This preparation guarantees your envelope will look neat and professional after sewing.
How to Make Fabric Envelopes: Sewing the Fabric Envelope
Assembling the Layers
Begin by assembling your fabric envelope’s layers. Lay the outer fabric piece on a flat surface with the pattern side up. Then, place the lining fabric on top, with the pattern side down, so the right sides of both fabrics face each other. Position it between these fabric layers if you’ve chosen to include interfacing. Align all the edges carefully, and use pins along the perimeter to hold the fabric layers together in preparation for sewing.
Sewing the Edges
Next, take to your sewing machine or thread a needle if sewing by hand, and begin sewing along the edges of the fabric rectangle. Use a straight stitch and an ¼ inch seam allowance. Remember to leave a 2 to 3-inch gap on one side; this is essential for turning the fabric right-side out later. For added strength, backstitch at both the beginning and end of your stitching line to prevent unraveling.
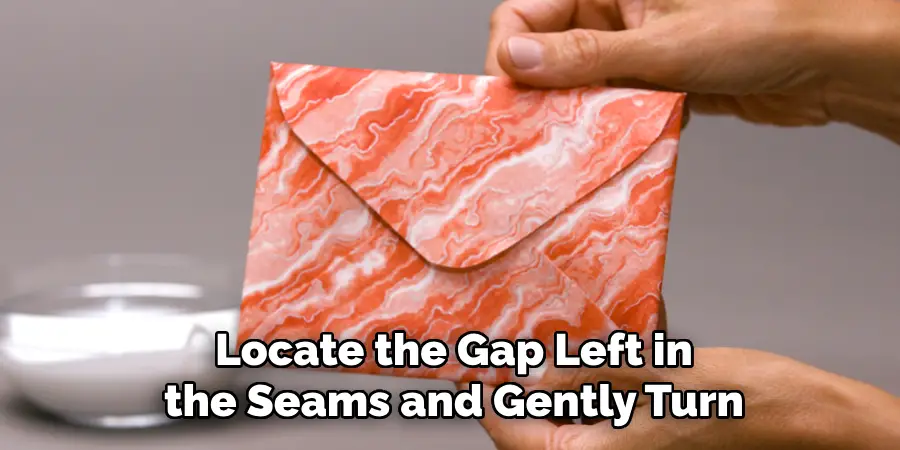
Turning the Envelope Right-Side Out
With the sewing completed, locate the gap left in the seams and gently turn the fabric envelope right-side out through it. Use a blunt object, like a chopstick or a pencil, to carefully push out the corners, ensuring they are crisply defined. Once turned right-side out, press the envelope with an iron to smooth out any creases or wrinkles, giving it a refined appearance before proceeding to the next step.
Closing the Gap
With the envelope now right-side out, you need to address the gap. Fold the raw edges of the gap inward so they align with the rest of the seam, and secure them with pins. Sew this gap closed with a top stitch, using a thread color that matches your fabric for a seamless finish.
Forming the Envelope Shape
To give your fabric piece its envelope form, fold the bottom part of the rectangle upwards, forming the main body. Ensure this section constitutes two-thirds of the total envelope height, leaving the remaining third as the flap. Pin both sides of the envelope body to keep them in position, then stitch close to the edge, maintaining a neat and consistent seam.
Sewing the Flap
Finally, attend to the flap. Depending on your preference, you can leave the flap unfinished for a casual look or fold the raw edges inward to create a neat hem. If you opt to hem, sew a small top stitch around the perimeter of the flap. This offers a polished presentation and increases durability, preventing frayed edges over time. With these steps completed, your fabric envelope is ready for embellishments and closures, bringing personalized charm and functionality to your crafted item.
Adding the Closure and Embellishments
Adding a Button or Snap Fastener
To attach a button, first decide on the button’s placement on the flap and mark it with fabric chalk. Sew the button onto the flap using a strong thread, ensuring it is secure. Next, create a corresponding buttonhole on the body of the envelope. For best results, reinforce the buttonhole area with interfacing to prevent the fabric from stretching or fraying. Alternatively, for a modern closure, consider using snap fasteners or Velcro. These options are straightforward to attach and provide a convenient, user-friendly way to secure the envelope.
Decorative Ribbons and Lace
To enhance the visual appeal of your fabric envelope, consider incorporating decorative elements like ribbons or lace. You can sew the ribbon onto the edges of the envelope or along the flap. Depending on your design preference, this can be done either before or after assembling the envelope. Additionally, creating a ribbon tie closure is a charming and functional embellishment. Attach ribbons to both sides of the envelope and tie them into a bow to keep it closed elegantly.
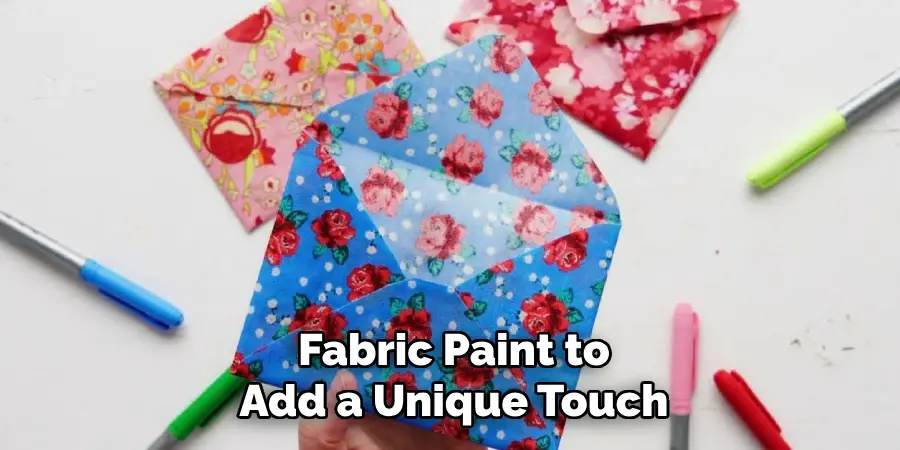
Embroidery or Fabric Paint
Personalize your fabric envelope with hand embroidery or fabric paint to add a unique touch. Embroidery allows for customization, such as adding names, initials, or themed designs like snowflakes or flowers. Utilize simple stitches like backstitch or satin stitch, which are beginner-friendly yet effective in creating intricate designs. Similarly, fabric paint offers artistic freedom to create details that reflect your personal style or occasion themes, transforming your envelope into a keepsake with sentimental value.
Conclusion
In summary, creating a fabric envelope involves several straightforward steps: choosing the right fabric, precise cutting, careful sewing, and adding thoughtful closures. Following these steps, you can craft a simple yet beautiful fabric envelope tailored to your preferences. Fabric envelopes are practical and reusable and offer a high level of customization, making them perfect for both beginners and experienced crafters. This crafting project doesn’t just provide a useful item; it also allows for creative expression.
The flexibility in design enables you to experiment with various types of fabrics, different sizes, and a variety of embellishments, resulting in unique, personalized envelopes. Use them to gift, store, or organize items creatively. We hope this guidance on how to make fabric envelopes inspires you to embrace your own creative journey and explore the endless possibilities they present for any occasion.
About
Angela is the chief editor of Indoorense. She began her career as an interior designer before applying her strategic and creative passion to lifestyle and home.
She has close to 15 years of experience in creative writing and online content strategy for housekeeping and cleaning,home decorations as well as other efforts.
She loves her job and has the privilege of working with an extraordinary team. She lives with her husband, two sons, and daughter in Petersburg. When she’s not busy working she spent time with her family.