

Are you tired of constantly feeling cold in your raised house? Do you want to save money on your heating bill by improving the insulation in your home? Then it’s time to learn how to insulate floor of raised house!
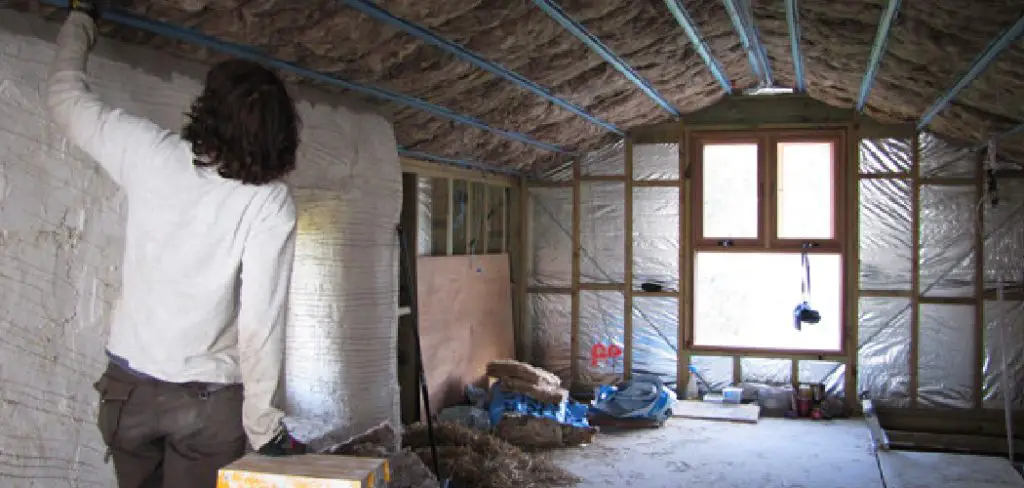
Insulating the floor of a raised house is a crucial step in enhancing energy efficiency and comfort. Raised houses, often built on pilings or stilts, can be vulnerable to heat loss due to the airflow beneath them. Proper floor insulation helps maintain a consistent indoor temperature, reduce energy costs, and minimize drafts, making the home more comfortable year-round. Additionally, it can prevent moisture buildup, which can lead to mold and structural issues.
By understanding the various insulation materials and methods available, homeowners can effectively insulate their floors to safeguard against the elements while also contributing to environmental sustainability.
What Will You Need?
To insulate the floor of a raised house, you will need some essential tools and materials. These may include:
- Insulation material (such as fiberglass batts or rigid foam panels)
- Utility knife
- Measuring tape
- Staple gun
- Caulking gun and sealant
- Safety gear (gloves, goggles, mask)
It’s important to note that the type and amount of insulation needed may vary depending on your climate and local building codes. Before beginning any insulation project, it’s always best to consult with a professional or research the specific requirements for your area.
10 Easy Steps on How to Insulate Floor of Raised House
Step 1. Prepare the Area
The first step in insulating the floor of a raised house is to prepare the area underneath. Begin by clearing away any debris, dirt, or items that may obstruct your work. It is essential to have a clean and dry surface to ensure proper insulation installation. Next, assess the condition of the subfloor and joists for any damage or signs of rot that may need repair before proceeding.

Ensure that there are no water leaks or excess moisture, as these can compromise the effectiveness of the insulation and lead to mold growth. Finally, measure the spacing between the joists to determine the necessary dimensions of insulation material you’ll require. This careful preparation sets the foundation for a successful insulation project, ensuring safety and effectiveness.
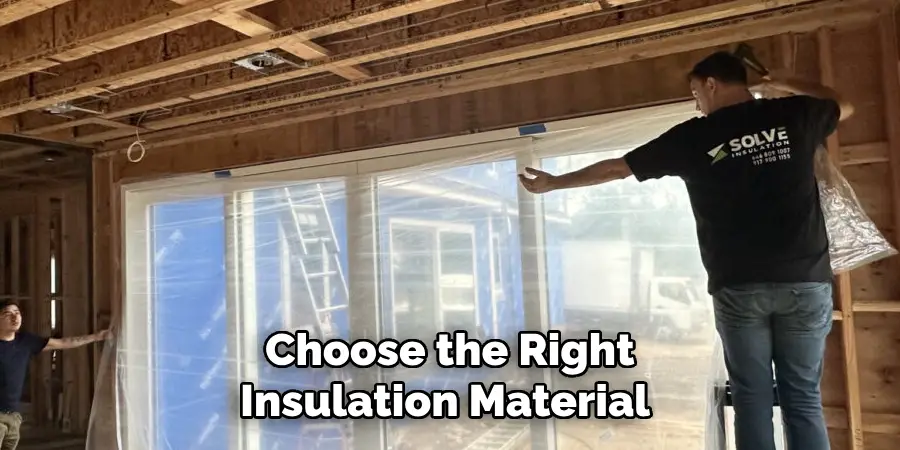
Step 2. Choose the Right Insulation Material
Selecting the appropriate insulation material is critical for achieving optimal thermal performance. Fiberglass batts and rigid foam panels are popular choices, each with unique benefits. Fiberglass is known for its flexibility and ease of installation, fitting snugly between joists to provide adequate insulating coverage. Rigid foam panels, on the other hand, offer superior moisture resistance and high R-value per inch, making them ideal for areas prone to dampness.
Consider the specific needs of your house, including climate and potential exposure to moisture, to help guide your decision. Additionally, check local building codes for any particular insulation materials and installation requirements. By choosing the proper insulation, you ensure long-lasting comfort and energy efficiency for your raised house.
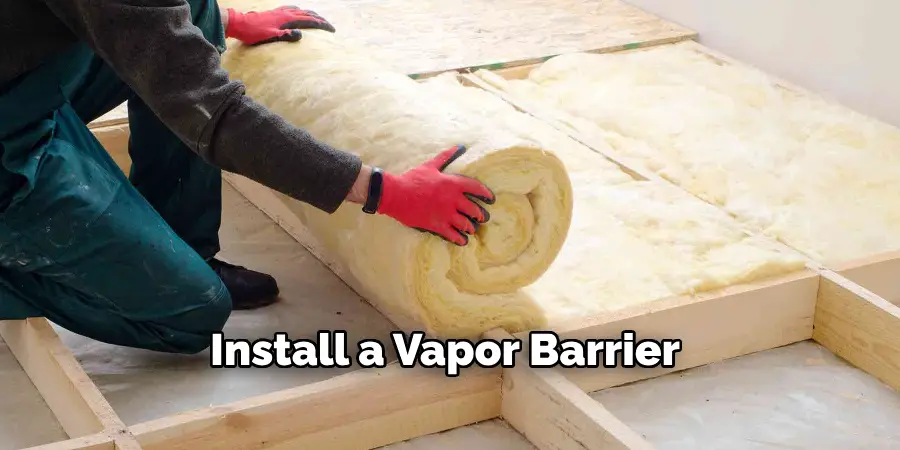
Step 3. Install a Vapor Barrier
After selecting the appropriate insulation material, installing a vapor barrier to protect your home from moisture-related problems is essential. A vapor barrier is a material layer, such as a polyethylene sheet, that prevents moisture from seeping into the insulation and subflooring. Begin by positioning the vapor barrier directly against the underside of the subfloor, ensuring it covers the entire area without gaps.
Use a staple gun to securely attach the barrier to the joists, and overlap any seams by at least a few inches. Seal the seams with tape or sealant to ensure a continuous moisture-resistant layer. Proper vapor barrier installation helps prevent condensation, mold growth, and wood rot, ultimately enhancing the durability and performance of your home’s insulation system.
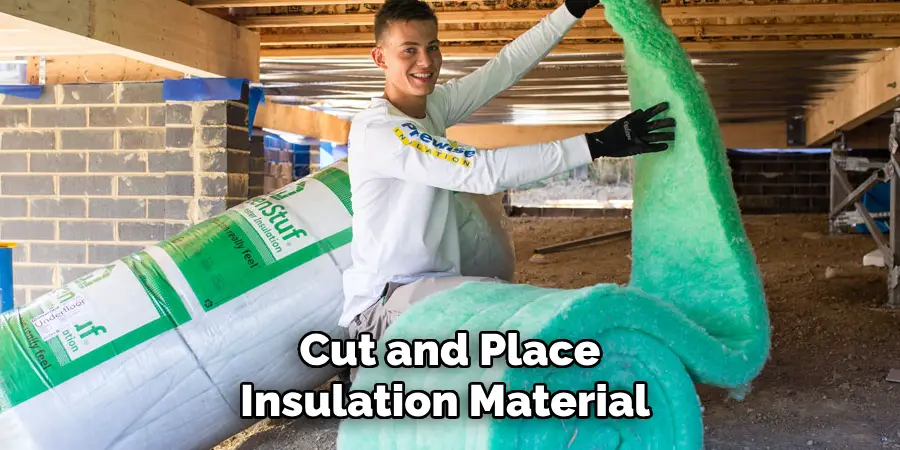
Step 4. Cut and Place Insulation Material
With the vapor barrier securely in place, the next step is to cut and position your selected insulation material. Use a utility knife to cut the insulation to fit snugly between the floor joists, ensuring that it fills the entire space without compression. For fiberglass batts, place them with the paper side facing up toward the subfloor if applicable. For rigid foam panels, ensure they are cut precisely to provide a tight fit between the joists.
Fill any gaps around the edges to maximize the insulation’s effectiveness. Accurate cutting and careful placement are crucial for optimal thermal resistance and energy efficiency. Always wear safety gear, like gloves and a mask, when handling insulation to protect yourself from irritation.
Step 5. Secure the Insulation in Place
Once you have positioned the insulation material, it’s essential to secure it to prevent any sagging or movement over time. If you’re using fiberglass batts, you can staple the insulation’s paper facing to the sides of the joists, ensuring it remains in place firmly. For rigid foam panels, use mechanical fasteners or adhesives designed for insulation to attach them securely to the joists.
Ensure there is no compression or deformation of the material during this process, as it can diminish the insulation’s performance. Double-check that all sections are securely in place, as shifts or gaps can lead to heat loss and decreased effectiveness. Proper insulation ensures its longevity and consistent insulating capabilities, contributing to better energy savings and comfort in your home.
Step 6. Seal Gaps and Cracks
After securing the insulation material, the next important step is to seal any gaps or cracks in the subfloor and around the edges of the insulation. This helps prevent air leakage, which can compromise the insulation’s efficiency and lead to energy loss. Use a caulking gun with sealant to fill in any visible cracks or spaces between the insulation and the joists.
Pay special attention to corners and joints, as these areas are familiar sources of drafts. Ensure the sealant is applied evenly and has fully cured according to the manufacturer’s instructions. Properly sealing gaps enhances thermal efficiency and prevents moisture intrusion and pest infiltration, ensuring a warmer and more energy-efficient home.
Step 7. Install an Access Hatch
Access to the insulated area beneath a raised house is vital for future inspections and maintenance. An access hatch should be created in the subflooring if not present. Choose a location that provides convenient access while minimizing disruption to the insulation. The hatch should be large enough to allow easy passage and maneuverability for anyone working in the space.
Frame the opening with wood to reinforce the edges and install a hinged cover that fits snugly to prevent air leakage. Insulate the hatch cover, if possible, to maintain continuity with the surrounding insulated areas. Installing a functional access hatch ensures that future inspections and any necessary maintenance tasks can be carried out with ease and efficiency, preserving the integrity and performance of the insulation system.
Step 8. Conduct a Final Inspection
Once all the previous steps are completed, conducting a thorough final inspection of the insulation installation is crucial. Begin by checking each section to ensure the insulation is securely in place, with no visible gaps, compression, or sagging. Verify that all seams in the vapor barrier are adequately sealed and that caulking applied to gaps and cracks has cured completely. Inspect the access hatch for airtightness and proper insulation.
Additionally, confirm that no safety hazards, such as exposed edges or loose materials, are present. A meticulous inspection helps ensure the insulation system performs effectively, providing enhanced energy efficiency and comfort in your raised house.
Step 9. Maintain the Insulation System
Regular insulation system maintenance is critical to ensure its continued effectiveness and longevity. Begin by scheduling routine inspections, ideally biannually, or whenever you suspect any issues with your home’s energy efficiency or moisture infiltration. During these inspections, check for any signs of damage, such as moisture stains, mold, or pest activity, and take prompt corrective actions if needed. Assess the condition of the vapor barrier and ensure it has not been breached. It’s also important to check that all insulation remains in place and the access hatch remains properly insulated and airtight. Regular upkeep helps sustain optimal insulation performance and prevents potential costly repairs, preserving the integrity and comfort of your home over time.
Step 10. Educate Occupants on Insulation Importance
Educating everyone living in the home about the importance of the insulation system is critical to maximizing its effectiveness. By understanding how proper insulation contributes to energy efficiency, comfort, and environmental sustainability, occupants are likelier to adopt practices that preserve its integrity. Encourage behaviors such as promptly reporting any drafts or unusual changes in indoor temperature, which can indicate issues with the insulation. Also, explain the importance of securely keeping the access hatch closed to maintain insulation efficiency.
With proper education, occupants can become active participants in maintaining an energy-efficient and comfortable home by practicing habits that support the insulation system’s performance.
Conclusion
How to insulate floor of raised house effectively can greatly enhance energy efficiency, comfort, and even the durability of the home.
By following a systematic approach—from selecting the suitable insulation materials to securing them in place, sealing potential points of air leakage, and ensuring ease of access for maintenance—you create a robust insulation system that serves the household well over time. Regular maintenance and educating occupants about the system’s benefits maximize its potential. In conclusion, a well-insulated floor contributes to lowered energy costs and improved indoor comfort and plays a crucial role in reducing environmental impact by minimizing energy consumption.
By investing in floor insulation, homeowners can enjoy peace of mind and a more sustainable living environment.
About
Angela is the chief editor of Indoorense. She began her career as an interior designer before applying her strategic and creative passion to lifestyle and home.
She has close to 15 years of experience in creative writing and online content strategy for housekeeping and cleaning,home decorations as well as other efforts.
She loves her job and has the privilege of working with an extraordinary team. She lives with her husband, two sons, and daughter in Petersburg. When she’s not busy working she spent time with her family.