

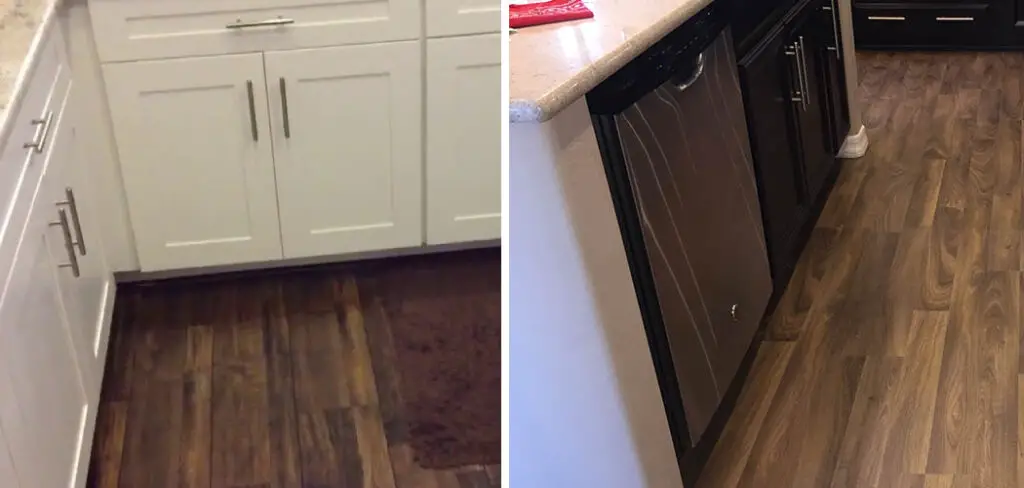
Installing laminate flooring around kitchen cabinets can be a daunting task, but it doesn’t have to be a grueling one. The key to success is taking your time, accurately measuring the spaces you’ll need to work on, and having the right tools handy. Here, we’ll walk you through step-by-step instructions on how to install laminate flooring around kitchen cabinets. With clear instructions and helpful tips along the way, you too will soon achieve a beautiful and professional result in no time!
Laminate flooring comes in a wide variety of colors and styles, meaning that you can customize your kitchen to fit any budget. Laying the material around cabinets might seem like an intimidating task, but with proper preparation and basic instructions, anyone can successfully lay laminate flooring around their kitchen cabinets. In this blog post, we’ll walk through everything you need to know about installing laminate flooring around kitchen cabinets so you can create the perfect finishing touch for your home renovation project.
Benefits of Installing Laminate Flooring Around Kitchen Cabinets
1. More Affordable Than Other Materials
One of the main advantages of using laminate flooring around kitchen cabinets is that it is much more affordable than other materials such as hardwood or tile. Laminate flooring has many different styles and colors to choose from, making it easy to match the décor of any kitchen.
2. Easy To Install
Laminate flooring is also relatively easy to install compared to other materials. With the right tools, a DIYer can install laminate flooring around kitchen cabinets in just a few hours.
3. Durable And Long Lasting
Finally, laminate flooring is very durable and long-lasting. It is resistant to scratches and scuffs and also won’t fade over time like some other materials might. This makes it an ideal material for use in high-traffic areas like kitchens.
Installing laminate flooring around kitchen cabinets is a great way to update the look of your home without breaking the bank. It is also relatively easy to install and durable so you can be confident that your new floors will stand up to years of wear and tear. With all these benefits, laminate flooring is a great choice for any kitchen.
How to Install Laminate Flooring Around Kitchen Cabinets in 6 Easy Steps
Step 1: Gather All The Tools You Need
The very first step is to make sure you have all the right tools and supplies needed for this job. You’ll need a jigsaw, laminate flooring, quarter-round molding, miter saw, tapping block, spacers, hammer and nails, safety glasses or goggles, measuring tape, and pencils.
Step 2: Measure The Space
Using your measuring tape and pencils, measure the space where you’ll be installing the laminate flooring. Be sure to mark the measurements on your paper so that you don’t make any mistakes later on.

Step 3: Cut The Laminate Flooring
Using the jigsaw, cut your pieces of laminate flooring according to your measurements. Make sure they fit snugly into the space where you’re going to be installing them.
Step 4: Install The Flooring
Using your tapping block, hammer, and nails, carefully install the laminate flooring pieces into place. Make sure each piece fits snugly together by using spacers between them and tapping lightly until they fit firmly in place.
Step 5: Cut The Quarter-Round Molding
Using your miter saw, cut the quarter-round molding to fit around your newly installed laminate flooring. Make sure the edges are all even and that there aren’t any gaps between them.
Step 6: Nail The Moldings
Finally, use a hammer and nails to attach the quarter-round moldings into place. You’ll want to make sure they are firmly attached so that they don’t come loose over time.

And there you have it! You’ve successfully installed laminate flooring around your kitchen cabinets in 6 easy steps. With just a bit of preparation, patience, and the right tools and materials, you can create a beautiful and long-lasting floor for any room in your home. Good luck!
Some Additional Tips to Install Laminate Flooring Around Kitchen Cabinets
1. Do Not Cut Laminate Too Short
Before cutting any pieces of laminate, measure the area with a tape measure and make sure all pieces are at least 2mm longer than the measurement. If you cut them too short they may not fit into the space properly.
2. Leave Space for Expansion Gaps
When installing laminate around kitchen cabinets, leaving a 1/4 inch expansion gap between the cabinets and floor will help to prevent buckling caused by temperature changes. Also make sure to leave a gap between the walls and floor for this same reason.
3. Use Underlayment
Using an appropriate underlayment beneath your laminate flooring can help to cushion it against warping or other damage caused by water spills or temperature changes. It will also help with soundproofing and will provide extra insulation for your kitchen.
4. Use Underlayment
Using an underlayment when installing laminate around kitchen cabinets is highly recommended. This helps absorb noise and prevents moisture from seeping up from underneath, which can cause damage to the flooring over time.
5. Use a Pull Bar
Using a pull bar when installing laminate around kitchen cabinets is very important to ensure that the planks are properly secured and will not come apart over time. A pull bar has teeth that latch onto the edges of the laminate planks, allowing you to press them down firmly without damaging them.
6. Clean Up Any Glue or Adhesive
Make sure to clean up any glue or adhesive that may have been used during the installation of the laminate flooring. This will help to ensure that no moisture is able to seep in and cause warping over time.
7. Allow Time To Acclimate
Make sure you give your laminate enough time to acclimate to the room before installing it around kitchen cabinets. This is very important as temperature and humidity can cause different types of flooring to expand or contract, which could potentially cause damage if not given enough time to adjust.
These tips should help you install your laminate flooring properly and correctly around kitchen cabinets. Following these steps will help ensure that your laminate lasts for many years to come! Good luck and enjoy your new flooring!
Frequently Asked Questions
What Precautions Should I Take Before Installing Laminate Flooring Around the Kitchen Cabinets?
Before starting any installation, it’s important to note the types of materials being used. This is especially important when working with cabinets and laminate flooring, as they have different requirements for installation. Ensure that you have properly measured your space so you know exactly where you need to cut around your cabinets.
It’s also important to make sure the laminate flooring is designed for use in kitchens; some laminates may not be suitable for wet areas like kitchens. Additionally, you should check the underside of your cabinets to make sure they are properly sealed and will not allow moisture into the subfloor below. Finally, always wear protective gear such as safety glasses when cutting the flooring.
What Are the Steps for Installing Laminate Flooring Around Kitchen Cabinets?
Before you start, make sure that you have all of the necessary tools and materials to hand. When cutting, it’s best to use a circular saw with a fine-toothed blade; this will help prevent chipping or curling of the laminate. When you are ready to begin, ensure that your cabinets are firmly in place and level before starting the installation.

Can I Install Laminate Flooring Around Kitchen Cabinets Without Removing Them?
Yes, you can install laminate flooring around kitchen cabinets without removing them. However, it is important to ensure that the cabinets are level and firmly anchored in place; otherwise, your floors may become uneven over time. Additionally, you will need to measure carefully and use a jigsaw or circular saw to make precise cuts around the cabinets. This will help keep your flooring looking neat and tidy.
Can I Lay Laminate Flooring in Front of Kitchen Cabinets?
Yes, you can lay laminate flooring in front of kitchen cabinets provided that the cabinets are firmly anchored in place and level. When cutting, it’s important to use a jigsaw or circular saw with a fine-toothed blade to prevent chipping. Additionally, be sure to measure carefully and use spacers when laying the laminate planks in order to maintain an even and professional finish. Once the flooring is laid, you can then install the cabinets over it.
Are There Special Requirements for Installing Laminate Flooring Around Kitchen Cabinets?
Yes, there are special requirements when installing laminate flooring around kitchen cabinets. It’s important to make sure that the laminate flooring you have chosen is suitable for wet areas like kitchens. Additionally, it’s essential to measure carefully and use a jigsaw or circular saw with a fine-toothed blade for precise cuts. Finally, always wear protective gear when cutting and make sure that the cabinets are firmly in place and level before starting your installation. This will help ensure a neat and professional finish.

Conclusion
Working on laminate flooring projects can be a bit overwhelming. But if undertaken with the right preparation and guidance, it can provide desired outcomes that you will love for years to come. We hope you have found this guide helpful in beginning to educate yourself on the process of installing laminate flooring around kitchen cabinets.
Following these steps should make your DIY project run more smoothly and lead to a successful outcome which will help to enhance a beautiful kitchen space with hard-wearing floors that will last for years to come!
Now you know how to install laminate flooring around kitchen cabinets! Best of luck with your renovation journey and don’t forget that there are professionals available who can offer specialist advice when needed. Take the plunge, be brave, trust yourself and most importantly have fun while embracing some new challenges. Install your floors right and you won’t regret the decision or all the effort you’ve put into it!
About
Angela is the chief editor of Indoorense. She began her career as an interior designer before applying her strategic and creative passion to lifestyle and home.
She has close to 15 years of experience in creative writing and online content strategy for housekeeping and cleaning,home decorations as well as other efforts.
She loves her job and has the privilege of working with an extraordinary team. She lives with her husband, two sons, and daughter in Petersburg. When she’s not busy working she spent time with her family.