
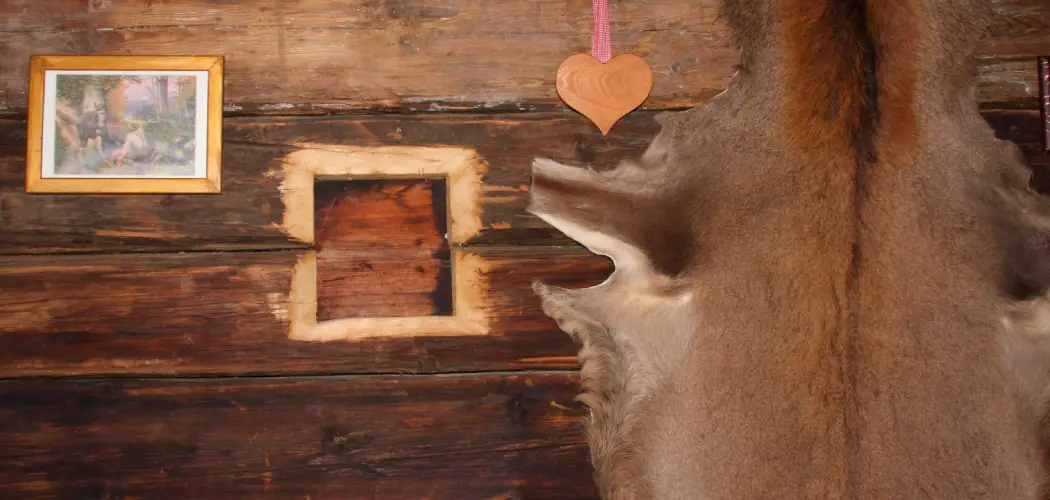
Hides, whether crafted from animal skins or synthetic materials, have become popular decorative elements in many homes due to their unique appeal and versatility. These pieces add a touch of nature’s elegance while providing warmth and texture to any room, serving as an eye-catching focal point. Hanging a hide on the wall is an excellent way to maximize its impact in a space, transforming it into a gallery-like exhibition.
There are various types of hides available, including cowhide, sheepskin, reindeer hide, and faux alternatives, each requiring slightly different techniques for optimal display. For instance, cowhides are more robust and may need stronger supports, while faux hides might only need simple methods. Understanding how to hang a hide on the wall is crucial to maintaining the integrity of both the hide and the wall. Selecting the right method ensures that the hide remains secure without causing damage.

Choosing the Right Spot for the Hide
When deciding where to hang your hide, consider the size of the hide as your starting point. Larger hides are best suited for spacious walls; their expansive beauty can be fully appreciated in ample spaces where they can dominate the visual field without overwhelming the room. Conversely, smaller hides can be strategically used on narrower walls or in confined spaces, where their details can add a touch of texture and interest without creating a cluttered appearance. Before proceeding, measure both the hide and the available wall space to ensure compatibility and a harmonious balance.
The material of the wall is another critical aspect to consider. Different wall types, such as drywall, brick, or plaster, each demand specific hanging methods. For instance, drywall may require wall anchors to provide additional support, while sturdier surfaces like brick can handle heavier loads with the right masonry hardware. It’s essential to assess the sturdiness of the chosen wall; a capable wall can securely hold the weight of the hide without risking damage. Selecting the appropriate hardware tailored to the specific wall material is pivotal for the safe and secure hanging of the hide.
Lighting and surrounding decor are vital in creating an aesthetically pleasing display. Position the hide where natural or artificial light can accentuate its texture and color, bringing out its nuanced patterns and tones. It’s also crucial to balance the hide with other nearby wall decor, such as framed art or shelves, to maintain an uncluttered and harmonious visual presentation. This careful arrangement enables the hide to serve as a captivating focal point while complementing the overall decor theme.
Prepping the Hide for Hanging
It is crucial to prepare your hide properly before displaying it to ensure it looks its best and to prolong its longevity.
Cleaning the Hide
If the hide is new, a light cleaning with a soft brush or vacuum can remove any loose fibers or minimal dust. A more thorough cleaning process might be necessary for older or second-hand hides to eliminate built-up dust or any lingering odors.
Hides made from animal skins, like cowhide, can benefit from gentle surface cleaning using a damp cloth. Special care should be taken to avoid saturating the hide. Utilize a specific leather cleaner, designed to treat natural fibers, to preserve the hide’s quality. Ensure the cleaner is compatible with the material by testing it on a small, inconspicuous area first.

Flattening the Hide (Optional)
If your hide has been rolled or folded, flattening it is an optional but highly recommended step to avoid creases when hanging. Start by laying the hide flat on a clean, dry surface. Depending on the thickness and material of the hide, this process may take several hours to a few days.
For quicker results, you can carefully place lightweight items, such as books, along the hide’s edges. This technique applies gentle pressure to aid in flattening without stretching or damaging the hide. Regularly check the condition of the hide during this step to adjust weights as needed and ensure that it maintains its natural shape and integrity.
How to Hang a Hide on The Wall: Selecting the Hanging Method
Choosing the right hanging method for your hide is essential to ensure it looks visually appealing and secure. Each technique has its own advantages and is suitable for different types of hides, so consider the weight, size, and material of your hide before deciding. Below are four effective methods to consider:
1. Using a Curtain Rod or Dowel
- Materials Needed: Curtain rod or wooden dowel, screws, and brackets.
- Steps to Hang: Begin by folding the top edge of the hide over the rod or dowel. Secure the hide in place using heavy-duty clips, upholstery staples, or by sewing a fabric sleeve along the top edge. Attach the rod or dowel to the wall using brackets. Adjust the placement as necessary to ensure the hide hangs straight.
- Advantages: This method allows the hide to hang naturally and makes it easy to take down or switch out if needed. It’s particularly ideal for larger, heavier hides that require robust support.

2. Velcro Strips or Hook and Loop Fasteners
- Materials Needed: Industrial-strength Velcro strips.
- Steps to Hang: First, attach one side of the Velcro strip to the back of the hide, making sure it runs evenly along the top edge. Then, affix the other Velcro side to the wall in the desired position. Finally, press the hide firmly onto the wall to ensure it sticks securely.
- Advantages: Velcro provides a damage-free solution that can be easily adjusted if necessary. This method is highly effective for lightweight hides that do not require heavy-duty support.
3. Tacks, Nails, or Push Pins
- Materials Needed: Upholstery tacks, nails, or decorative push pins.
- Steps to Hang: Position the hide on the wall and mark the points where tacks or nails will be inserted, typically around the edges or corners. Carefully hammer the tacks or nails into both the hide and the wall, ensuring the hide is stretched evenly and securely.
- Advantages: This method allows the hide to be tightly stretched across the wall and can accommodate heavier hides. However, it may leave small holes in both the wall and the hide, which should be considered when choosing this method.
4. Hanging Strips (Command Strips)
- Materials Needed: Command strips designed for heavier items.
- Steps to Hang: Attach the adhesive strips to the back of the hide, following the strip’s instructions. Press the hide firmly against the wall, ensuring it is level and securely adheres.
- Advantages: Command strips are damage-free and easily removable, making them an ideal choice for renters or those who frequently change their decor. They are best suited for lightweight hides that don’t require robust supporting methods.
Ensuring Proper Alignment and Security
Checking for Level
To ensure that your hide is displayed attractively, use a level tool to check that it is hanging straight. This step is especially crucial for larger pieces where any tilt can be quite noticeable. If you are using multiple nails or Velcro strips, verify that the hide is not tilting at any angle. Adjust the placement of the supports as needed to achieve a perfectly horizontal alignment.
Securing the Edges
If you notice the corners or edges of the hide starting to droop after hanging, it’s important to make adjustments promptly. Consider adding support by strategically placing additional tacks, Velcro, or hooks at the corners or sides. This reinforcement helps ensure the hide remains secure and aligns correctly, maintaining a taut appearance.
Preventing Sagging Over Time
To prevent the hide from sagging over time, particularly if using nails or tacks, periodically check its alignment and tension. You may need to re-tighten or adjust the hanging method occasionally. This maintenance step is vital for preserving the display’s integrity, ensuring that the hide remains a prominent and tightly secured focal point in your decor.
Maintenance and Care After Hanging
Regular Cleaning
To keep your hide looking fresh, regularly dust or vacuum it using a soft brush attachment to gently remove surface dirt. For natural animal hides, apply specific leather cleaners and conditioners to maintain the hide’s quality and natural sheen. Always test these products on a small, inconspicuous area first to ensure compatibility with your hide’s material.

Avoiding Sun Damage
Protect your hide by positioning it away from direct sunlight, which can cause fading or drying over time. Natural hides are particularly susceptible to sun damage, so consider placing them on walls that do not receive prolonged sun exposure or use window treatments to filter UV rays.
Adjusting Over Time
Periodically inspect your hide to ensure it hasn’t shifted or become loose. Make necessary adjustments to its hanging method to maintain alignment and prevent sagging. Regular checks will help preserve the hide’s appearance and ensure it remains a prominent feature in your decor.
Conclusion
Selecting the appropriate hanging method is crucial for ensuring your hide is both securely anchored and visually appealing. Each hide’s unique size, weight, and material dictate the best approach for how to hang a hide on the wall, whether using a curtain rod, Velcro, tacks, or command strips. Taking the time to methodically consider and implement the best hanging solution will result in a robust display, enhancing the hide’s natural beauty and preserving its condition over time.
A thoughtfully hung hide doesn’t just provide a sense of security, but it also elevates the aesthetic of a room, infusing it with warmth and texture. As a significant feature of your decor, a well-displayed hide can become a captivating focal point, transforming the ambiance of a space with its unique charm and tactile allure. Embrace the process, ensuring your hide receives the display it deserves.
About
Angela is the chief editor of Indoorense. She began her career as an interior designer before applying her strategic and creative passion to lifestyle and home.
She has close to 15 years of experience in creative writing and online content strategy for housekeeping and cleaning,home decorations as well as other efforts.
She loves her job and has the privilege of working with an extraordinary team. She lives with her husband, two sons, and daughter in Petersburg. When she’s not busy working she spent time with her family.