
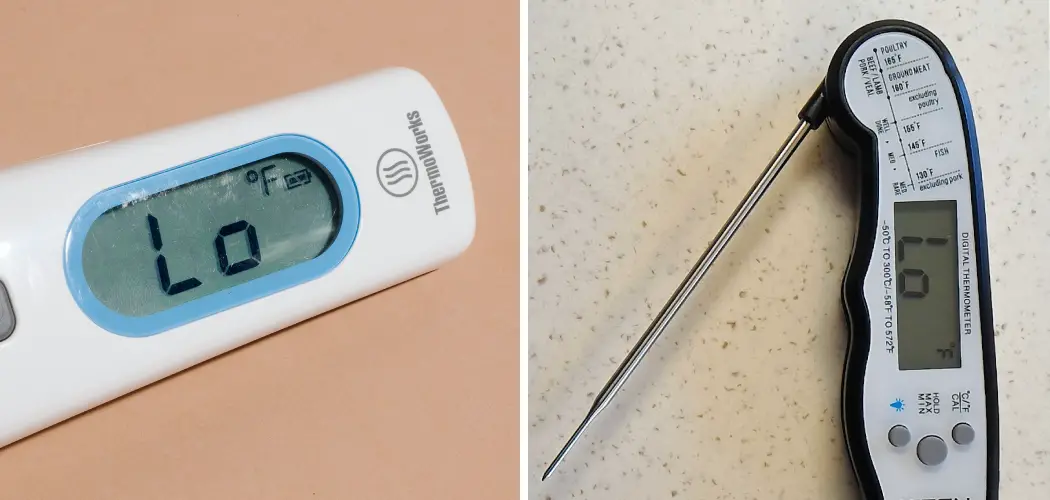
Have you ever noticed that your digital thermometer is no longer able to detect accurate temperatures? Experiencing an issue with your digital thermometer not registering a temperature reading? If so, you are not alone. Many people find themselves with malfunctioning or inaccurate digital thermometers and don’t know the best way to troubleshoot them and get them back in working order.

Don’t panic – it’s likely you can fix this problem at home without needing to purchase a new device. Fortunately, there are a few simple steps on how to fix lo in digital thermometer you can take to diagnose and fix any temperature-related issues with a digital thermometer. In this blog post, we will walk through all of the ways you can troubleshoot these devices so that they once again work as intended!
Why Do You Need to Fix Lo in Digital Thermometer?
1. For Accuracy
Before we get into how to fix lo in digital thermometer, it’s important to understand why you need to do this in the first place. Digital thermometers are designed with a range of temperature detection that can be affected by various factors. This means that over time or due to circumstances outside of your control, your device may no longer accurately detect temperatures and display an incorrect reading.
2. To Test the Device
Even if your digital thermometer is not displaying accurate readings, you’ll still need to test it before attempting any repairs or replacements. This will help you determine what type of issue you are dealing with and whether it can be fixed at home or requires professional attention.
3. To Prevent Damage
Finally, it’s important to fix any issues with your digital thermometer as soon as possible. If left, these problems can lead to further damage and may even mean a total replacement of the device. By taking the time to troubleshoot these devices and identify any potential malfunctions, we can prevent long-term damage and save ourselves money in the long run.
Now that we know why it’s important to fix lo in digital thermometers, let’s take a look at some of the steps you can take in order to do this.
Required Items for Fixing a Digital Thermometer
- Alcohol swab
- Soft cloth
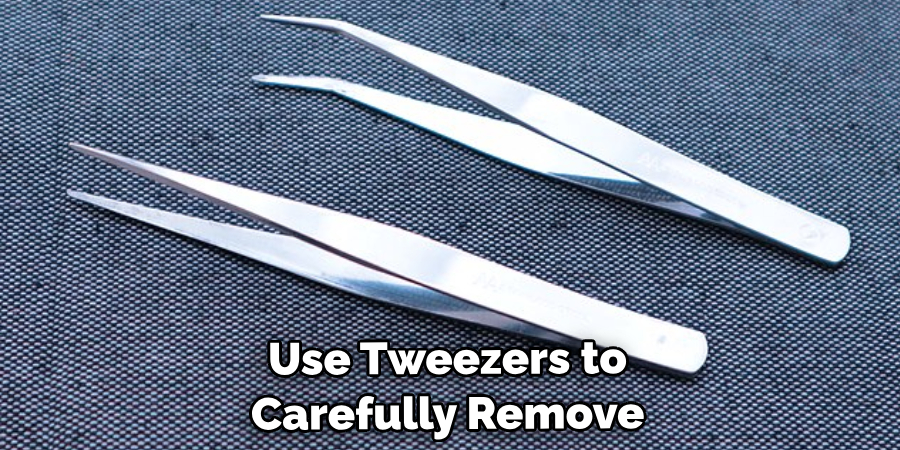
- Tweezers
- Disposable gloves
- Small screwdriver (optional)
- Digital thermometer
- New battery (if needed)
- Replacement parts (if needed)
10 Steps on How to Fix Lo in Digital Thermometer
Step 1: Turn Off the Thermometer
Begin by turning off the digital thermometer and disconnecting any wires or cables attached to it. Then, remove the back panel of the device with a small screwdriver (if applicable). Keep in mind that you should wear disposable gloves when handling any of the internal components.

Step 2: Inspect the Internal Parts
Next, take a close look at all of the internal parts of your digital thermometer. Inspect for any signs of corrosion or damage and check that all connections are tight and secure. If you notice anything irregular, it is important to replace these parts before continuing.
Step 3: Clean the Device
Using a soft cloth and an alcohol swab, gently clean any dirt or debris from the inside of the digital thermometer. This will help to ensure that all connections are tight and secure before you begin troubleshooting.
Step 4: Test the Battery
Remove the old battery from your thermometer and replace it with a new one. Make sure to use the correct type and size of battery for your device. Once you have installed the new battery, test it by turning on the thermometer and attempting a temperature reading.
Step 5: Check All Connections
Using tweezers, carefully check all connections inside the digital thermometer to ensure they are secure and properly connected. If any of the connections are loose, tighten them before continuing.
Step 6: Replace Any Broken Parts
If your device has any broken or damaged components, it is important to replace these immediately. Use tweezers to carefully remove the parts and then use a small screwdriver to install new ones (if applicable). Make sure that all connections are secure before proceeding.
Step 7: Reassemble the Thermometer
Once all of the internal components have been inspected and replaced (if necessary), reassemble the digital thermometer. Be sure to check that all wires and connections are secure before closing up the device.
Step 8: Test the Device Again
Turn on your digital thermometer and attempt a temperature reading. If the device is still not displaying accurate results, you may need to repeat steps 4-7.
Step 9: Readjust the Settings
If your digital thermometer is still not functioning properly, you may need to readjust the settings. Refer to the user manual for instructions on how to do this correctly.
Step 10: Seek Professional Help
If all of these steps have been unsuccessful and your digital thermometer is still not working properly, it is best to seek professional help. A trained technician will be able to identify the issue with your device and recommend the best course of action for repair or replacement.

These are the 10 steps on how to fix lo in digital thermometer that can help you diagnose any issues with your device and get it back up and running in no time. By following these steps, you can save yourself the cost of replacing your device and ensure that you have an accurate and reliable thermometer at all times. If you ever find yourself in need of help with your digital thermometer, contact a qualified technician for assistance.
8 Maintenance Tips
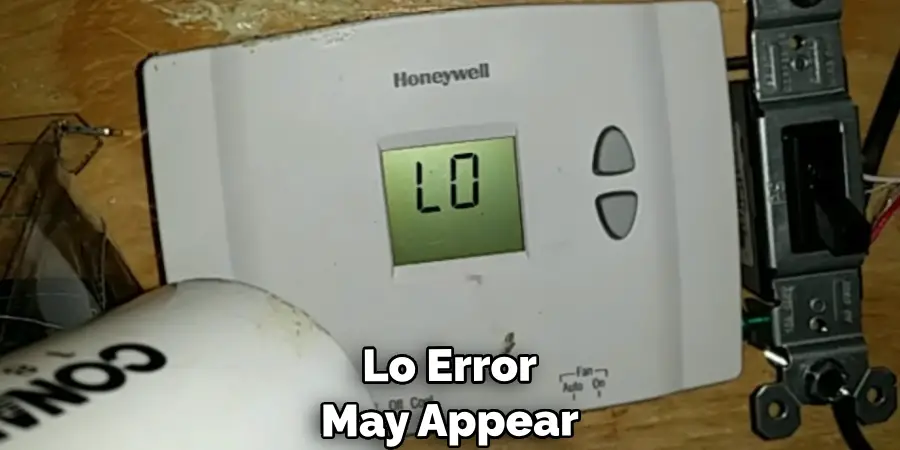
1. Check the batteries often. Make sure that your thermometer is properly powered with fresh batteries to ensure accuracy. If it’s been more than a few months since you last changed the batteries, replacing them can often fix the “Lo” message.
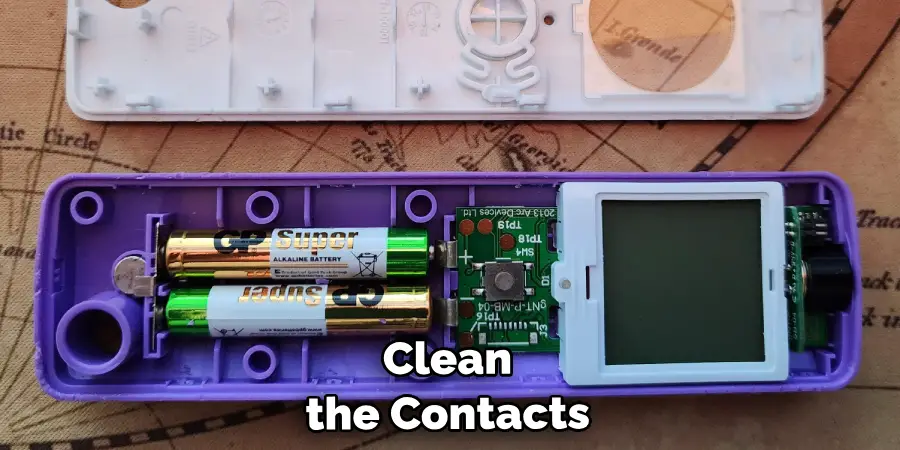
2. Clean the contacts if you’re getting an intermittent Lo message. Make sure that any metal-based contacts are free of dust and debris, as this can cause erratic readings and errors.
3. Check the environment if your thermometer is displaying a “Lo” message in rapid succession. Some digital thermometers need to be used in a temperature range of around 32 to 122 degrees Fahrenheit. If the thermometer has been exposed to temperatures outside this range, it could be causing errors.
4. Make sure that the sensor is properly connected and seated firmly in place if you’re getting a “Lo” message intermittently or with sudden dips in temperature readings.
5. Don’t move the thermometer around during use. Digital thermometers become more accurate as they stay in one place for an extended period of time, so avoid jostling them while taking readings.
6. Make sure that there is proper airflow between the sensor and what you’re measuring. If a fan or air conditioner is blowing directly on the sensor, it could cause inaccurate readings.
7. Test the thermometer against a known temperature source such as an ice bath or boiling water, to make sure that it’s still calibrated correctly.
8. If all else fails, you may need to replace your digital thermometer with a new one if it continues to display “Lo” messages. A malfunctioning thermometer can give you inaccurate readings or no readings at all, which could lead to unsafe food preparation. A new digital thermometer should be able to provide reliable temperature readings for years to come.
Following these simple maintenance tips on how to fix lo in digital thermometer will help you fix a “Lo” message in your digital thermometer and help it remain accurate and reliable. Properly maintaining your thermometer will help you avoid foodborne illnesses and keep your kitchen safe.
6 Safety Precautions to Follow When Fixing a Digital Thermometer
When you are trying to fix your digital thermometer, it is important to follow safety precautions to ensure the process goes smoothly and without incident. Here are 6 essential safety measures to follow when attempting to repair a digital thermometer:
1. Unplug the thermometer from the power source before beginning any repairs. This will help ensure you don’t get an electric shock or cause any further damage to the device.
2. Wear protective gear when handling electronic components, such as gloves and safety glasses. This will protect your skin and eyes from any potential harm that could be caused by sharp edges or exposed wires.
3. Take pictures of the thermometer before starting any repairs so that you have a reference for where the wires and other components are connected.
4. Check to make sure all wiring is properly connected and secure before powering on the thermometer again.
5. Carefully follow any instructions provided by the manufacturer when attempting repairs. If you’re not familiar with electronics, it’s best to leave complex repairs to a professional technician.
6. Make sure to dispose of any electronic waste properly according to local regulations. This will keep your home and environment safe from hazardous materials.
Following these safety measures on how to fix lo in digital thermometer when fixing a digital thermometer can help ensure that the process goes smoothly and without incident. Be sure to take all necessary precautions before beginning repairs on your thermometer, and consult with a professional technician if you are unsure of the best way to proceed.
Frequently Asked Question
How Often Do You Need to Fix Lo in Digital Thermometer?
In general, you should not need to fix the Lo error in your digital thermometer too often. If it appears on a regular basis, then something may be wrong, and you should take steps to troubleshoot and repair the issue. Ensure that you have properly calibrated the thermometer according to the manufacturer’s instructions and check for any loose connections or corroded wires. If all else fails, consider purchasing a new digital thermometer.
What Causes Lo to Show Up on Digital Thermometers?
A Lo error on a digital thermometer can occur due to several different causes. The most likely reason is that the temperature being measured is lower than the thermometer’s range of measurement. Other possible causes include loose connections or corroded wires in the thermometer, incorrect calibration of the thermometer, or a defective thermometer. Keep in mind that certain digital thermometers may only measure temperatures up to a certain range, so if you are trying to measure a temperature outside of this range, the Lo error may appear.
Conclusion
To conclude, fixing low readings in a digital thermometer is rather easy and straightforward. All one needs to do is make sure that the battery is installed properly, the display screen face is not covered, and the thermometer isn’t placed near direct heat sources. Going through these simple steps should ensure accurate temperature readings with your thermometer.
By understanding how a digital thermometer works, monitoring temperatures has never been easier. You can use it to monitor and maintain a consistent temperature for various food items or even check whether your water heater or air conditioner is working correctly. This will allow you to quickly rectify any problems with your device if something does go wrong, allowing you to keep comfortable in your home all year round! Follow these steps on how to fix lo in digital thermometer to fix a “Lo” message in your digital thermometer and ensure that it is giving accurate temperature readings.
Rick is a handyman who grew up helping his dad with his business. He learned a lot from him about how to fix things, and also about how to work hard and take care of business. These days, Rick is still into fixing things- only now, he’s doing it for a living.
Rick is always looking for new ways to help people grow and develop. That’s why he started contributing to this blog: to share all his experience and knowledge so that he can help people who are interested in DIY repair.