

A loose door lock cylinder can be a frustrating issue that compromises the security of your home. This common problem might arise from wear and tear, improper installation, or even door or lock mechanism damage. When the cylinder becomes loose, it can make locking or unlocking the door challenging, leading to potential safety concerns. Thankfully, learning how to fix a loose door lock cylinder is generally a straightforward process that can be accomplished with basic tools. Whether you are dealing with a front door, back door, or interior door, it is crucial to address this issue promptly to maintain the integrity and safety of your home.
In this guide, we will walk you through the necessary steps to diagnose the problem, secure the lock cylinder, and ensure your door functions properly once again.
Identify the Problem
Step 1: Check the Fit of the Cylinder
The first step in fixing a loose door lock cylinder is to determine whether it is indeed loose. Check if the cylinder moves or wiggles when you turn the key or attempt to lock or unlock the door. If you notice any movement, it’s a sign that the cylinder needs attention.
Step 2: Inspect for Visible Damage
Look for any signs of damage to the door or lock. Check the door frame for any gaps or misalignment affecting the cylinder’s fit. Additionally, inspect the lock itself for wear or damage. If the lock is cracked or broken, you may need to replace it entirely.
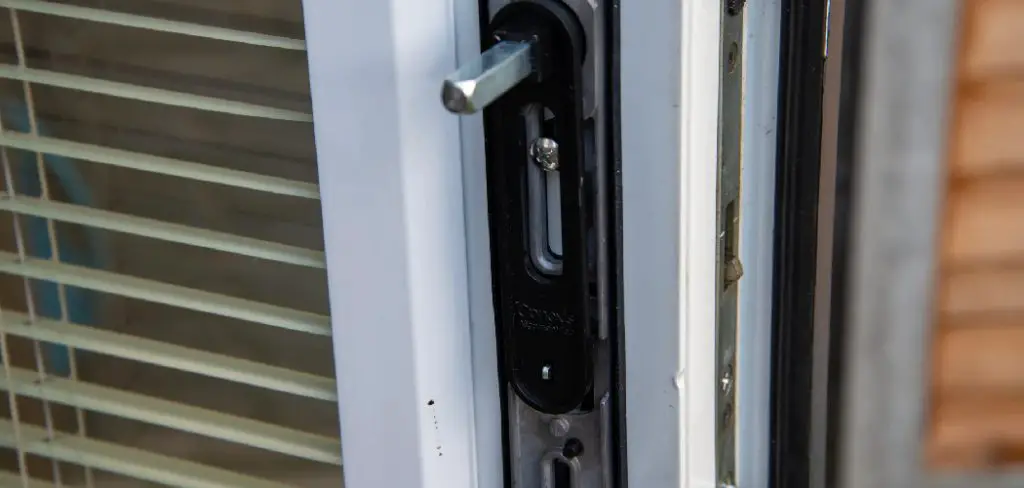
Step 3: Determine the Type of Lock
Different locks have different designs, so identifying the type of lock (e.g., deadbolt, knob lock) will help you understand how to secure the cylinder properly. Familiarize yourself with the lock mechanism and how the cylinder is installed.
Step 4: Gather Tools and Supplies
Before proceeding, gather the necessary tools. Common tools for this repair include a screwdriver, pliers, and possibly a replacement lock cylinder if necessary. Everything on hand will streamline the process, ensuring you’re prepared to address the issue efficiently.
How to Fix a Loose Door Lock Cylinder: Tighten the Cylinder
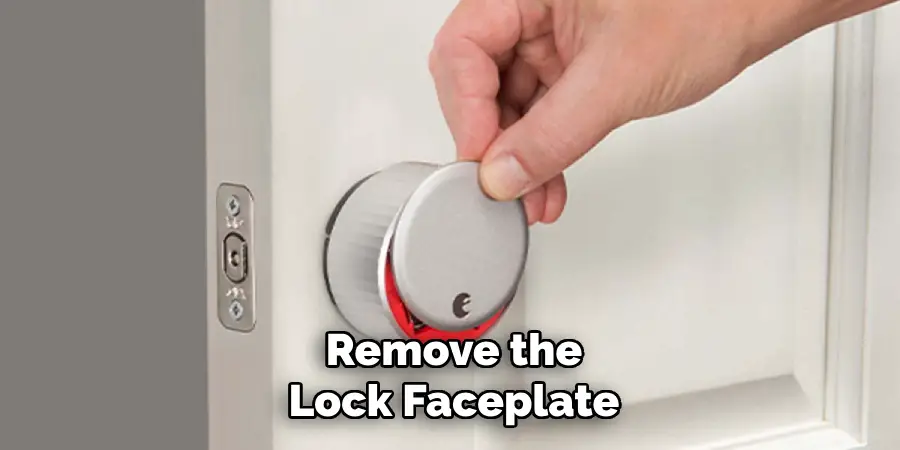
Step 1: Remove the Lock Faceplate (If Applicable)
If your lock has a faceplate covering the screws, the first step is to use a screwdriver to remove it. This will give you the necessary access to the screws securing the cylinder in place. Not all locks feature a faceplate, so it’s essential to check your specific lock design to determine if this step is needed. Carefully set aside the screws and faceplate for reassembly later.
Step 2: Locate the Mounting Screws
Next, you need to locate the screws that hold the cylinder securely in place. These crucial screws are typically found on the side of the door or within the main lock mechanism. It’s important to inspect both the interior and exterior sides of the lock, as screws might be present on both sides. Accurately identifying their location will help in the effective execution of the tightening process.
Step 3: Tighten the Screws
With the appropriate screwdriver, proceed to gently tighten the screws that secure the cylinder. Exercise caution to avoid overtightening, as this can lead to stripped screws or potential damage to the lock itself. The goal is to ensure that the lock cylinder is snug against the door, exhibiting no excessive movement when the key is turned.
Step 4: Reattach the Lock Faceplate (If Applicable)
If a faceplate was previously removed, reattach it at this stage by aligning it properly with the screw holes and securing it in place. This not only improves the visual appearance of the lock but also contributes to keeping the cylinder firmly positioned.
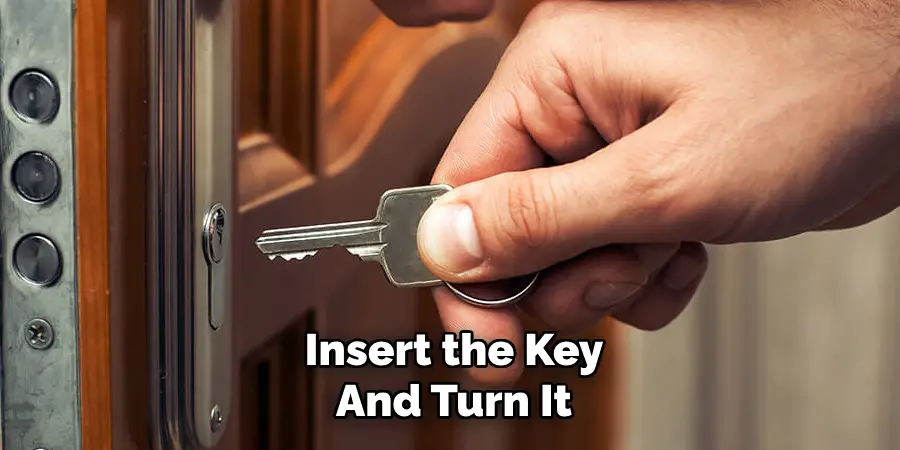
Step 5: Test the Lock
Finally, evaluate the effectiveness of your adjustments by testing the lock. Insert the key and turn it, ensuring the cylinder operates smoothly without any wobbling or give. Should the lock continue to feel loose, consider additional measures to secure it further to maintain your door’s security and functionality.
Use Lock Cylinder Retaining Clips
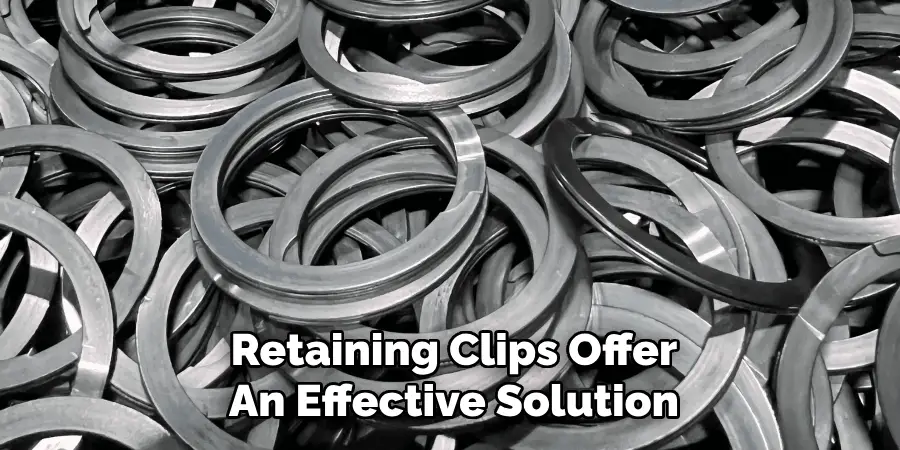
Step 1: Understand Retaining Clips
Some door locks come equipped with retaining clips, which are small but crucial components designed to keep the lock cylinder securely in position. Retaining clips offer an effective solution to prevent the cylinder from loosening over time. Not every lock features these clips, so it’s important to verify whether your particular lock model includes them.
Step 2: Remove the Cylinder
If you haven’t already removed the cylinder from its housing in the previous steps, now is the time to do so. Refer back to the earlier steps in this guide for instructions on properly extracting the lock cylinder from the door. This will allow you to work more easily with the cylinder and access the necessary areas to secure it with retaining clips.
Step 3: Locate the Clip Slot
With the cylinder removed, examine it closely to identify the slot designed to accommodate a retaining clip. This slot is typically situated near the rear of the cylinder, aligning with where it engages the lock mechanism. Not every cylinder is designed to use a retaining clip, so it’s essential to ascertain whether this step is applicable to your lock configuration.
Step 4: Insert the Retaining Clip
Once you’ve identified the slot for the retaining clip, carefully insert the clip in accordance with the manufacturer’s instructions. Ensuring that the clip is inserted correctly is critical for maintaining the cylinder’s stability. This small component should fit snugly into the slot, serving as an anchor that helps keep the cylinder from moving or loosening again.
Step 5: Reinstall the Cylinder
Following successfully inserting the retaining clip, proceed to reinstall the lock cylinder into its original position in the door. Ensure that it is properly aligned and engages the lock mechanism correctly. Take your time with this step to avoid misalignment, as it could potentially lead to further issues with the lock’s functionality.
Step 6: Test the Lock
After the cylinder is reinstalled, thoroughly test the lock to confirm everything is operating smoothly. Insert the key and turn it to lock and unlock the door, checking for any wobble or give. If the cylinder feels secure and functions without issue, you’ve resolved the problem of the loose cylinder, ensuring your door’s security and operational efficiency.
Replace the Lock Cylinder
Step 1: Assess the Need for Replacement
If tightening the screws and using retaining clips have left your lock cylinder feeling unstable or if there’s visible damage and significant wear, replacing the lock cylinder may be necessary. This is critical in maintaining your door’s security and ensuring reliable operation.
Step 2: Purchase a Compatible Replacement
Visit a reputable hardware store or browse online retailers to find a replacement lock cylinder that precisely matches the specifications of your existing lock. Check for compatibility with your door thickness and lock style to ensure a seamless fit.
Step 3: Remove the Old Lock Cylinder
To replace the lock cylinder, begin by revisiting the previous instructions outlined for cylinder removal. Delicately detach any screws or retaining clips securing the old cylinder, taking care not to damage any surrounding hardware during this process.
Step 4: Install the New Lock Cylinder
Carefully insert the new lock cylinder into the door, making certain that it aligns perfectly with the lock mechanism. Fasten it securely using the mounting screws or clips that came with the new lock. Take your time with this step to prevent misalignment, which could hinder the lock’s functionality.

Step 5: Reattach the Lock Faceplate
If your lock system includes a faceplate, reattach it to the new cylinder at this stage. Align the faceplate properly to cover any exposed screws or lock openings, which not only enhances the aesthetics but also contributes to the secure fit of the lock cylinder.
Step 6: Test the New Lock Cylinder
Finally, thoroughly test the newly installed lock cylinder to verify its smooth operation and secure placement. Insert the key and turn it to lock and unlock the door, checking for any wobbling or resistance. Confirm that the lock meets your security standards, knowing that proper replacement ensures your door’s protection and operational integrity.
Prevent Future Issues
Step 1: Regular Maintenance
To keep your door lock functioning smoothly, make regular maintenance a priority. Begin by cleaning the lock cylinder and the surrounding area regularly to prevent dirt and debris buildup, which can interfere with the lock’s operation. Periodically check the screws that secure the lock in place, and tighten them if necessary to ensure a stable and firm fit.
Step 2: Avoid Excessive Force
Exercise care to avoid using excessive force when locking or unlocking the door, as this can lead to unnecessary wear and the loosening of the cylinder over time. Always ensure that the key is fully inserted into the lock before turning. Avoid yanking or pulling harshly on the door, which could compromise the lock’s integrity and result in mechanical issues.
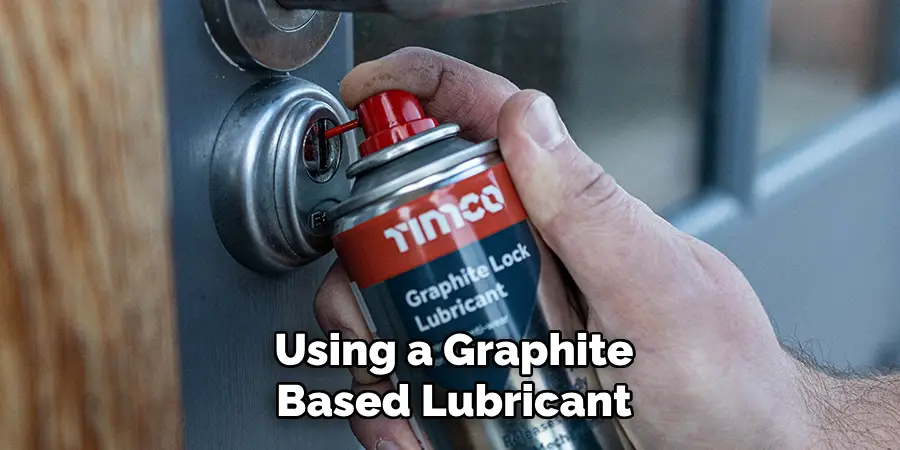
Step 3: Lubricate the Lock
To prolong your lock’s lifespan further, consider periodically using a graphite-based lubricant. This can help reduce friction within the lock mechanism, minimizing wear on the lock cylinder and enhancing its efficiency. Regular lubrication can also prevent sticking and improve the ease with which the lock operates, ensuring it remains in optimal condition.
Step 4: Consider Weather Factors
If your door is exposed to environmental elements, it’s crucial to consider weather factors. Ensure that adequate weatherstripping is in place around the door and lock to prevent moisture ingress. This protective measure helps minimize rust and corrosion, which can otherwise lead to the loosening or malfunction of the lock over time. By taking these preventative steps, you can maintain the durability and security of your door lock system.
Conclusion
A loose door lock cylinder can compromise your home’s security and functionality, but it’s a manageable issue with the right approach. Understanding how to fix a loose door lock cylinder involves identifying the problem, tightening the screws, using retaining clips, or replacing the cylinder when necessary. These steps will help restore the integrity of your door lock. Regular maintenance and care play a critical role in preventing future issues and ensuring that your door remains secure and operates smoothly.
However, if you encounter persistent problems or feel uncomfortable performing these tasks, don’t hesitate to contact a professional locksmith for assistance. By taking these measures, you can effectively manage your home’s security, enjoying peace of mind knowing that your door lock is in good working order.
About
Angela is the chief editor of Indoorense. She began her career as an interior designer before applying her strategic and creative passion to lifestyle and home.
She has close to 15 years of experience in creative writing and online content strategy for housekeeping and cleaning,home decorations as well as other efforts.
She loves her job and has the privilege of working with an extraordinary team. She lives with her husband, two sons, and daughter in Petersburg. When she’s not busy working she spent time with her family.