
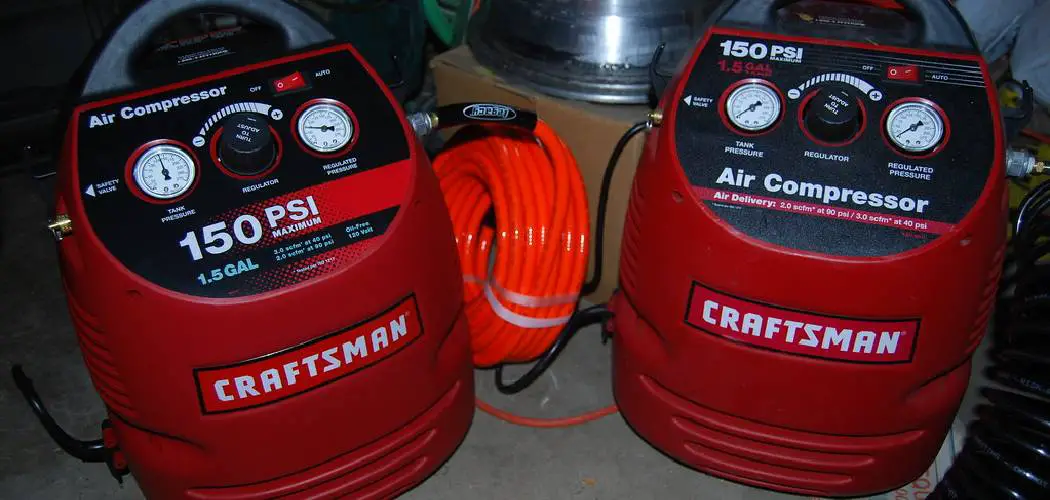
A compressor is an important tool for any workshop. While many compressors are on the market, Craftsman air compressors are some of the best. These compressors are durable and reliable but require proper maintenance to keep them running in top condition.

This blog post will show you how to drain craftsman air compressor. Follow these simple steps, and your compressor will be ready to use when needed.
What Causes Air Compressors to Overheat?
Several factors can cause an air compressor to overheat. The most common cause is improper maintenance. If your air compressor is not properly maintained, the build-up of dirt and debris can clog the air filters and cause the compressor to overheat. Another common cause of overheating is using the compressor in an enclosed space. If the compressor is used in an area that does not have proper ventilation, the heat from the compressor can build up and cause the unit to overheat.
Additionally, using the compressor for extended periods can also cause it to overheat. If you notice that your compressor is running hot, take a break and let the unit cool down before continuing to use it. The other cause of overheating is a faulty cooling system. If the cooling system is not working properly, the compressor will overheat and may shut off automatically to prevent damage. Lastly, if the compressor is overworked, it will also cause the unit to overheat.
Why is it Important to Drain the Craftsman Air Compressor?
It is important to drain the Craftsman air compressor on a regular basis to prevent damage to the unit. When the compressor is used, moisture and other contaminants can build up in the unit. If this build-up is not removed, it can cause rust and other damage to the compressor. Additionally, the build-up can clog the air filters and cause the compressor to overheat. Draining the compressor regularly will help prevent these problems and keep your compressor running in top condition.
Another reason to drain the compressor is to prevent freeze damage. If water is allowed to build up in the unit, it can freeze and damage the compressor. When the compressor is not in use, be sure to drain it to prevent this problem. Finally, draining the compressor will also help remove any oil accumulated in the unit. Oil can cause the compressor to overheat and may damage the unit if it is not removed.

Step by Step How to Drain Craftsman Air Compressor
1. Turn Off the Compressor
The first step is to turn off the compressor. This is because you will be working with the unit’s electrical components and do not want to turn it on while you are working accidentally. To turn off the compressor, find the switch on the unit and flip it to the “Off” position. If the compressor has a power cord, unplug it from the outlet.
2. Disconnect the Power
Once the compressor is turned off, you will need to disconnect the power. To do this, locate the power cord on the unit and unplug it from the outlet. If the compressor has a battery, remove it from the unit. Try to avoid touching the compressor’s electrical components with your hands as you disconnect the power.
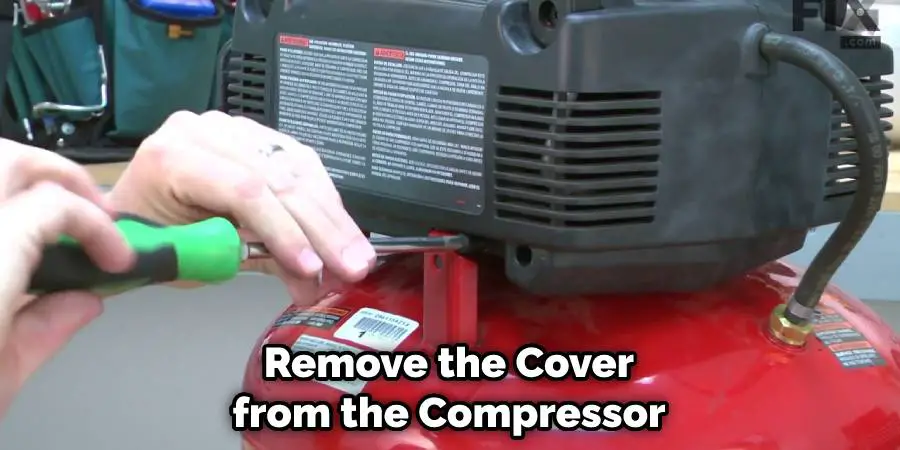
3. Remove the Cover
The next step is to remove the cover from the compressor. This will give you access to the internals of the unit. To remove the cover, locate the screws or bolts that are holding it in place. Use a screwdriver or wrench to remove these fasteners.
Once the screws are removed, the cover should come off easily. If the cover is stuck, you may need to tap it lightly with a hammer to loosen it. Avoid hitting the cover too hard, as you may damage the unit.
4. Remove the Air Filter
The air filter is located inside the compressor and helps remove contaminants from the air. Over time, the air filter can become clogged with dirt and debris. This can cause the compressor to overheat and may damage the unit.
To remove the air filter, locate it inside the unit and unscrew it from the housing. Once the screws are removed, the air filter should come out easily. You may need to tap it lightly with a hammer to loosen it if it is stuck. Try to avoid damaging the air filter as you remove it.
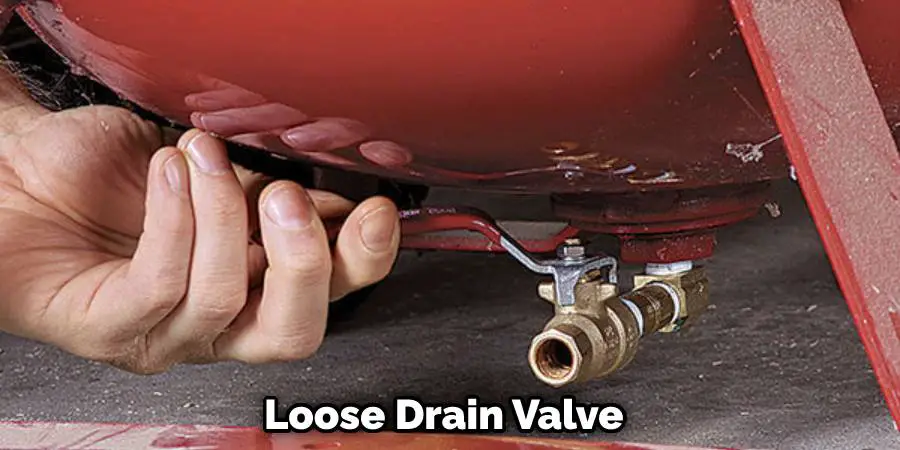
5. Loosen the Drain Valve
The drain valve is located at the bottom of the compressor and is used to drain the unit. This is a very important step in properly maintaining your air compressor. To drain the unit, loosen the valve and let all the air and moisture escape. To do this, first, ensure the power is off, and the unit is not in use. Then, locate the valve and use a wrench to loosen it.
Be sure not completely to remove the valve, as you may lose it. Once the valve is loose, all of the air and moisture should escape from the unit. If the compressor is still full of air, you may need to repeat this step. Avoid over-tightening the valve, as this may damage it.
6. Let the Compressor Drain
Once the drain valve is loosened, all of the air and moisture should escape from the compressor. Let the unit drain until no more water is coming out. If you have a large compressor, it may take a few minutes for all the water to drain. To speed up the process, you can tilt the compressor so that the drain valve is lower than the rest of the unit. Avoid tilting the unit too much, as this can cause damage.
7. Close the Drain Valve
Once all of the water is drained from the compressor, you will need to close the drain valve. This is because leaving the valve open will allow air to escape from the tank, eventually leading to the compressor not working properly.
To close the drain valve, first, make sure that the valve is in the closed position. Then, take a look at the pressure gauge to see if it is in the green zone. If it is, then you can close the valve. If the pressure gauge is not in the green zone, then you will need to wait until it is before you close the valve.
8. Turn on the Compressor
After the drain valve is closed, you can turn on the compressor. To do this, locate the power switch on the unit and flip it to the “on” position. The compressor should start running automatically. If it doesn’t, you may need to check the power cord to ensure it is plugged in correctly. Once the compressor is running, you can begin using it again.
9. Check the Pressure Gauge
After the compressor is turned on, you should check the pressure gauge to make sure that it is in the green zone. This is because the compressor will not work properly if the gauge is not in the green zone. If the pressure gauge is in the red zone, then you will need to turn off the compressor and let it cool down.
To check the pressure gauge, look at the needle and see where it is pointing. The needle should be in the green zone between 0 and 100 PSI. If it is not, then you will need to adjust the pressure regulator until it is. Once the gauge is in the green zone, you can begin using the compressor again.
10. Check for Leaks
After you have turned on the compressor, you should check for leaks. To do this, look around the unit for any signs of leaking air. If you see any leaks, then you will need to repair them as soon as possible. Leaks can cause the compressor not to work properly and can also be dangerous.

Tips and Warnings on How to Drain Craftsman Air Compressor
Tips:
- Always ensure that the air compressor is turned off and unplugged before beginning any maintenance.
- Familiarize yourself with the manual for your Craftsman air compressor model. This will help you to understand the individual parts and how they work together.
- If you are unsure about anything, always consult a professional before continuing.
Warnings:
- Take extra care when working with electrical components.
- Always wear safety goggles and gloves when working with compressed air.
- Never use a Craftsman air compressor without proper ventilation.
- Do not over-tighten any fittings or connections. This could damage the compressor.
- Always check for leaks after completing any maintenance on the air compressor.
You Can Check It Out To Tell if Ac Compressor Fuse is Bad
Conclusion
So there you have it! Now you know how to drain craftsman air compressor. Follow these steps, and you will be able to perform this maintenance task with ease. And, as always, if you have any questions, write them down in the comments section below, and we will be happy to answer them for you. Thanks for reading!
Rick is a handyman who grew up helping his dad with his business. He learned a lot from him about how to fix things, and also about how to work hard and take care of business. These days, Rick is still into fixing things- only now, he’s doing it for a living.
Rick is always looking for new ways to help people grow and develop. That’s why he started contributing to this blog: to share all his experience and knowledge so that he can help people who are interested in DIY repair.