

Limewash paint is a centuries-old technique that has gained popularity in recent years. It involves using a mixture of lime, water, and natural pigments to create a unique finish on walls, furniture, or other surfaces. The result is a beautiful, rustic look that can add character and charm to any space.
The main advantage of using limewash paint is its breathability. Unlike modern paints, which form a plastic-like barrier on the surface, limewash allows moisture to pass through. This not only prevents water damage and mold growth but also helps regulate indoor humidity levels. In this blog post, You will learn in detail how to do limewash paint.
Tools You Will Need
- Lime Putty
- Water
- Pigment (natural or synthetic)
- Paintbrush
- Bucket
- Stirring stick
- Protective gear (gloves, mask, goggles)
- Drop cloths or plastic sheets
- Ladder or step stool
- Clean rags or towels
Step by Step Processes for How to Do Limewash Paint
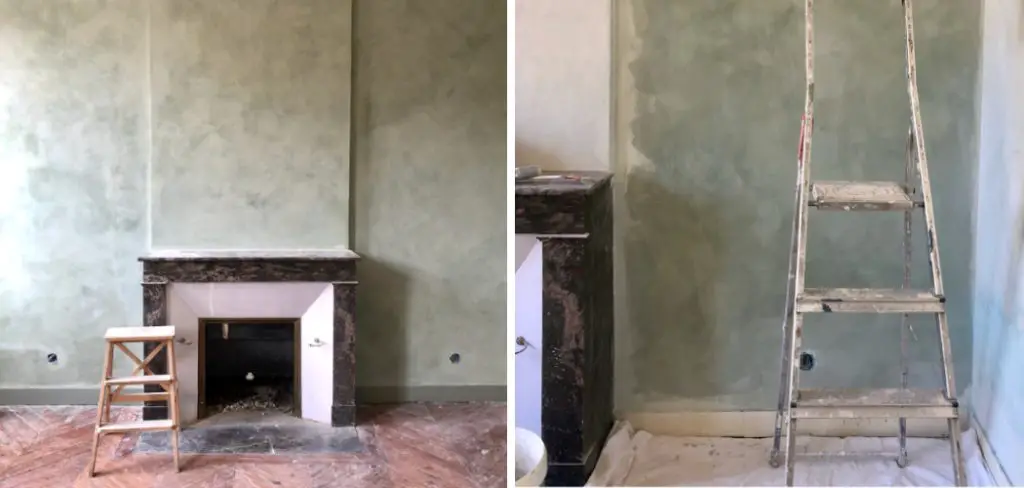
Step 1: Inspect the Walls
Before you begin, inspect the walls to determine if they need any repairs such as filling in cracks or holes. If there are any major issues that need to be addressed, it’s important to take care of those first before proceeding with the limewash paint.
Step 2: Prepare the Area
Cover the floor and any furniture in the room with drop cloths to protect them from the paint. Use painter’s tape to cover any areas that you don’t want to get painted, such as trim or windows. To create the limewash paint, mix water with hydrated lime and stir until it forms a thick paste.

The amount of water and lime needed will vary depending on the brand of lime you are using, so be sure to follow the instructions on the package.
Step 3: Apply a Base Coat
Using a brush or roller, apply a base coat of limewash paint to the walls. The consistency of the paint should be similar to that of thick cream. Make sure to cover the entire wall evenly and let it dry for at least 24 hours.
In a separate container, mix water with white latex paint to create a whitewash solution. The ratio of water to paint will depend on how opaque you want the final result to be. A higher ratio of water will result in a more transparent finish.
Step 4: Apply the Whitewash
Using a brush or roller, apply the whitewash mix to the walls in small sections, working in a random pattern. This will create a textured and aged look. Make sure to blend each section together seamlessly. After applying the whitewash, use a clean cloth or rag to remove any excess paint that may have pooled or dripped. This will help create a more natural and uneven finish.
Step 5: Create Dimension
To add depth and dimension to the walls, use a sponge or rag to lightly dab on additional layers of whitewash in certain areas. This will create a mottled effect that mimics the look of aged plaster. Allow the walls to dry completely, which may take up to 24 hours. Keep in mind that the color of the limewash paint will lighten as it dries.

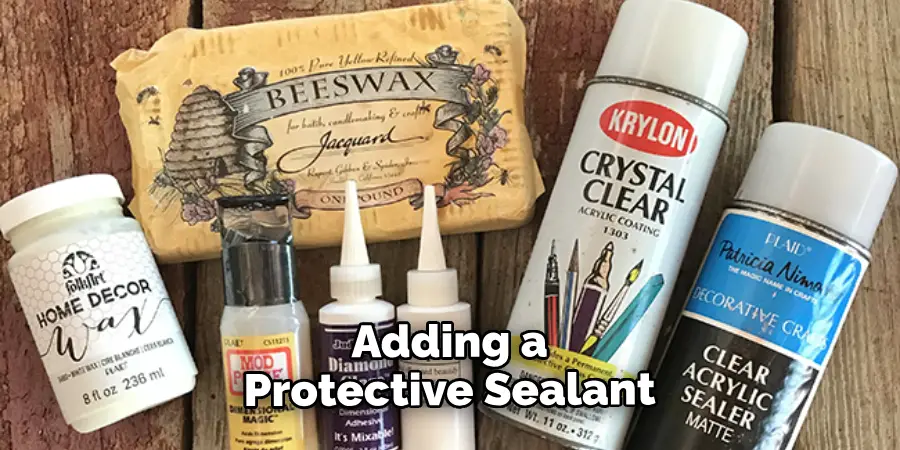
If you want a more durable finish, you can seal the limewash paint with a clear water-based sealer once it has dried completely. This will help protect the walls and make them easier to clean. However, if you prefer a more natural and matte finish, it is not necessary to seal the limewash paint.
Safety Tips for How to Do Limewash Paint
When attempting to do limewash paint, there are certain safety measures that you should be aware of. The following tips and precautions are essential to ensure that your painting experience is as safe as possible:
- Before starting the painting process, make sure to wear gloves, a face mask, and protective clothing. Lime can irritate the skin and cause respiratory problems if inhaled.
- Lay down drop cloths or plastic sheets to protect your floors and furniture from accidental spills. Also, make sure the room is well-ventilated to avoid any buildup of fumes.
- Lime can be hazardous if not handled properly. It is recommended to use gloves when handling the paint and avoid any contact with your eyes or mouth.
- It is best to mix the limewash paint in a well-ventilated area, such as outdoors. If indoors, make sure the room has good air circulation and wear a face mask while mixing.
- When applying the paint, start from the top and work your way down. This will prevent any drips or splatters from ruining your finished work.
- Keep a bucket of water nearby to rinse off any tools or yourself in case of accidental contact with the paint.
- After you have completed painting, make sure to properly dispose of any leftover lime and clean all equipment thoroughly to avoid any potential hazards.
In addition to these safety tips, it is also important to understand the proper mixing ratio for your desired consistency of limewash paint. This will ensure that you achieve the best results and minimize any potential risks.
What Are the Benefits of Using Limewash Paint?
Limewash paint is a traditional coating that has been used for centuries. It’s made from natural materials including lime, water, and sometimes other additives such as clay or pigments. This ancient method of painting has recently become popular once again due to its many benefits. One major benefit of using limewash paint is its breathability. The porous nature of the lime allows for moisture to evaporate, preventing the paint from trapping it and causing damage to the underlying surface.
This makes limewash paint ideal for use on old or historic buildings that may be more prone to moisture issues. Additionally, limewash paint is eco-friendly and non-toxic. Unlike modern paints that contain chemicals and toxins, limewash paint is made from all-natural ingredients, making it safe for both the environment and those who apply it. It also has a low impact on indoor air quality, making it a great choice for interior applications.

How Do You Prepare the Surface Before Applying Limewash Paint?
Before learning to do limewash paint, it is important to know the proper preparation process for the surface you will be working on. This step is crucial in achieving a successful and long-lasting finish. The first step is to clean the surface thoroughly. Remove any dirt, grime, or other debris that may prevent the paint from adhering properly. You can use a pressure washer or a stiff brush to clean the surface.
Next, inspect the surface for any cracks or holes. These should be filled and repaired before painting to achieve a smooth finish. You can use an exterior patching compound or caulk to fill these imperfections. After cleaning and repairing the surface, it is recommended to apply a primer. This will help the limewash paint adhere better and also provide a more even base for the color. Choose a primer that is suitable for your specific surface material.
How Do You Maintain Limewash Painted Surfaces?
To ensure your limewash painted surfaces maintain their beautiful look, it’s important to follow these simple maintenance steps:
1. Regular Cleaning
Limewash paint is a porous material, meaning it can easily trap dirt and grime. To prevent this build-up and keep your surface looking fresh, regularly clean the surface with mild soap and water. Avoid using harsh chemicals or abrasive scrubbers that can damage the paint.
2. Touch-Up
Over time, limewash paint may start to fade or chip in high-traffic areas. To maintain a consistent look, touch up these areas with a fresh coat of limewash paint.
3. Protect from Harsh Elements
Limewash paint is not as durable as other types of paint and can be damaged by harsh weather conditions. To protect your painted surface, consider adding a protective sealant or wax to keep it looking like new.
4. Avoid Pressure Washing
While pressure washing may seem like an easy solution for cleaning limewash paint, it can actually damage the surface and cause the paint to chip or peel. Stick to gentle cleaning methods instead.
5. Monitor for Repairs
As with any type of paint, check the surface periodically for any repairs that may be needed. Small chips or cracks can easily be fixed with touch-up paint before they become larger issues.
By following these maintenance steps, you can keep your limewash painted surfaces looking beautiful and vibrant for years to come.
Conclusion
While limewash paint has many advantages, there are also some disadvantages to consider. Firstly, it is not as durable as other types of paint and may require more frequent touch-ups or maintenance. Additionally, the application process can be time-consuming and labor-intensive compared to other types of paint.
In conclusion, limewash paint is a versatile and environmentally friendly way to give your walls or furniture a beautiful, vintage look. With its long history and many benefits, it’s no wonder that this technique has stood the test of time. Remember to choose high-quality materials and take your time with each step for the best possible outcome. I hope this article has been beneficial for learning how to do limewash paint. Make Sure the precautionary measures are followed chronologically.
About
Angela is the chief editor of Indoorense. She began her career as an interior designer before applying her strategic and creative passion to lifestyle and home.
She has close to 15 years of experience in creative writing and online content strategy for housekeeping and cleaning,home decorations as well as other efforts.
She loves her job and has the privilege of working with an extraordinary team. She lives with her husband, two sons, and daughter in Petersburg. When she’s not busy working she spent time with her family.