Dealing with an air leak at the bottom of a door can be a common yet frustrating problem, especially during extreme weather conditions. Not only does it affect the comfort level within your home by letting in drafts, but it can also lead to higher energy bills as your heating or cooling system has to work harder to maintain a consistent temperature.

Fortunately, there are several effective solutions to tackle this issue, from simple DIY fixes to more professional methods.
This guide on how to stop air leak at bottom of door will walk you through step-by-step instructions on identifying and sealing air leaks to ensure your home remains energy-efficient and comfortable year-round.
Why is There an Air Leak at the Bottom of Your Door?
Before we dive into the solutions, it’s essential to understand why there may be an air leak at the bottom of your door. The most common cause is typically poor insulation or wear and tear on weatherstripping and door sweeps. Over time, these components can become cracked or worn, allowing gaps for air to seep through.
Another reason could be that the door itself is not properly installed or aligned. If the gap between the bottom of the door and the floor is uneven or too large, it can create a pathway for air to enter.
Necessary Tools and Materials
To fix an air leak at the bottom of your door, you may need some basic tools and materials. These include:
- Tape Measure
- Caulk or Sealant
- Weather Stripping
- Door Sweep
- Screwdriver
- Scissors or Utility Knife
- Sandpaper
8 Simple Step-by-step Guidelines on How to Stop Air Leak at Bottom of Door
Step 1: Identify the Air Leak
Start by carefully examining the bottom of your door for any visible gaps or openings. Close the door and inspect the edge where it meets the floor from both inside and outside your home. You may also use a flashlight to help you see smaller gaps; shining the light from one side will allow you to notice any areas where light passes through to the other side.

Additionally, check for drafts by holding a piece of lightweight tissue or paper near the bottom of the door and observing if it moves. Identifying the exact location and extent of the air leak is crucial before proceeding with any repairs.
Step 2: Measure the Gap
Once you have identified the air leak, the next step is to measure the size of the gap that needs to be sealed. Use a tape measure to determine the width and height of the opening at the bottom of the door. It’s important to measure both from the inside and outside to account for any inconsistencies.
Accurate measurements will help you select the appropriate materials, such as weather stripping or a door sweep, that are best suited to effectively seal the gap. Remember, precise measurements are key to ensuring a snug fit and optimal performance of the sealing materials.
Step 3: Clean the Area
Before applying any sealant or weather stripping, it’s essential to clean the area thoroughly. Use a damp cloth to remove any dust, dirt, or debris from the bottom of the door and the floor. This will ensure proper adhesion of the sealing materials and prevent them from peeling off in the future.
You can also use sandpaper to smooth out any rough or uneven surfaces that could hinder the proper installation of the weather stripping or door sweep.
Step 4: Apply Caulk or Sealant
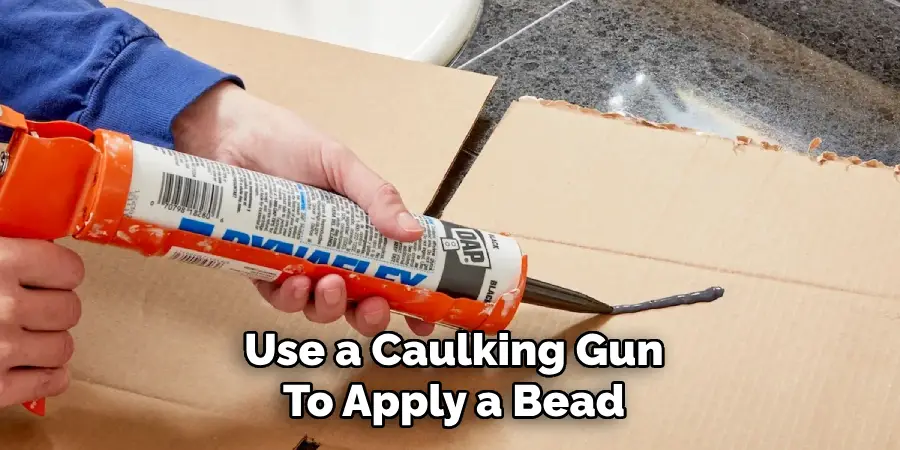
If you have identified small gaps or cracks, you can use caulk or sealant to fill them in. This option is best for minor leaks and quick fixes. Use a caulking gun to apply a bead of caulk along the bottom edge of the door, filling in any visible openings.

Smooth out the caulk with your finger or a putty knife, and wipe away any excess with a damp cloth. Allow it to dry completely before moving on to the next step.
Step 5: Install Weather Stripping
For larger gaps or uneven surfaces, weather stripping is the most effective option. It comes in various materials such as foam, rubber, and felt, so be sure to choose one that suits your needs and budget.
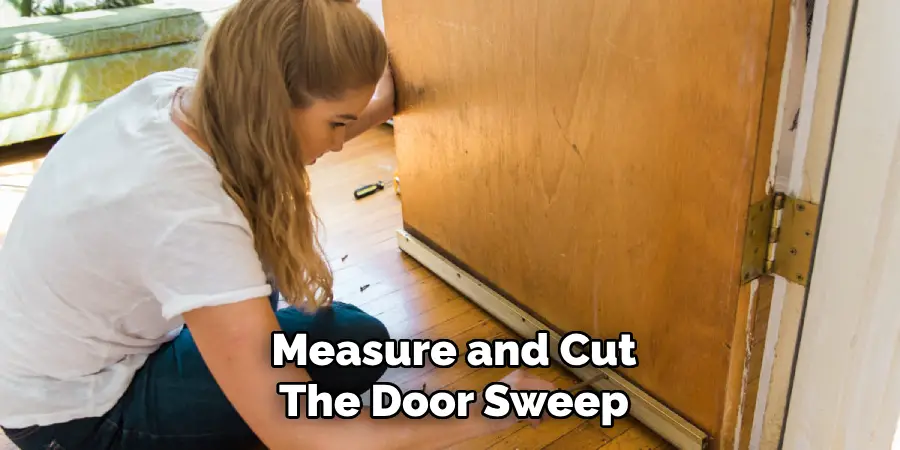
Measure and cut the weather stripping according to your previous measurements. Then, peel off the adhesive backing and carefully press it onto the bottom of the door with firm pressure. Make sure it adheres evenly along the entire length of the door.
Step 6: Install Door Sweep
If there is a significant gap between your door and the floor, you may need to install a door sweep. This flexible strip of rubber or plastic attaches to the bottom of your door and creates a seal with the floor when the door is closed.
Measure and cut the door sweep to fit your door width, leaving an additional inch on each end. Then, screw it into place using a screwdriver. Ensure that the sweep is flush against the bottom of the door and forms a tight seal with the floor.

Step 7: Test for Air Leaks
After completing all necessary repairs, it’s important to test for air leaks again. Repeat the tissue or paper test described in step one to see if there are any remaining drafts or gaps. If you notice any, you may need to apply more caulk or weather stripping until there are no longer any visible leaks.
It’s also a good idea to wait at least 24 hours before testing for air leaks again, as this will allow the sealant and adhesive to be properly set.
Step 8: Regular Maintenance
To ensure your door remains energy-efficient and free of air leaks, it’s crucial to check and maintain the weather stripping and door sweep periodically. Over time, these materials can wear out or become damaged, so be sure to replace them when necessary.
Additionally, check the alignment of your door regularly. If you notice any gaps or unevenness between the bottom of the door and the floor, adjust accordingly to prevent future air leaks.
Following these simple steps on how to stop air leak at bottom of door can help you effectively seal any air leaks at the bottom of your door, reducing energy costs and keeping your home comfortable. Remember to regularly check for drafts and perform maintenance to ensure the longevity of your fixes. With proper care, you can stop air leaks and enjoy a more energy-efficient home.
Do You Need to Use Professionals?
While many homeowners can successfully follow the steps outlined above to stop air leaks at the bottom of a door, there are situations where hiring a professional might be beneficial. If the gaps are particularly large or the door itself is damaged or misaligned, specialized knowledge and tools may be required to achieve an effective seal. Additionally, if the homeowner is not confident in their ability to accurately measure, cut, and install materials, a professional can ensure the job is done correctly the first time.

Consulting with a professional can also be advantageous if you wish to identify additional energy-saving opportunities around your home, such as addressing leaks in windows or improving insulation. Ultimately, whether to hire a professional depends on your personal comfort level, the complexity of the repair needed, and your overall goals for energy efficiency in your home.
Frequently Asked Questions
Q: How Do I Know if My Door Needs Weather Stripping or a Door Sweep?
A: If you can easily see gaps or feel drafts at the bottom of your door, it’s likely that you will need to install weather stripping or a door sweep. Additionally, if you notice an increase in your energy bills or difficulty maintaining a consistent temperature in your home, it could be due to air leaks at the bottom of your door.
Q: Can I Use Weather Stripping and a Door Sweep Together?
A: Yes, using both weather stripping and a door sweep together can provide even better insulation and protection against air leaks. However, be sure not to overlap the materials as this can create gaps and reduce their effectiveness.
Q: How Often Should I Check for Air Leaks at the Bottom of My Door?
A: It’s recommended to check for air leaks at least once a year, preferably before the start of each season. This will allow you to identify and address any potential issues before they become more significant problems.
Q: Are There Any Alternative Methods for Sealing Air Leaks at the Bottom of a Door?
A: Yes, there are various other options for sealing air leaks, such as using door snakes or draft stoppers, adding weather stripping or caulk to your existing door threshold, or installing an automatic door bottom. However, these methods may not be as effective as weather stripping or a door sweep in completely sealing off air leaks.
Conclusion
Ensuring a tightly sealed door is essential not only for maintaining a comfortable indoor climate but also for enhancing energy efficiency and reducing utility bills. By following the outlined steps on how to stop air leak at bottom of door, you can effectively stop air leaks at the bottom of your door.
Regular maintenance and inspection are key to sustaining these repairs, allowing you to enjoy a draft-free home environment year-round. Whether it’s a simple caulking job or installing new weather stripping and door sweeps, taking the time to address door gaps can make a significant difference in your home’s overall efficiency and comfort.
About
Angela is the chief editor of Indoorense. She began her career as an interior designer before applying her strategic and creative passion to lifestyle and home.
She has close to 15 years of experience in creative writing and online content strategy for housekeeping and cleaning,home decorations as well as other efforts.
She loves her job and has the privilege of working with an extraordinary team. She lives with her husband, two sons, and daughter in Petersburg. When she’s not busy working she spent time with her family.

