

Are you looking to upgrade your Ikea furniture? Staining is a great way to add a personal touch and make it match your home decor. This guide will walk you through the steps of staining your Ikea furniture.
How to stain Ikea furniture can be an exciting way to personalize and elevate the look of your space, giving affordable pieces a custom finish. Whether you’re looking to refresh an old item or want to tailor a new purchase to fit your decor better, staining is a straightforward process that can achieve stunning results.
This guide will walk you through each step, from selecting the right preparation materials to applying the perfect stain. Whether you’re a DIY novice or a seasoned home improvement enthusiast, our tips will help ensure your Ikea furniture project succeeds. Let’s transform simple pieces into extraordinary features for your home.
What Will You Need?
Before diving into the staining process, gathering all the necessary materials is important. Here’s a list of items you will need:
- Sandpaper or sanding block
- Clean cloth
- Tarp or drop cloth
- Stain (water-based or oil-based)
- Polyurethane sealant (optional)
- Paintbrushes (various sizes)
- Gloves
- Respirator mask (if using oil-based stain)
It’s also helpful to have some additional supplies on hand, such as a stir stick, painter’s tape, and an old shirt or apron to protect your clothing from stains.
10 Easy Steps on How to Stain Ikea Furniture
Step 1: Prepare Your Work Area
Before starting the staining process, it is essential to set up an appropriate workspace to ensure both efficiency and safety. Begin by selecting a well-ventilated area, as this will help disperse fumes—mainly if you’re using an oil-based stain. Work outside or in a garage with open doors and windows if possible.
Cover the floor with a tarp or drop cloth to prevent accidental drips and spills. Arrange all materials within easy reach to avoid interruptions once you begin the process. Don your gloves and, if necessary, a respirator mask to protect your skin and lungs from the chemicals in the stain. Taking these preparatory steps will provide a cleaner and safer working environment, allowing you to focus on achieving a beautiful finish on your Ikea furniture.

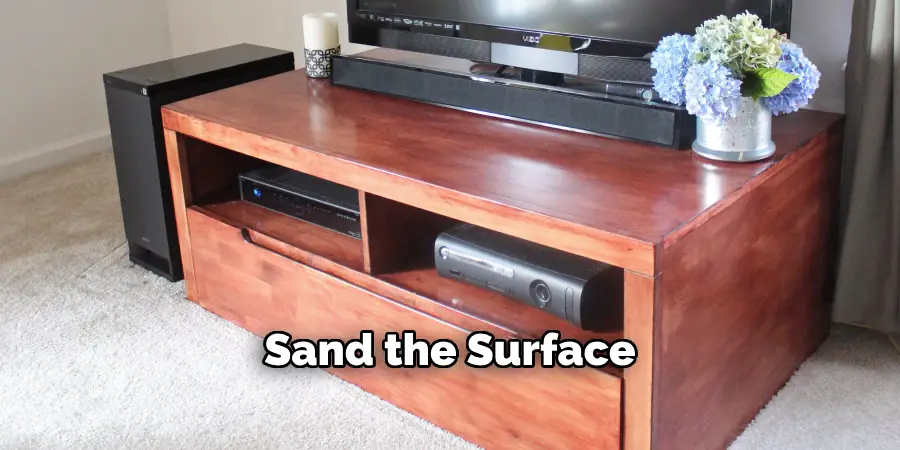
Step 2: Sand the Surface
Once your work area is ready, it’s time to sand the surface of your Ikea furniture. Sanding is crucial because it helps remove any existing finish, lacquer, or gloss, ensuring that the new stain will adhere properly and evenly. Start by using sandpaper with a medium grit (such as 120 grit) to sand the entire surface, following the wood’s natural grain. This will help create a rough surface that the stain can cling to.
As you sand, make sure to reach any nooks and crannies, as uneven surfaces will cause the stain to appear blotchy or inconsistent. After the initial sanding, switch to a finer grit (such as 220 grit) for a smoother finish. This step will help remove any scratches from the previous sanding. Remember to wipe away the dust with a clean cloth or vacuum it up between different grits, ensuring a clean surface for the stain application.
Step 3: Clean the Surface
After sanding, it’s crucial to thoroughly clean the surface to remove any lingering dust or debris, as these can interfere with the stain application. Use a clean cloth to wipe down the entire piece, eliminating all dust from the sanding process. For best results, dampen the cloth slightly with water or mineral spirits to capture finer particles that might not be visible to the naked eye. Pay special attention to corners and detail work, as dust can quickly settle in these areas.
Use a vacuum cleaner with a brush attachment to ensure a comprehensive clean. Skipping this step might result in an uneven finish, so ensure all areas are spotless before moving on to stain application. A clean surface will contribute beyond measure to the final aesthetic of your stained Ikea furniture, highlighting the natural beauty of the wood grain.
Step 4: Apply the Stain
Now that your furniture surface is clean and prepared, it’s time to apply the stain. Stir the stain thoroughly before use, ensuring an even consistency, as pigments can settle at the bottom of the can. Using a paintbrush, apply the stain evenly across the surface, following the direction of the wood grain. Work in small sections for better control and to prevent the stain from drying too quickly. Make sure to apply a thin, even coat to prevent blotches and uneven coloration.
If you prefer a darker color, allow the first coat to dry completely according to the manufacturer’s instructions, then apply additional coats as needed. After applying the stain, let it penetrate the wood for 5 to 15 minutes, depending on the desired depth of color. Use a clean, lint-free cloth to wipe away any excess stain, again following the wood grain to avoid streaks.
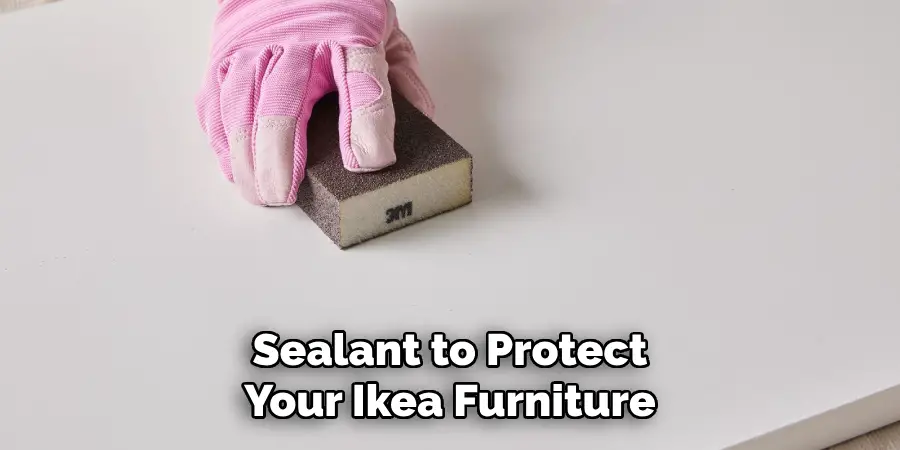
Step 5: Apply a Sealant
Once the stain has dried to your satisfaction, consider applying a sealant to protect your Ikea furniture and enhance its durability. A polyurethane sealant is commonly used for this purpose, and it is available in matte, satin, or gloss finishes, allowing you to choose the level of sheen that best complements your decor.
Begin by lightly sanding the stained surface with fine-grit sandpaper (220-grit) to ensure the sealant will adhere correctly. Clean the surface once more to remove any dust. Using a clean paintbrush, apply a thin, even coat of sealant, working with the wood grain to avoid streaks. Cover all surfaces, including edges and undersides, for comprehensive protection.
Step 6: Maintain Your Furniture
Regular maintenance is critical to keep your newly stained Ikea furniture looking its best. Dust the surfaces regularly with a soft, dry cloth to prevent build-up and maintain the luster. For deeper cleaning, use a damp cloth followed by drying with a clean, dry towel to prevent water damage. Avoid using harsh chemicals or abrasive cleaning tools, as they can damage the finish. Instead, opt for mild wood cleaners designed explicitly for stained furniture.
Additionally, consider placing coasters or mats under items to prevent scratches or damage from spills. If scratches or wear become noticeable over time, minor touch-ups can be done with furniture markers that match the stain. Proper care will ensure that your furniture remains a beautiful and functional part of your home for years.
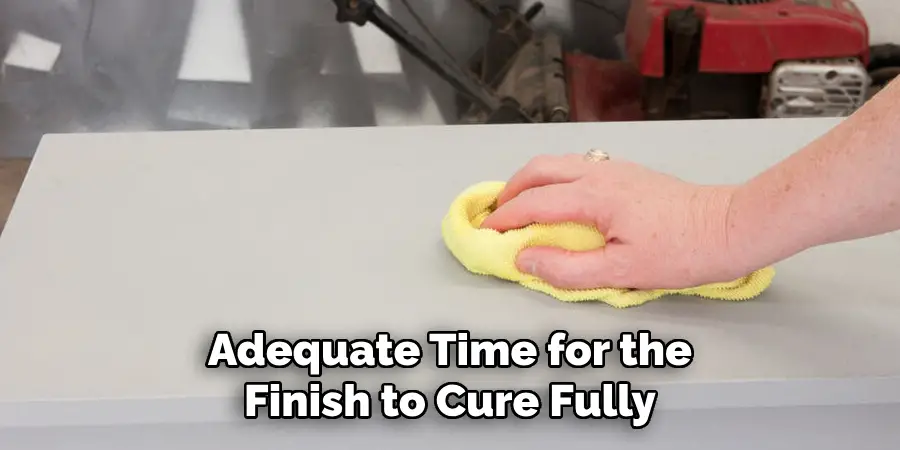
Step 7: Final Touches
After completing the staining and sealing process, allow adequate time for the finish to cure fully. Depending on the sealant used and environmental conditions, this may range from a few days to a week. During this period, avoid placing heavy objects on the surface or moving the furniture to prevent impressions or damage. Once fully cured, assess the furniture piece for any last-minute adjustments. If any areas appear uneven or lack sheen, gently buff with a polishing cloth or apply an additional sealant layer as necessary. Finally, rearrange your room setting as desired and enjoy the refreshed look of your Ikea furniture, knowing it was customized with care and precision for a professional-grade result.
Step 8: Enjoy Your Furniture
Now that your newly stained and sealed Ikea furniture is complete, it’s time to enjoy the fruits of your labor. Admire the beautiful finish and how it enhances the decor of your home. Consider the satisfaction and personal touch you’ve added to a piece that reflects your style and preferences. Remember the care tips mentioned earlier to maintain the furniture’s appearance and longevity. Whether it’s a centerpiece in your living space or a functional addition to your room, your effort in customizing the furniture ensures it is both a practical and aesthetic addition to your home.
Step 9: Share Your Work
Now that you have successfully stained and sealed your Ikea furniture consider sharing the results with friends, family, or even an online community. Take quality photos that capture your furniture piece in great light, highlighting the smooth finish and the color richness achieved through your efforts. If you found tips and tricks or faced challenges during the process, sharing these in a blog post or on social media could assist others embarking on similar projects. Engaging with a community can provide you with feedback and encouragement and inspire you for future DIY endeavors.
Step 10: Reflect on the Experience
As you conclude your Ikea furniture staining project, take some time to reflect on the experience and the skills you have developed. Consider what worked well and what challenges you encountered along the way. This reflection can be invaluable for future DIY projects, helping refine your techniques and approach. Additionally, think about your satisfaction and the joy of transforming a standard furniture piece into something unique and customized. Embrace the pride in your craftsmanship and let it fuel your creative spirit for upcoming projects or enhancements around your home.
By following these steps and putting in the effort, you can transform your Ikea furniture into a beautiful, personalized addition to your home.
Conclusion
How to stain Ikea furniture is a gratifying process that allows you to personalize a piece and make it uniquely yours.
By following the steps meticulously, from preparing the surface to applying the stain and sealant, you can achieve a professional-looking finish that enhances the beauty and functionality of your furniture. Through careful maintenance and sharing your experiences, you ensure that your hard work is appreciated by both you and others.
This project imbues your home with a custom touch and hones your DIY skills for future endeavors. In reflection, the time and effort invested result in a rewarding transformation, proving that a little creativity and dedication can significantly elevate standard furniture pieces.
About
Angela is the chief editor of Indoorense. She began her career as an interior designer before applying her strategic and creative passion to lifestyle and home.
She has close to 15 years of experience in creative writing and online content strategy for housekeeping and cleaning,home decorations as well as other efforts.
She loves her job and has the privilege of working with an extraordinary team. She lives with her husband, two sons, and daughter in Petersburg. When she’s not busy working she spent time with her family.