
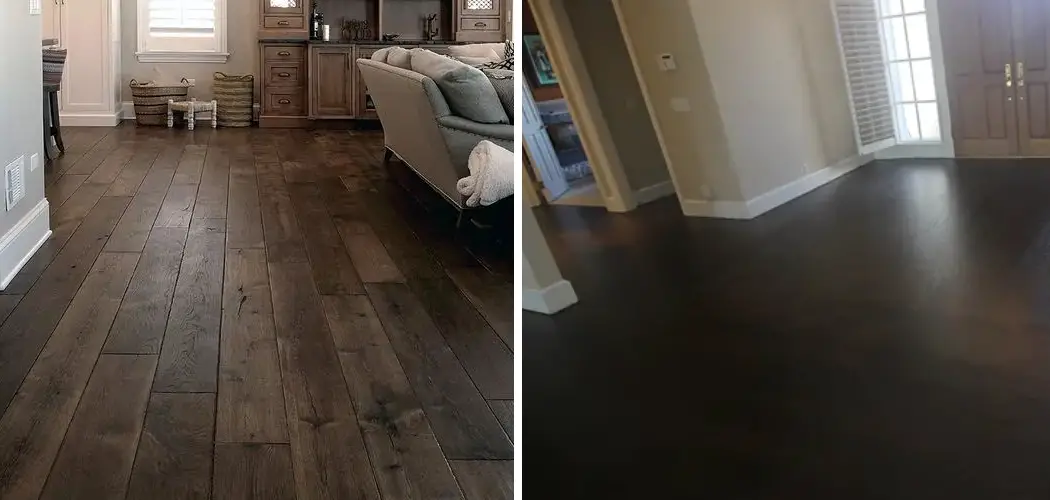
Staining the hardwood floors in your home can be a rewarding project, not only does it add warmth and beauty to any room, but it also provides a unique sense of accomplishment. If you’re thinking about taking on this task yourself, it’d be important to know what is involved – from choosing the right stain for your floors’ specific type of wood species and finish protection to ensuring proper application techniques for best results.

And if darker hues are desired, don’t worry – staining hardwood floors darker is entirely possible without compromising their integrity or longevity. In this article, we’ll help you learn how to stain hardwood floors darker with confidence!
Tools and Materials You Will Need to Stain Hardwood Floors Darker
- Floor sander
- Finishing screen
- High-quality, oil-based stain color of your choice
- Brushes and rags for application
- Polyurethane sealant
- Vacuum cleaner
- Masking tape
- Painters’ drop cloths
Step-by-Step Guidelines on How to Stain Hardwood Floors Darker
Step 1: Prepare the Floor
Before staining your hardwood floors, it is important to properly prepare them for the task. Begin by removing all furniture from the room, and using a vacuum cleaner to remove any dust particles from the floor surface. Use masking tape to cover up any adjacent carpeting or tiled areas to ensure they don’t become stained when working with the wood.

Step 2: Sand the Floor
To create a smooth surface for your new stain, you’ll need to sand down the hardwood floor. Start by using a floor sander (or orbital sander if dealing with smaller spaces) and 80-grit sandpaper to remove any existing finish or stain. Work in small, circular motions, and use a vacuum cleaner regularly to get rid of dust particles as you go. Once the floor is evenly sanded, switch to a finishing screen with 120-grit sandpaper for a smoother finish.
Step 3: Apply the Stain
When applying the stain, it’s important to use a high-quality oil-based product that is designed specifically for staining hardwood floors. Begin by stirring the stain thoroughly and applying a thin coat with a brush or cloth. Ensure you cover every inch of the floor, including its edges and corners where necessary. Allow the first coat to dry over several hours before adding any additional coats if required.
Step 4: Apply the Sealant
To seal and protect your newly stained hardwood floors, you will need to apply a polyurethane sealant. Again, use an oil-based product that’s specifically designed for hardwood flooring. Start by mixing the sealant thoroughly and applying a thin coat with a brush or cloth in long, even strokes. Allow this first coat to dry for at least 8 hours before adding additional coats if necessary.

Step 5: Clean Up
When you are finished, it’s important to clean up the area to ensure a safe working environment. Start by removing all masking tape from adjacent areas and vacuuming up any dust or debris left over from sanding. Finally, use painter’s drop cloths to cover the floor and protect it from any scratches or knicks while furniture is being moved back into the room.
Following these simple steps will help you stain your hardwood floors darker with confidence and leave you feeling proud of a job well done! If you are still unsure or feel overwhelmed by the task, it might be best to hire a professional for assistance. Good luck!
Additional Tips and Tricks to Stain Hardwood Floors Darker
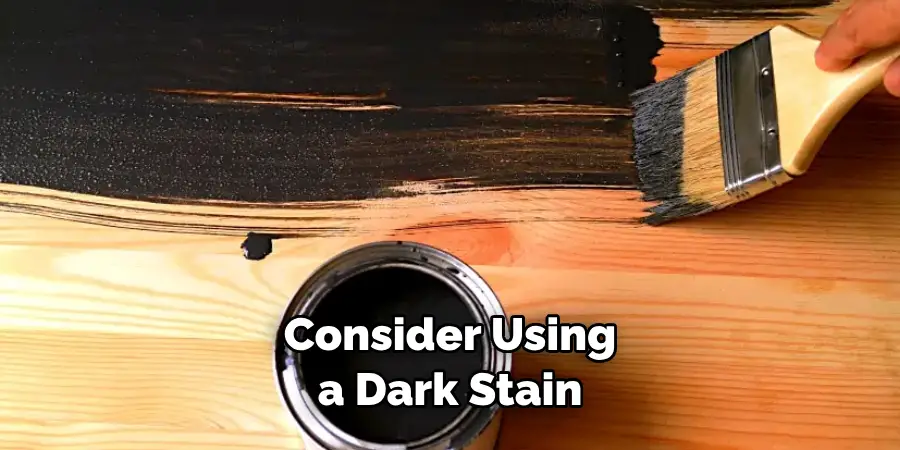
- Choose a darker stain than you would normally use for hardwood floors. Many of the dark stains available come in different shades, so it’s important to choose one that is dark enough to achieve the desired effect.
- Make sure that your floor is properly sanded before staining, as this will help ensure an even application and prevent any uneven patches.
- Use an oil-based stain for a deep, dark finish that will last for years to come. Oil-based stains are more durable than water-based stains, so they won’t need to be refinished as frequently.
- Consider applying multiple coats of stain if you want your floor to be darker and more vibrant. This will give your floor an even darker and richer color.
- Make sure to protect your floors with a sealant after staining them in order to prevent any dirt or grime from accumulating and affecting the look of the wood.
- Consider using a dark stain on only certain areas, such as near furniture or doorways, for an extra pop of color. This is a great way to add a little depth and character to your floors without going overboard.
- If you want to make sure that the stain holds up for the long term, try using a polyurethane finish over the stain. This will provide an extra layer of protection against any dirt or grime while also helping to prolong the life of the stain.
- Be sure to use a quality brush and roller when staining your floor, as this will help ensure that the stain is evenly applied and there are no streaks or uneven patches. A poorly applied stain can ruin the look of your floors!
- Consider using dark wax over the stained wood for an extra layer of protection and added shine. The dark wax will help to give the wood a deeper, richer color while also providing an extra layer of durability to the surface.
- Lastly, don’t forget to properly clean your floors before staining them. This will make sure that all dirt and dust particles are removed so that the stain can be applied evenly and without any problems. It will also help to ensure that the stain holds up over time.
By following these tips and tricks, you can easily achieve a darker, deeper finish on your hardwood floors with minimal effort and great results! Staining your hardwood floors is an easy way to add some character to any room in your home without breaking the bank. So, give it a try and enjoy the new look of your floors! Good luck!
Things You Should Consider to Stain Hardwood Floors
- Consider the age of your hardwood floors. Staining an old floor can be difficult, as it may have seen many years of wear and tear that will make it harder to take on a new stain color. It is important to know if you are dealing with an older floor before deciding whether or not to attempt staining it.
- Consider the type of wood you are staining. If you have a softer wood, such as pine or cedar, it may be more difficult to get an even finish when darkening your floor. Harder woods, on the other hand, may take darker stains with ease.
- Consider the current finish of your hardwood floor. Floors that have a glossy finish, such as polyurethane, will be more difficult to stain and may require sanding to prepare the surface. Floors with a matte or satin finish are easier to work with.
- Consider the amount of time you have for staining your floors. Darker stains take longer to dry and can often require multiple coats; if you don’t have the time to properly tend to your floors, it is best to leave the staining job to a professional.
- Consider how much of a change you want in your wooden floor’s color. If you are aiming for something subtle, such as lightening or darkening the current hue by just a few shades, then DIY staining may be an option. But if you are looking for a dramatic change in color, it is best to consult with a professional to ensure the best results.
By considering all of these factors before staining your hardwood floors, you can be sure that you will get the beautiful results that you desire. With a little bit of planning and care, darkening your hardwood floors can be a rewarding experience. Good luck!
Precautions Need to Follow for Staining Floors Darker
- Always test a sample area to make sure that you’re happy with the results before performing on the entire floor.
- Take into account the overall condition of your floor including moisture levels and warping before applying a stain as this may affect absorption levels.
- Make sure the area is well-ventilated during the application and drying process.
- Wear protective gear such as gloves, pants, long sleeves, and safety glasses when applying any type of stain.
- Always read product instructions before use to ensure proper care and application techniques for best results.
- Once a stain is applied, ensure that the floor surface is completely dry before walking on the floor or moving furniture back in place.
- If you’re working with an existing floor, make sure to sand the surface before adding stain as this will ensure even coverage.

By following these precautions and taking proper care during the application, you can successfully stain your hardwood floors darker and achieve the look you desire. With the right knowledge and preparation, you can rest assured that your newly stained floor will look beautiful for years to come.
Frequently Asked Questions
Can Hardwood Floors Be Stained Darker?
Yes, it is possible to stain hardwood floors darker. To do this, you will need to use an oil-based wood stain and apply a few coats until the desired darkness is achieved. It is important to properly prepare the floor before staining, as poor preparation can lead to undesirable results.
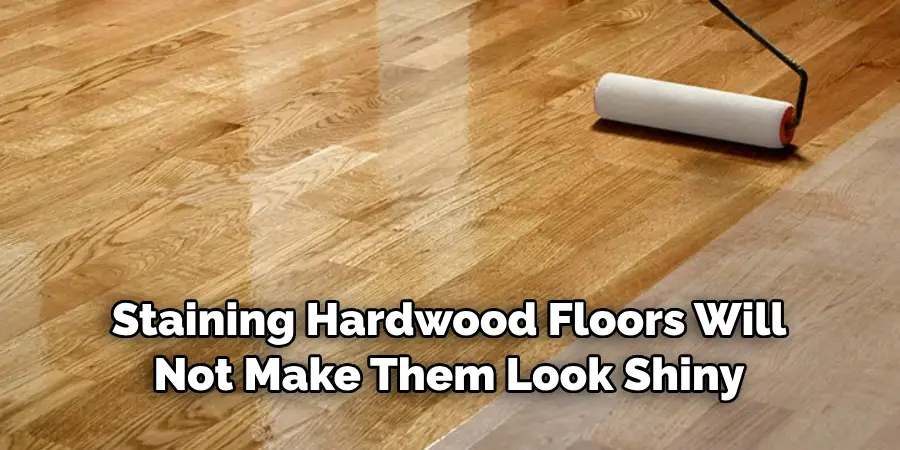
Will Staining Hardwood Floors Make Them Look Shinier?
No, staining hardwood floors will not make them look shiny. To achieve a glossy finish, you will need to apply a seal or a topcoat of polyurethane after staining. This will provide the floor with a more polished and finished look, as well as additional protection.
Do I Need Special Tools to Stain Hardwood Floors?
No special tools are needed to stain hardwood floors. A paintbrush or a cloth can be used to apply the stain and a roller is recommended for even coverage. Make sure to use protective gear such as gloves, safety goggles, and breathing masks when applying the stain.
How Long Does It Take to Stain Hardwood Floors?
The amount of time it takes to stain hardwood floors will vary depending on the size of the area being stained. Generally, it can take anywhere from one day to several days for the entire process from preparation to finishing. It is important to allow enough time for the stain and sealer/topcoat to dry before walking on the floor.
Do I Need to Re-Stain Hardwood Floors Regularly?
No, hardwood floors do not need to be re-stained regularly. However, it is important to periodically inspect the floor for any signs of damage or fading and touch up as needed. This will help keep your floors looking beautiful for years to come.
Are There Different Types of Stains That Can Be Used?
Yes, there are different types of stains that can be used on hardwood floors. Polyurethane-based stains provide a more durable finish that can withstand wear and tear better than oil-based stains. Water-based stains are also available and they dry more quickly than oil-based stains. It is important to research the different types of stains and choose the one that best fits your needs.

Conclusion
To sum it up, staining hardwood floors darker is a great investment that could add tremendous value and character to your home. This process requires careful preparation and following the instructions outlined in this blog post, you can easily understand how to stain hardwood floors darker.
Additionally, make sure to wear protective equipment as you go through all stages of the staining process. It is important to note that when dealing with wooden surfaces, the quality of labor and materials is vital for achieving excellent results. With a bit of patience and dedication, you can upgrade your space and be pleased with the outcome – making sure to enjoy your newly stained hardwood flooring for many years to come!
About
Angela is the chief editor of Indoorense. She began her career as an interior designer before applying her strategic and creative passion to lifestyle and home.
She has close to 15 years of experience in creative writing and online content strategy for housekeeping and cleaning,home decorations as well as other efforts.
She loves her job and has the privilege of working with an extraordinary team. She lives with her husband, two sons, and daughter in Petersburg. When she’s not busy working she spent time with her family.