

Are you tired of feeling like anyone walking by your window can see everything you’re doing? Do you want to enjoy natural light streaming in without sacrificing your privacy?
Setting blinds for privacy is essential to creating a comfortable and secure living space. Whether in an urban apartment or a suburban home, controlling the visibility into your environment can give you peace of mind. Properly adjusted blinds allow you to maintain your privacy without sacrificing natural light, creating a balance between seclusion and openness. As a bonus, adjusting your blinds can also help regulate the temperature in your room and save you money on energy bills.
This guide will walk you through the steps on how to set blinds for privacy, highlighting the best practices and tips to consider for different types of blinds and windows. Let’s get started!
What Will You Need?
Before diving into the process, ensure you have the tools and materials to set your blinds effectively. Here’s a quick checklist of what you’ll need:
- Measuring tape
- Screwdriver (if required for installation)
- Leveler or plumb line
- Pencil or marker
- Blinds of your choice
Once you have these items, you can begin setting blinds for privacy.
10 Easy Steps on How to Set Blinds for Privacy
Step 1: Measure Your Windows
The first step to setting blinds for privacy is accurately measuring your windows. This step is crucial as it will determine the size and type of blinds you need for each window. Use a measuring tape to get your window frame’s exact width and length. Measuring in three different places (top, middle, and bottom) is best to ensure accuracy.
Step 2: Choose the Right Blinds
Selecting the appropriate blinds is crucial in achieving the perfect balance of privacy, light control, and style. There are several types of blinds to consider, each offering unique features that cater to different needs.
- Venetian Blinds: These are horizontal slatted blinds, typically made from metal, wood, or plastic. They are highly versatile, allowing you to precisely adjust the slats to control light and privacy levels.
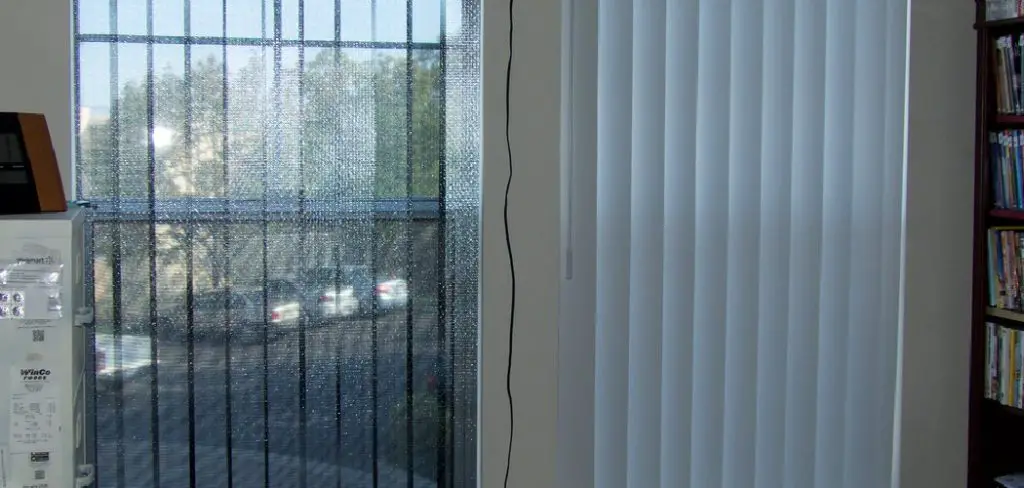
- Vertical Blinds: These blinds are composed of long, vertical slats, ideal for larger windows or sliding doors. They provide excellent window coverage and adjust easily to let in light or ensure privacy.
- Roller Blinds: Made from fabric that rolls up and down, roller blinds are perfect for people who prefer a minimalist and sleek design. When extended, they offer full window coverage, providing excellent privacy.
- Roman Blinds: These are fabric blinds that fold neatly into pleats when raised. Roman blinds offer a soft, elegant look that suits living rooms or bedrooms. Although they are less effective than roller blinds for complete light blockage, their aesthetic value is significant.
- Cellular Shades: Also known as honeycomb shades, these blinds are designed to provide insulation by trapping air in their cellular compartments. Cellular shades are excellent for energy efficiency and light diffusion while offering decent privacy.
With these options in mind, think about the room’s usage, your privacy needs, and your aesthetic preference. Choose the blinds that will best complement your space while providing the desired level of privacy and light control.
Step 3: Gather Your Tools
Before installing the blinds, gather all the tools you need to ensure a smooth setup. Having everything at hand will save you time and reduce the hassle during the installation process. You’ll need: a measuring tape, a screwdriver or drill (if necessary), and a leveler to ensure the blinds are appropriately aligned. Additionally, it might be helpful to have a pencil or marker to make any essential markings, along with your chosen blinds. Confirming that you have all these tools ready will help streamline the installation and adjustment process, allowing you to set up your blinds quickly and precisely.

Step 4: Install the Mounting Brackets
Now that your tools are ready, it’s time to install the mounting brackets for your blinds. Start by placing a bracket at each end of the window frame, ensuring they are level and aligned. Use a pencil or marker to mark the spots where you’ll need to drill holes.
Follow the manufacturer’s instructions for attaching the brackets to ensure they are securely fastened to the wall or window casing. If working with an uneven or textured surface, consider using wall anchors for extra support. Properly secured brackets are crucial for keeping your blinds stable and functioning correctly, providing you with years of reliable use and privacy control.
Step 5: Install the Blinds
With the mounting brackets securely in place, it’s time to install your blinds. Carefully lift the blinds and position them above the brackets. Most blinds will have a headrail that fits into the brackets—make sure this is properly aligned and seated. Depending on the type of blinds you have, there might be a clip or mechanism to secure the headrail.

Follow the manufacturer’s instructions to lock the headrail into place, ensuring it is firmly attached and won’t come loose. Gently pull the blinds down to test their functionality, making any necessary adjustments to ensure smooth operation and proper alignment. Confirm that the blinds move easily and provide the level of privacy and light control you desire.
Step 6: Adjust the Blinds for Optimal Privacy
Now that your blinds are installed, it’s important to adjust them properly to ensure you are achieving the maximum level of privacy. Begin by lowering the blinds ultimately. If you have chosen Venetian or vertical blinds, adjust the slats to be angled upwards. This orientation helps to reduce visibility from the outside while still allowing some light to enter the room. For roller or Roman blinds, ensure they are pulled down fully to block out the light.
Adjust the tension if needed to make sure they retract smoothly. Cellular shades should be extended to cover the window and create the desired balance between privacy and natural light. Make minor adjustments as necessary to align the blinds perfectly with the window frame, guaranteeing that no gaps are left for prying eyes.
Step 7: Final Touches and Maintenance
Once your blinds are installed and adjusted for privacy, it’s time to focus on the final touches and ongoing maintenance. Check that all components are functioning as expected, and examine the overall appearance to ensure your blinds are aligned evenly. To maintain the look and functionality of your blinds, regularly dust or wipe them with a soft cloth, especially on the slats, to prevent the buildup of dirt and grime.

For deeper cleaning, use a damp cloth with a mild detergent, taking care not to get the fabric wet if your blinds are made of delicate materials. Additionally, periodically check the brackets and screws to confirm they remain secure, adjusting as necessary to keep your blinds operating smoothly and effectively, enhancing your privacy and style.
Step 8: Troubleshooting Common Issues
Despite careful installation, you might encounter some common issues with your blinds. If you notice that the blinds are not lowering or raising smoothly, first check the alignment of the headrail within the mounting brackets. Misalignment can often cause sticking or uneven operation. For Venetian or vertical blinds, if slats become misaligned or tangled, gently realign them to the correct position and ensure no obstructions in their path. Sometimes, roller blinds may not retract as intended, which could be due to a spring tension issue. Consult the manufacturer’s guide on how to adjust the tension mechanism effectively.
Step 9: Ensure Safety and Child-Proofing
After installing and adjusting your blinds, it’s crucial to consider safety, especially if children or pets are in the home. Loose cords can present a significant hazard, so ensure all cords are kept out of reach. Consider using cord cleats to secure cords to the wall, or opt for cordless blinds or those with a built-in wand for operation. For added safety, ensure the blind’s tension systems are correctly configured and not easily accessible. Double-check that all installation components are tightly secured and that no loose parts could pose a risk.
Step 10: Enhance Energy Efficiency
Besides providing privacy and style, blinds can improve your home’s energy efficiency. During hotter months, adjust your blinds to block direct sunlight, reducing heat gain and keeping indoor temperatures more relaxed, thus lowering your cooling costs. In contrast, during colder months, open your blinds to allow natural sunlight to warm your home, potentially reducing the need for heating. Consider adding thermal liners to your blinds for increased insulation, helping to prevent heat loss in winter and keeping your home comfortable year-round. Regularly monitor the seal and alignment of your blinds to ensure they provide optimal energy efficiency, helping save on utility bills while maintaining a comfortable living environment.
By following these steps, you can successfully install and adjust your blinds for maximum privacy, style, and functionality.
Conclusion
How to set blinds for privacy involves careful planning and attention to detail throughout the installation process.
From securing the mounting brackets to making the necessary adjustments for light control, each step plays a crucial role in ensuring that your blinds function effectively and enhance both your privacy and comfort. By selecting the appropriate type of blinds and aligning them correctly, you can create a private and serene environment in your home. Regular maintenance, such as cleaning and safety checks, ensures long-lasting functionality and protection.
Ultimately, the thoughtful installation and adjustment of blinds provide practical benefits and add a stylish element to your living space, contributing to a harmonious and efficient home environment.
About
Angela is the chief editor of Indoorense. She began her career as an interior designer before applying her strategic and creative passion to lifestyle and home.
She has close to 15 years of experience in creative writing and online content strategy for housekeeping and cleaning,home decorations as well as other efforts.
She loves her job and has the privilege of working with an extraordinary team. She lives with her husband, two sons, and daughter in Petersburg. When she’s not busy working she spent time with her family.