
Scribing end panels is a crucial skill in woodworking and cabinetry, ensuring a perfect fit and seamless finish in your projects. Whether you’re fitting a cabinet against an uneven wall or customizing a piece of furniture, mastering the scribing technique can make all the difference. This process involves transferring the contour of a surface onto your workpiece, allowing for precise adjustments and cuts. In this guide, we’ll explore how to scribe end panels, providing you with the knowledge to achieve professional results in your woodworking endeavors.

What is Scribing End Panels?
Scribing end panels is a woodworking technique used to ensure that panels fit perfectly against irregular or uneven surfaces, such as walls or floors that are not entirely flat or straight. The process involves using a scribing tool to transfer the precise contours of the adjacent surface onto the panel that needs to be cut or trimmed.
This allows for accurate modifications to the panel so that it conforms exactly to the unique shape of the surrounding area, resulting in a snug and seamless fit. Scribing is especially important in cabinetry and custom furniture projects where precision and attention to detail are paramount. This technique helps to avoid visible gaps and ensures a polished and professional finish to any woodworking project.
Tools and Materials Needed for Scribing
To successfully scribe end panels, it’s important to gather the right tools and materials before beginning your project. Here’s a list of essentials you’ll need:
- Scribing Tool: This can be a specialized scribe or a simple compass. The purpose of this tool is to trace the contour of the surface onto the panel.
- Pencil: Use a sharp pencil to ensure precise markings on the panel after scribing.
- Panel Saw or Jigsaw: A cutting tool, such as a panel saw or jigsaw, is necessary for trimming the panel to match the scribed line.
- Straight Edge: Helpful for marking straight lines on the panel where needed.
- Measuring Tape: Essential for measuring distances before and after scribing to ensure accuracy.
- Sandpaper or File: For smoothing the edges of the panel after cutting to achieve a clean finish.
- Clamps: Useful to hold the panel stable while scribing and cutting.
- Safety Gear: Always wear safety glasses and gloves to protect yourself while working.
Having these tools and materials at hand will help streamline the scribing process, enabling you to achieve a seamless fit and a professional look for your woodworking projects.
10 Methods How to Scribe End Panels
1. Using a Scribing Tool (Compass Scriber)
The most common and effective method to scribe end panels is by using a dedicated scribing tool, often referred to as a compass scriber. This tool allows you to trace the contours of uneven walls or floors onto your end panel. Start by positioning the end panel roughly in place, with a small gap between the panel and the wall. Adjust the scribing tool’s arms to the size of the gap, then trace along the wall, letting the pencil mark the shape of the wall onto the panel. Once scribed, carefully cut along the traced line using a jigsaw or hand saw to ensure the panel fits snugly.
2. Scribing with a Block and Pencil
If you don’t have a scribing tool, a simple yet effective alternative involves using a block of wood and a pencil. First, find a small block (or any flat object) that matches the widest gap between the end panel and the wall. Place the block against the wall, and hold a pencil on top of it. Drag both the block and the pencil along the surface of the wall while tracing the wall’s contours onto the panel. This method achieves the same effect as using a dedicated scribing tool and is ideal for quick, impromptu adjustments.
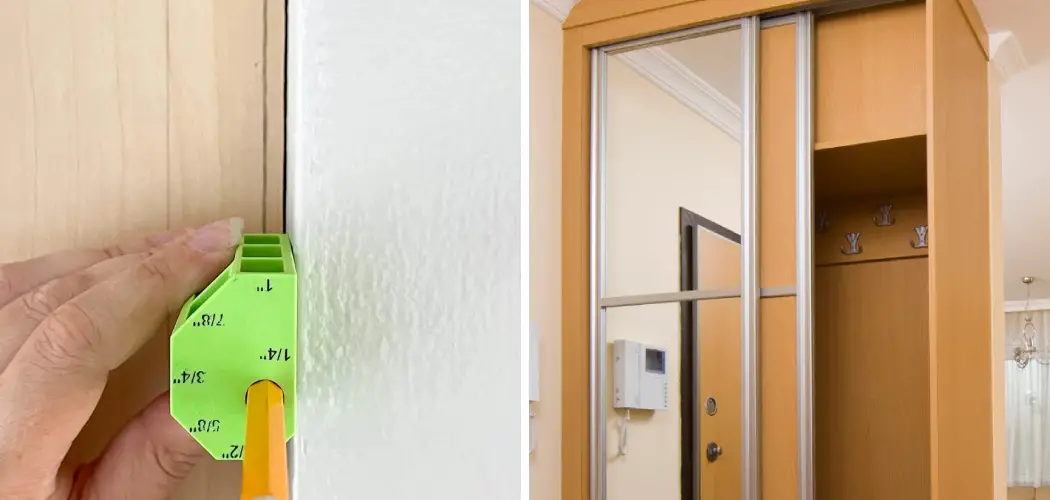
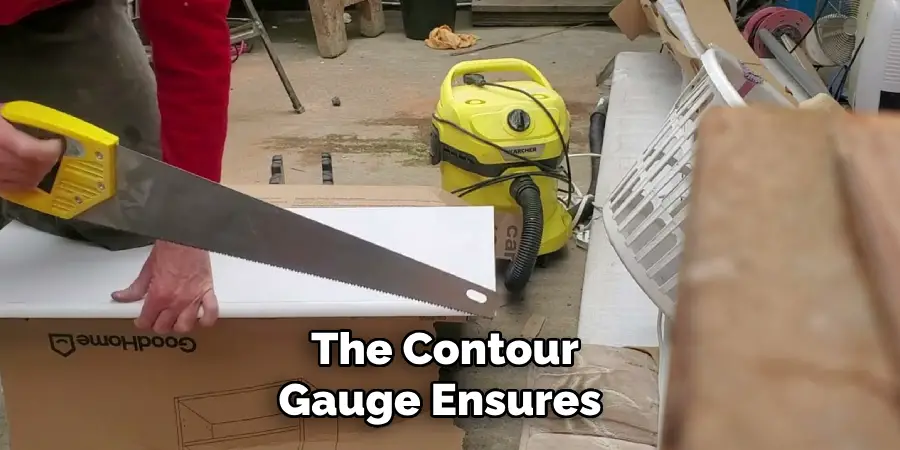
3. Using a Contour Gauge
A contour gauge is an excellent tool for more intricate scribing, especially when dealing with irregular shapes like stone walls or molding. Press the contour gauge against the uneven wall to capture the profile. Once the contour is set, transfer it to the end panel by tracing the shape onto the panel’s surface. This method works well for detailed scribing that involves complex shapes and curves, and the contour gauge ensures that every contour of the wall is perfectly replicated on the panel.
4. Tape as a Guide
For smaller gaps or more precise scribing, using painter’s tape as a guide can be helpful. Place a strip of painter’s tape along the edge of the end panel where it meets the wall. This will serve as a temporary surface on which you can draw your scribe line without marking the actual panel. Use either a compass scriber or a block and pencil to trace the contours of the wall onto the tape. Once the line is scribed, remove the tape and cut along the line you traced. This method helps protect your panel from unwanted marks and scratches during the scribing process.
5. Shim and Trim Method
When installing large end panels or cabinetry, you may need to use shims to stabilize the panel during the scribing process. Position the panel close to the wall, using shims to hold it in place. Once stabilized, use a pencil or scribing tool to trace the wall’s contours onto the panel. After cutting along the scribed line, remove the shims, and the panel should fit snugly against the wall. This method is particularly useful for panels that require more stability during the scribing process, such as heavy cabinetry or countertop end panels.
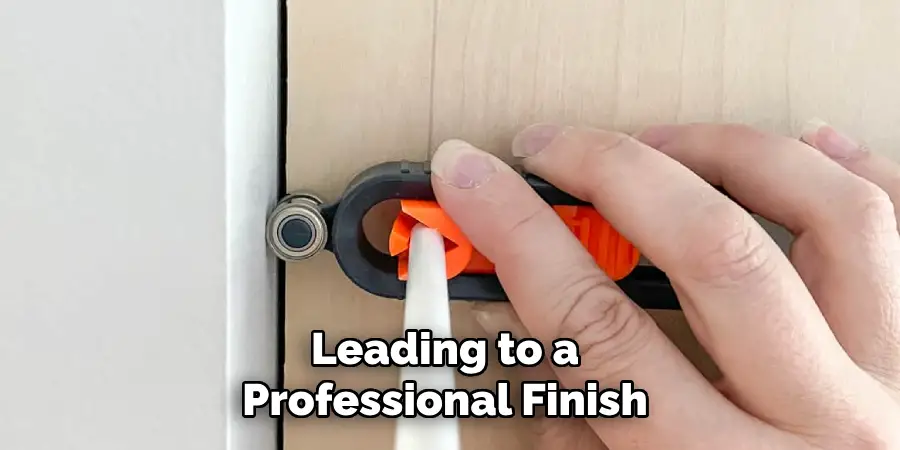
6. Scribing with a Level for Horizontal Panels
When scribing horizontal end panels, such as countertops or floating shelves, use a level to ensure the panel remains perfectly horizontal as you trace the wall’s contours. Hold the level on top of the panel and adjust it until it is perfectly level. While keeping the panel steady, use a scribing tool or pencil to trace the wall’s uneven edges onto the panel. This method ensures that your scribing is accurate without compromising the panel’s horizontal alignment, leading to a professional finish.
7. Planing the Edge After Scribing
After scribing the panel and cutting along the traced line, it’s often necessary to smooth and fine-tune the cut edges to ensure a perfect fit. Use a hand plane or block plane to shave down any rough or uneven spots. This method is particularly useful when you’ve made a rough cut and need to refine the panel’s fit against the wall. By planing the edges after cutting, you can achieve a clean, seamless fit without leaving gaps or rough edges.
8. Using a Jigsaw for Curved or Complex Shapes
When scribing end panels to fit against curved or irregular walls, a jigsaw is often the best tool for the job. Once you’ve traced the wall’s contours onto the panel, use the jigsaw to carefully follow the scribed line, cutting along curves and bends. A jigsaw’s flexibility allows you to handle more complex shapes that a standard saw might not be able to navigate. Make sure to use a fine-toothed blade to prevent splintering, especially if working with delicate materials like veneer or MDF.
9. Double Scribing for Angled Walls
For walls that are not square, you may need to employ double scribing to ensure both sides of the panel fit snugly. Begin by scribing one side of the panel to match the wall’s contour and cut it accordingly. Then, position the panel against the wall and repeat the scribing process for the opposite side, taking care to ensure the panel remains stable and level. Double scribing allows you to create a custom-fit panel that works for walls with multiple angles or sloping surfaces.

10. Dry Fit and Adjust
A critical step in any scribing process is to dry fit the panel after cutting. Place the scribed panel against the wall and check for any remaining gaps or areas where the fit is imperfect. Use a pencil to mark any spots that still need adjustment, then carefully sand, plane, or trim the panel to achieve a perfect fit. Dry fitting ensures that you won’t make any irreversible cuts or errors during the process, allowing you to make incremental adjustments until the panel fits snugly against the wall.
Troubleshooting Common Issues
Scribing end panels can be a meticulous process, and sometimes you may encounter issues even after careful execution. Here are some common problems and their solutions:
1. Gaps After Installation
If you notice gaps between the panel and the wall after installation, it may be due to inaccuracies during the scribing or cutting stages. Check to ensure all contour lines were correctly transferred and that cuts were made accurately. If the gaps are small, you can use caulking to fill them and create a seamless appearance. For larger gaps, consider re-scribing and making more precise cuts to achieve a better fit.
2. Panels Not Sitting Flush
Panels that don’t sit flush against the wall may be due to uneven cutting or improper use of shims during installation. Re-examine your scribing and cutting lines for any inconsistencies. Utilize a hand plane to refine the edge of the panel or reinsert shims to adjust the panel’s angle and ensure it sits flush.
3. Warping or Shifting Panels
Warping or shifting can occur over time, especially in areas with humidity changes. To mitigate this, ensure the panels are properly sealed and maintained. Regularly monitor the fit of the panels and, if necessary, reinstate stability using additional screws or brackets. Re-scribe the panels if warping severely impacts the fit.

4. Splintering During Cutting
Splintering is common when working with delicate materials. To prevent this, use a fine-toothed blade on your jigsaw or saw and take slow, steady cuts. If splintering has already occurred, smooth the edges with sandpaper or a hand plane to clean up the appearance.
5. Inconsistent Paint or Finish
Inconsistencies in paint or finish can detract from the panel’s visual appeal. To address this, ensure the surface is clean and properly prepared before applying paint or finish. For existing inconsistencies, lightly sand the affected area and apply a matching paint or finish to create an even look.
Conclusion
Scribing end panels is an essential skill in cabinetry and carpentry, as it ensures a clean, professional appearance and minimizes gaps between the panel and uneven walls or floors. Whether you use specialized tools like a compass scriber or common household items like a block and pencil, the key is to trace the contours of the wall accurately and carefully cut along the scribed line. By combining these techniques—such as using a contour gauge for complex shapes, planing the edges after cutting, and performing dry fits—you can achieve a flawless, custom-fit finish for your end panels. Thanks for reading, and we hope this has given you some inspiration on how to scribe end panels!
About
Angela is the chief editor of Indoorense. She began her career as an interior designer before applying her strategic and creative passion to lifestyle and home.
She has close to 15 years of experience in creative writing and online content strategy for housekeeping and cleaning,home decorations as well as other efforts.
She loves her job and has the privilege of working with an extraordinary team. She lives with her husband, two sons, and daughter in Petersburg. When she’s not busy working she spent time with her family.